Use Factory Speaker Frame to Mount Aftermarket Speakers
 07-09-2016, 10:03 PM
#1

Use Factory Speaker Frame to Mount Aftermarket Speakers
I had two of the original speakers on my '08 HHR die and needed to replace them. My model had the low-end stereo with weird bracket-mounted speakers. I didn't want to drill any holes into the car, so instead I punched out the old speakers and used those to mount the new ones. Here's the process for anyone who wants to do the same:
Materials:
○ New 6.5" speaker(s)
○ Soldering iron/solder
○ Drill/bits
○ Zip ties
○ Torx screwdriver
○ Socket wrench
○ Side cutters
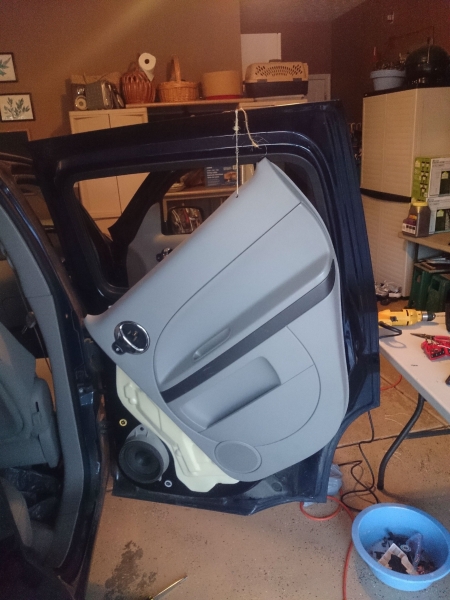
Take off your door panel using the standard process (2 screws in storage well, 1 behind handle, 1 plastic tab on side; unclip from bottom up). I just used some twine to hole the panel out of the way of the speaker so I wouldn't have to worry about disconnecting and reconnecting the window controls or door handle.

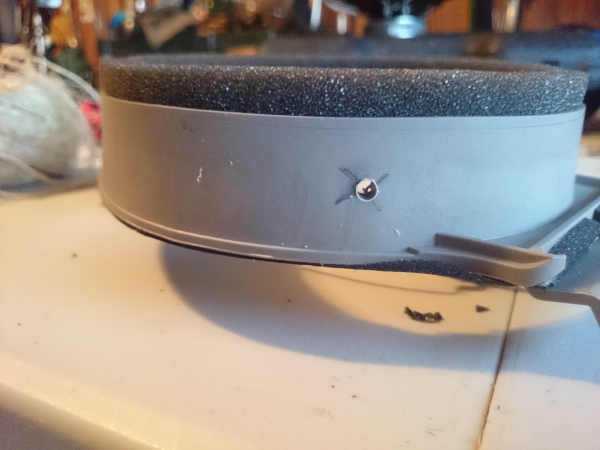
Here's what one of the stock speakers looks like without any modification. Light grey plastic is used for rear speakers, black in the front.

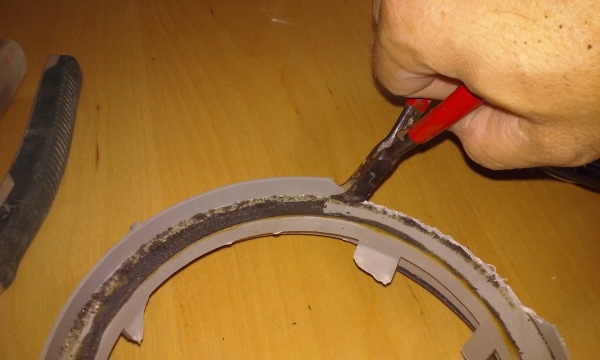
Next, tear out the old guts. The cone part is pretty flimsy so you can just rip it out by hand or use a pair of scissors if you want. If you have a dremel or a small saw, you can use that to remove the back. Personally, I found that a pair of side cutters was able to go through with little resistance. Note that with the front speaker in some of these pictures, I cut off the factory connector and just left it dangling by the cord. On the other speakers, I just cut around it and left it attached to the frame for a cleaner look.
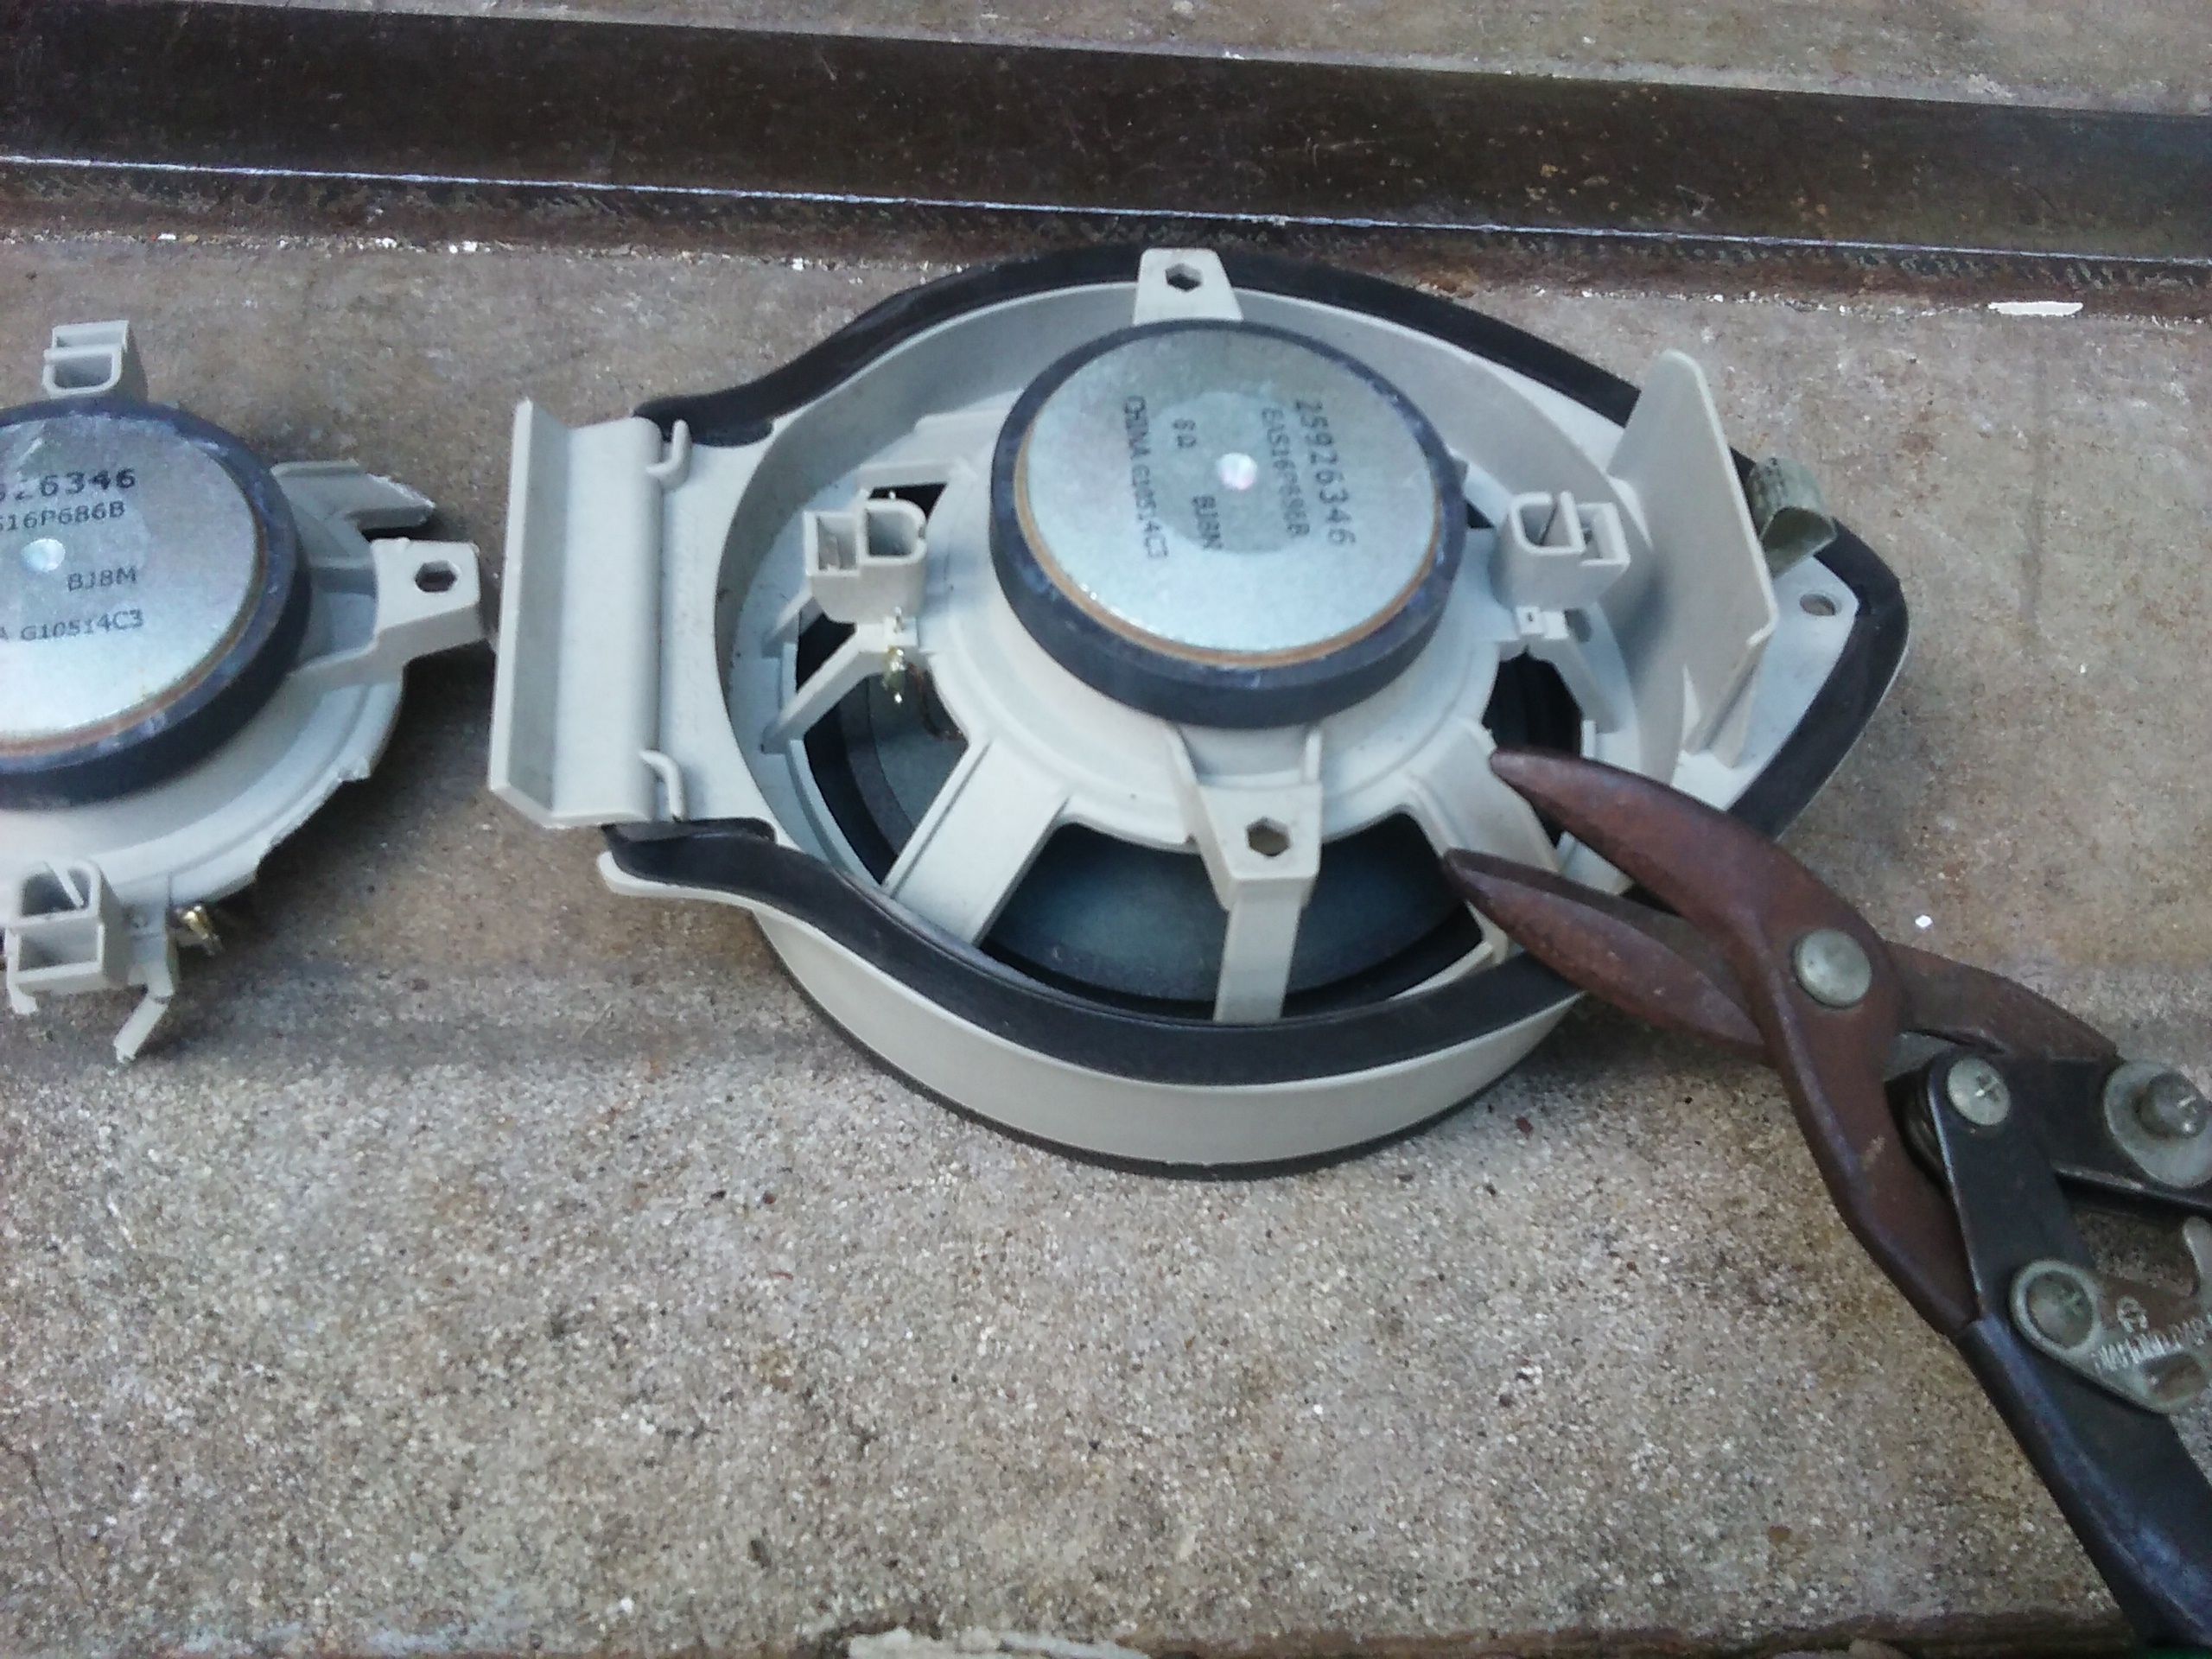
Line up your new speaker on the gutted frame, then mark off spots to drill holes. Use a bit big enough to fit whatever size zip ties you'll be using. Make sure you drill deep enough to bore through any residual plastic on the inside that didn't get cut.

Loop your zip ties through the holes, tighten and trim.
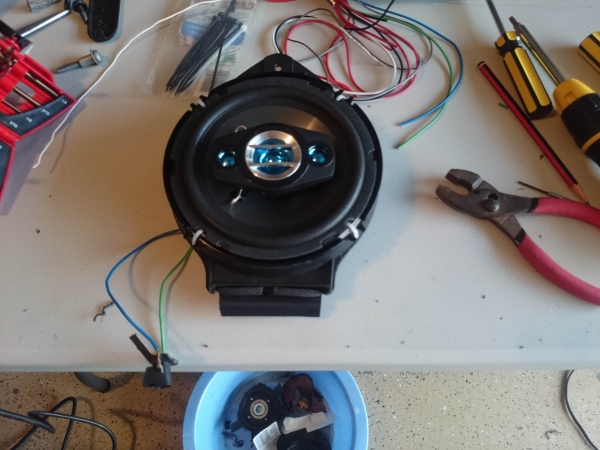
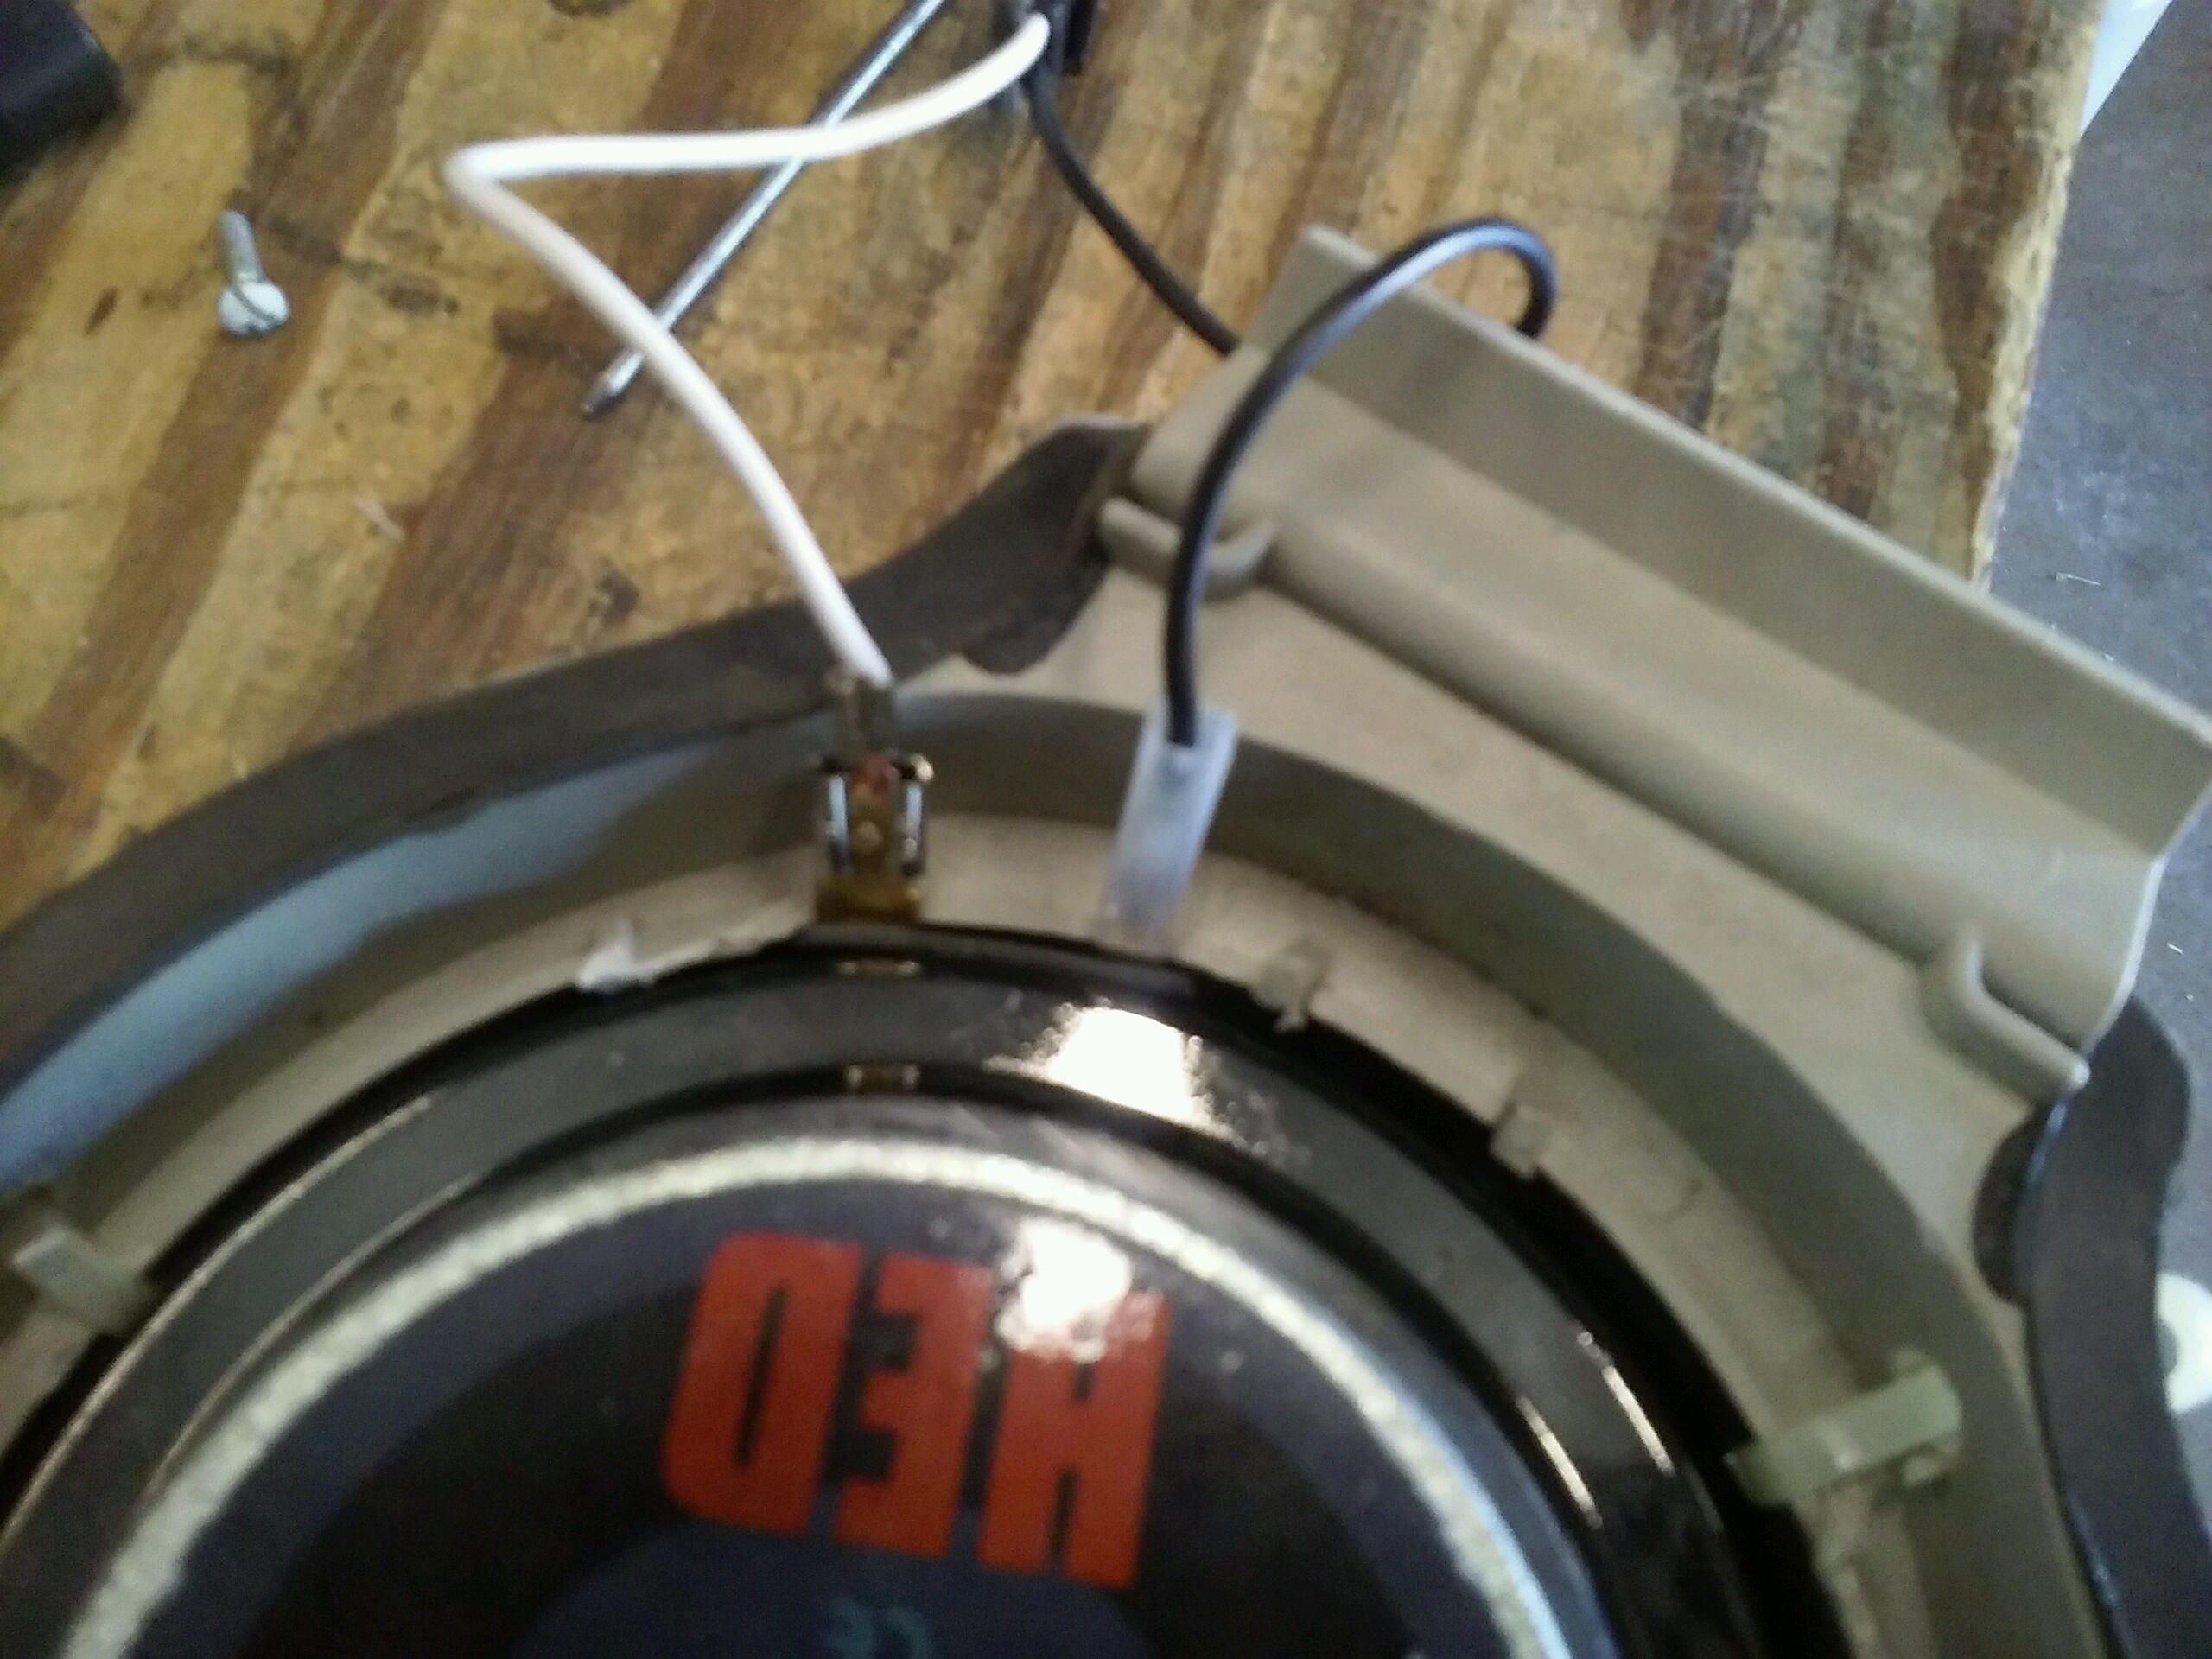
Solder leads from the new speaker to the original connector. This first one I did was a bit messy, but on the others where I left the connector attached to the frame, I was able to just use the original wires and safe myself a little time.
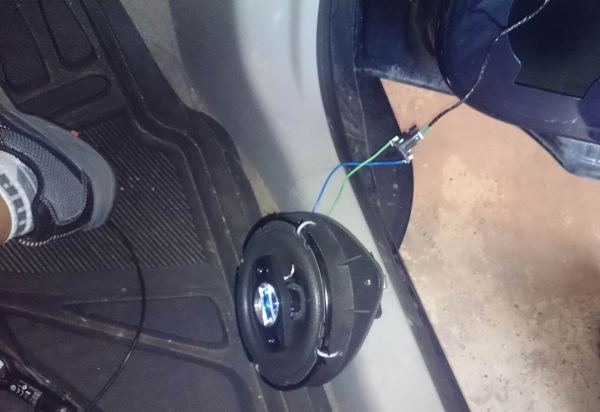
The bulk of the work is done! Now just test and re-assemble. You can see that the new speaker plugs in where the original was with zero modification.
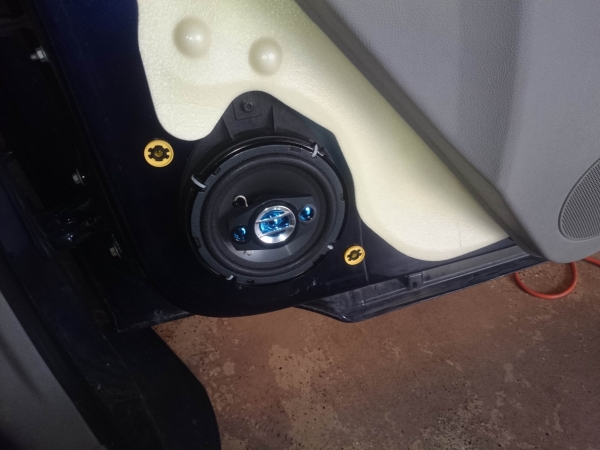
Just slot the speaker in and tighten the bolt. Done!

Slap the door panel back on and everything's good as new. No adapters or drilling into metal necessary.
That's it. Let me know if there's anything on here I need to clarify.
Materials:
○ New 6.5" speaker(s)
○ Soldering iron/solder
○ Drill/bits
○ Zip ties
○ Torx screwdriver
○ Socket wrench
○ Side cutters
Take off your door panel using the standard process (2 screws in storage well, 1 behind handle, 1 plastic tab on side; unclip from bottom up). I just used some twine to hole the panel out of the way of the speaker so I wouldn't have to worry about disconnecting and reconnecting the window controls or door handle.
Here's what one of the stock speakers looks like without any modification. Light grey plastic is used for rear speakers, black in the front.
Next, tear out the old guts. The cone part is pretty flimsy so you can just rip it out by hand or use a pair of scissors if you want. If you have a dremel or a small saw, you can use that to remove the back. Personally, I found that a pair of side cutters was able to go through with little resistance. Note that with the front speaker in some of these pictures, I cut off the factory connector and just left it dangling by the cord. On the other speakers, I just cut around it and left it attached to the frame for a cleaner look.
Line up your new speaker on the gutted frame, then mark off spots to drill holes. Use a bit big enough to fit whatever size zip ties you'll be using. Make sure you drill deep enough to bore through any residual plastic on the inside that didn't get cut.
Loop your zip ties through the holes, tighten and trim.
Solder leads from the new speaker to the original connector. This first one I did was a bit messy, but on the others where I left the connector attached to the frame, I was able to just use the original wires and safe myself a little time.
The bulk of the work is done! Now just test and re-assemble. You can see that the new speaker plugs in where the original was with zero modification.
Just slot the speaker in and tighten the bolt. Done!
Slap the door panel back on and everything's good as new. No adapters or drilling into metal necessary.
That's it. Let me know if there's anything on here I need to clarify.
Last edited by halomademeapc; 07-11-2016 at 07:18 AM.


 07-10-2016, 09:21 AM
#4
Administrator

Join Date: 10-13-2011
Location: Welland,Ont Canada
Posts: 36,498
Great write up, thanks for the pictures!
This was a decade ago!
https://www.chevyhhr.net/forums/audi...ize-501/page2/
Prod did a similar detail a few years ago
https://www.chevyhhr.net/forums/audi...t-35510/page3/
6.5 inch door speakers, a discussion and results here,
https://www.chevyhhr.net/forums/audi...l-44811/page3/
But your how to is the most detailed!
07-12-2016, 06:04 PM
#5
Senior Member

Join Date: 11-11-2007
Location: Sheboygan WI
Posts: 364
Good writeup, I didn't take enough photos of mine when I did this to do so. Are your speakers sitting on the top of the cylindrical lip round the edge? I needed some more clearance for the roll on the edge of the cones for mine, so I cut that away, and then could screw the speakers down to the flat face.

These are some cheesy speakers I put in temporarily, I got the Polk DB651 mentioned in the post Oldblue linked. They sound so nice I did the same to my Camaro, but I had to make up plywood mounts for that.
These are some cheesy speakers I put in temporarily, I got the Polk DB651 mentioned in the post Oldblue linked. They sound so nice I did the same to my Camaro, but I had to make up plywood mounts for that.
07-12-2016, 07:18 PM
#6
The screw locations on the new speakers were outside the original bracket (new speaker had a bigger diameter) so I just drilled horizontal holes in the side of the bracket and looped zip ties through to secure the speaker instead of using screws. With a smaller speaker I could drill vertically and mount the speaker with screws, but this is just how it worked out for me.
 06-20-2017, 04:50 PM
#8
Senior Member

Join Date: 05-15-2017
Location: Garland, TX.
Posts: 240
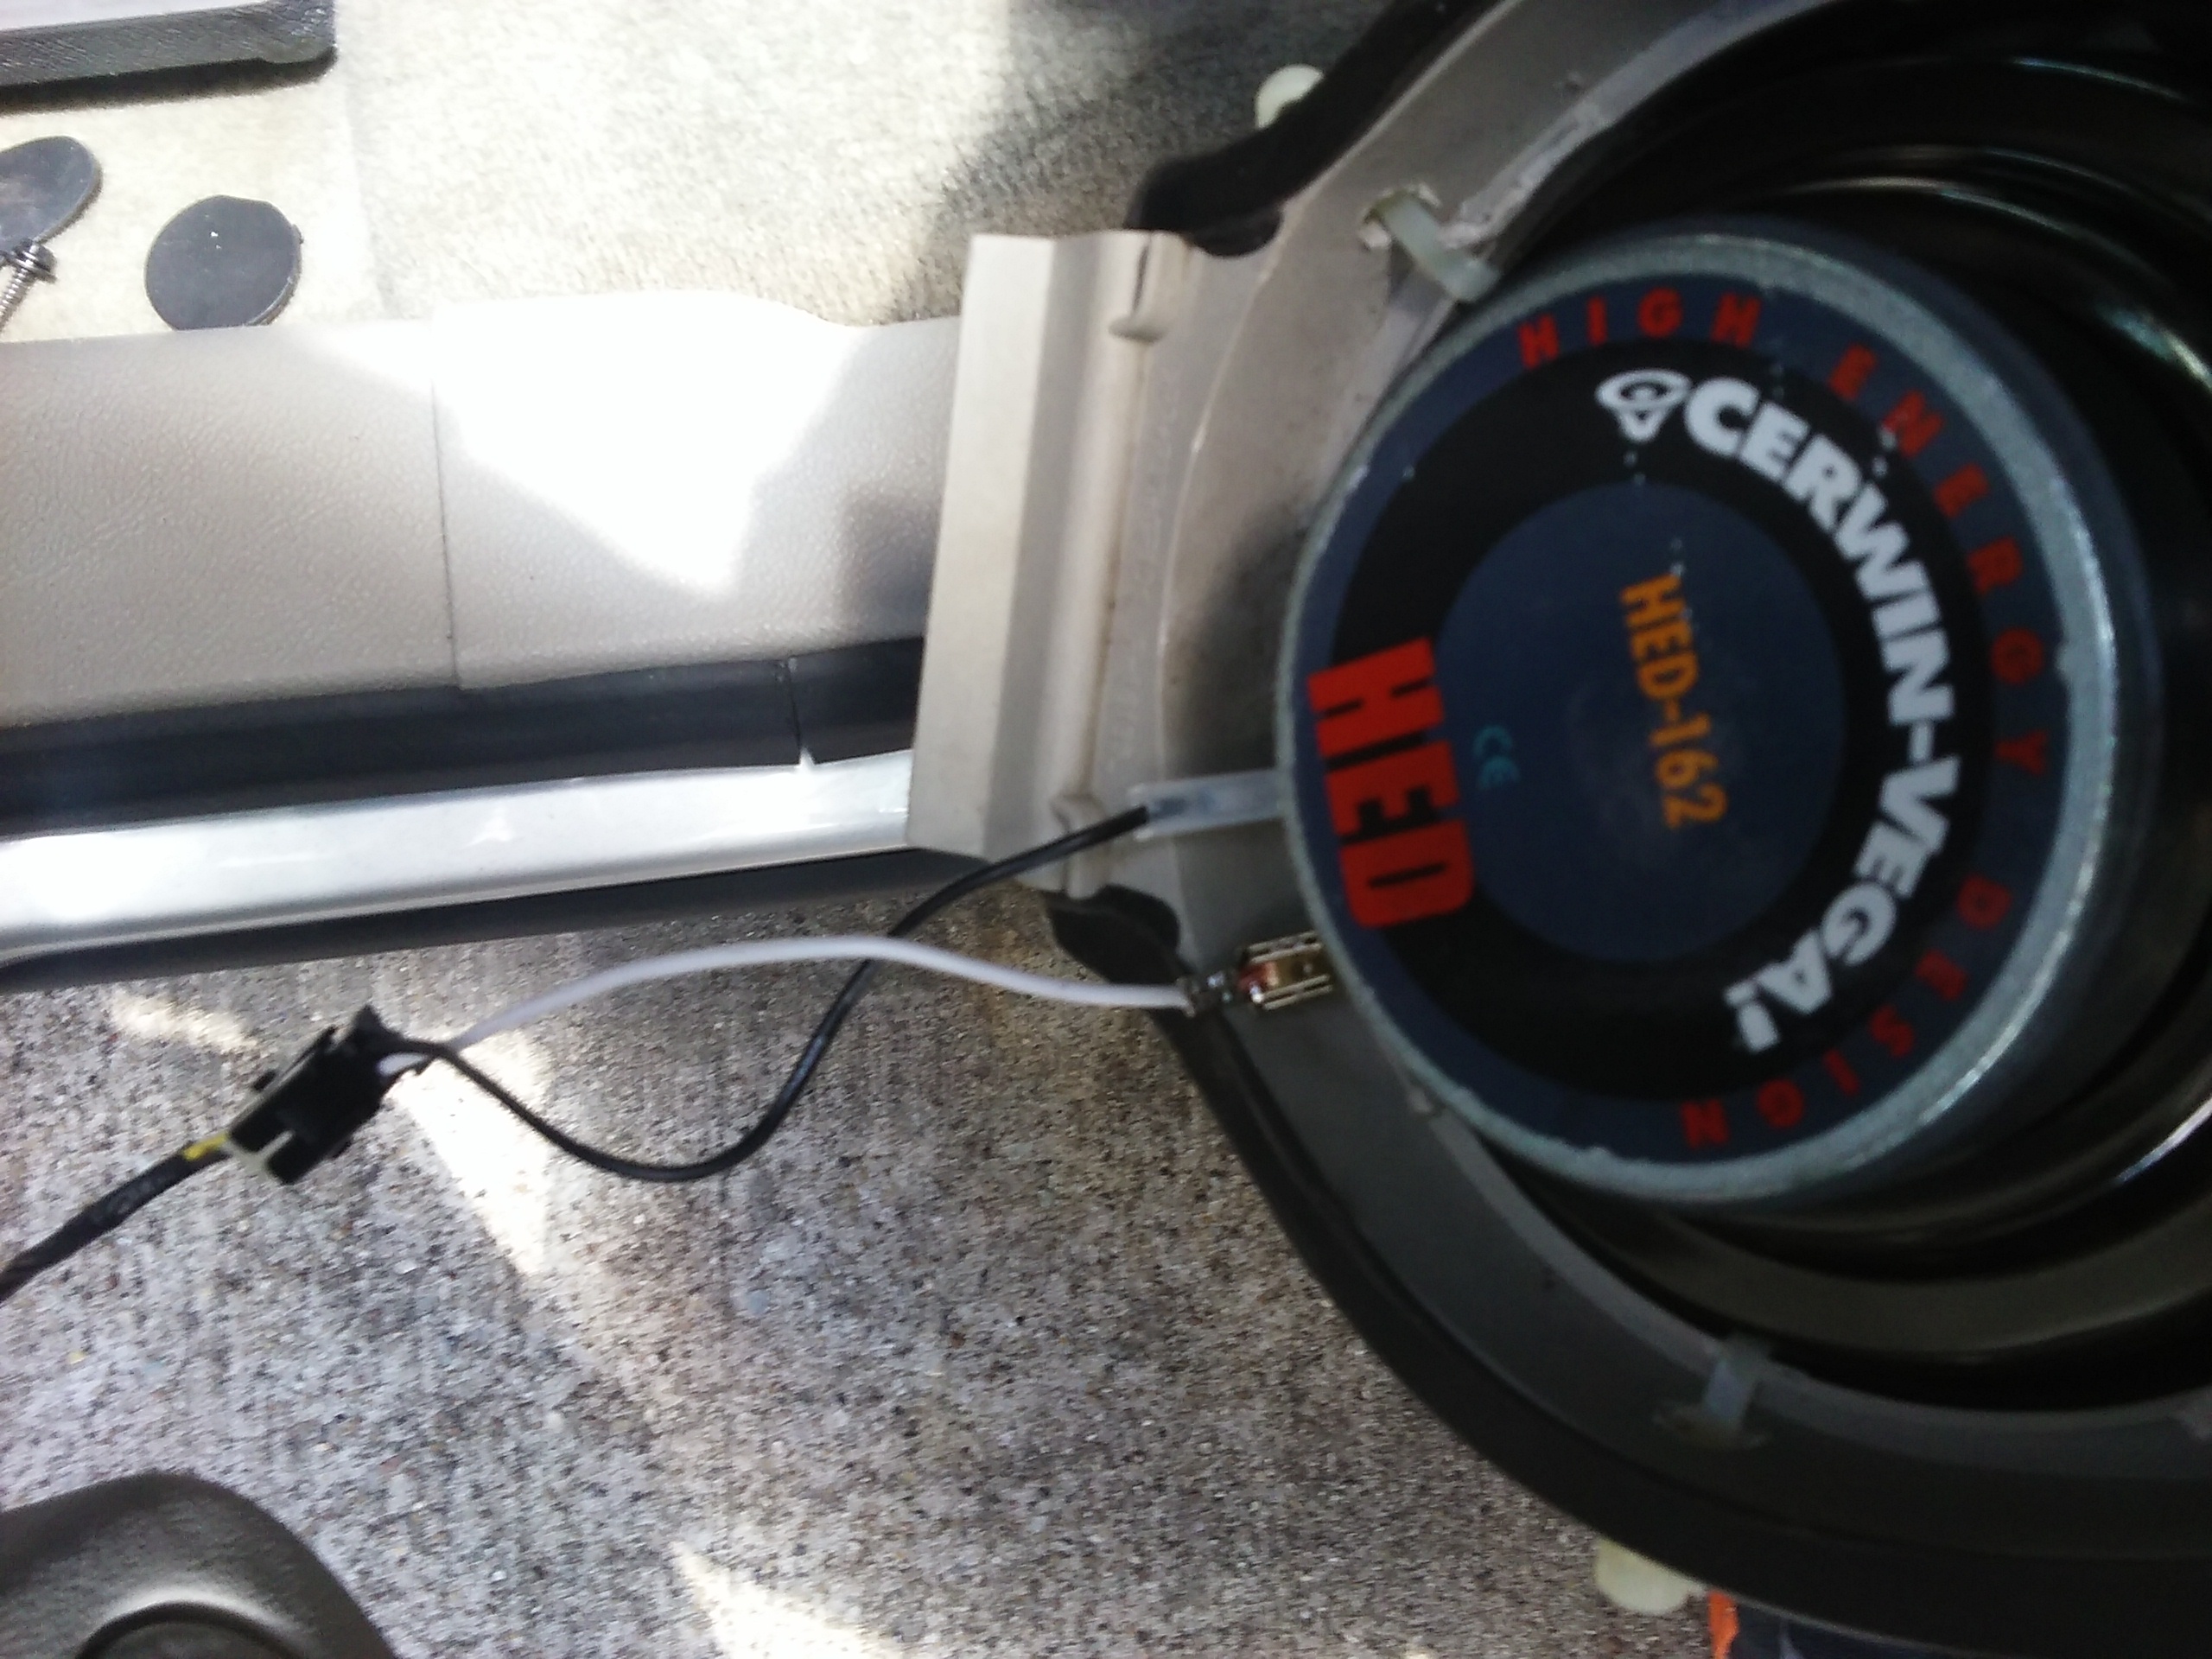
To the Top because this was super simple! If I can do this without losing a digit, anybody can. The plastic frame is easier to cut than it looks. Used tin snips but I bet side cutters would have worked just fine. Now all 6 speakers work and no radio issues. Cerwin Vega in the front and JVC in the rear.


 12-06-2018, 06:30 PM
#10
Senior Member

Join Date: 10-17-2018
Location: FL
Posts: 109
I just recently replaced my fronts with a set of 5.25 components, basically I just used the woofer part of the component as the stock tweeters are still working fine, Im sure eventually Ill replace them.
the 5.25 speaker I put in fit inside the lip perfectly, so once I removed the backing for the stock speakers, I just drilled holes for the 5's in the plate without need to remove vert lip. while some might comment about the 5.25 being too small, they really are not, not for the front.
as I have a panel, I plan on putting a pair of 6.5 subs in rear doors. should sound real nice (not looking for bump, just a nice clean fill) this, coupled with the fronts for mid/high should give me a nice range without over doing it.

Thread
Thread Starter
Forum
Replies
Last Post
drummerboy0088
Audio and Video
5
08-17-2015 08:57 PM