How to replace stock horn with 12V dual note horns
 07-05-2010, 06:35 PM
#1
Senior Member
Thread Starter

Join Date: 01-19-2008
Location: Chicago, IL (Waukegan)
Posts: 1,658
Today I decided to change out the stock horn in my SS with a dual note FIAMM el Grande set of horns.
Between this thread and one by steelwoolghandi which can be found here: How To Install A New Horn you should be able to accomplish this with little effort and headache.
I decided I wanted to get a more masculine note for the horn in my SS. I considered several models and after reading posts here on this site and viewing some YouTube videos I decided to purchase the FIAMM el Grande Dual Note Horns .
To begin, the horn is located up under the plastic wheel well trim on the driver's side front end. You do not need to remove the front tire to do this replacement however it would help since you sometimes have to contort in crazy ways if you leave it on like I did.
Items you will need to purchase in addition to the horn kit if using this same style:
Electrical Tape
18-gauge wire (I chose green and black to stay consistent with the stock wiring)
Female Quick Disconnect wire ends
18-gauge wire splices
Bolt, Nut and Washer for installing add'l bracket.
Here begins the How To:
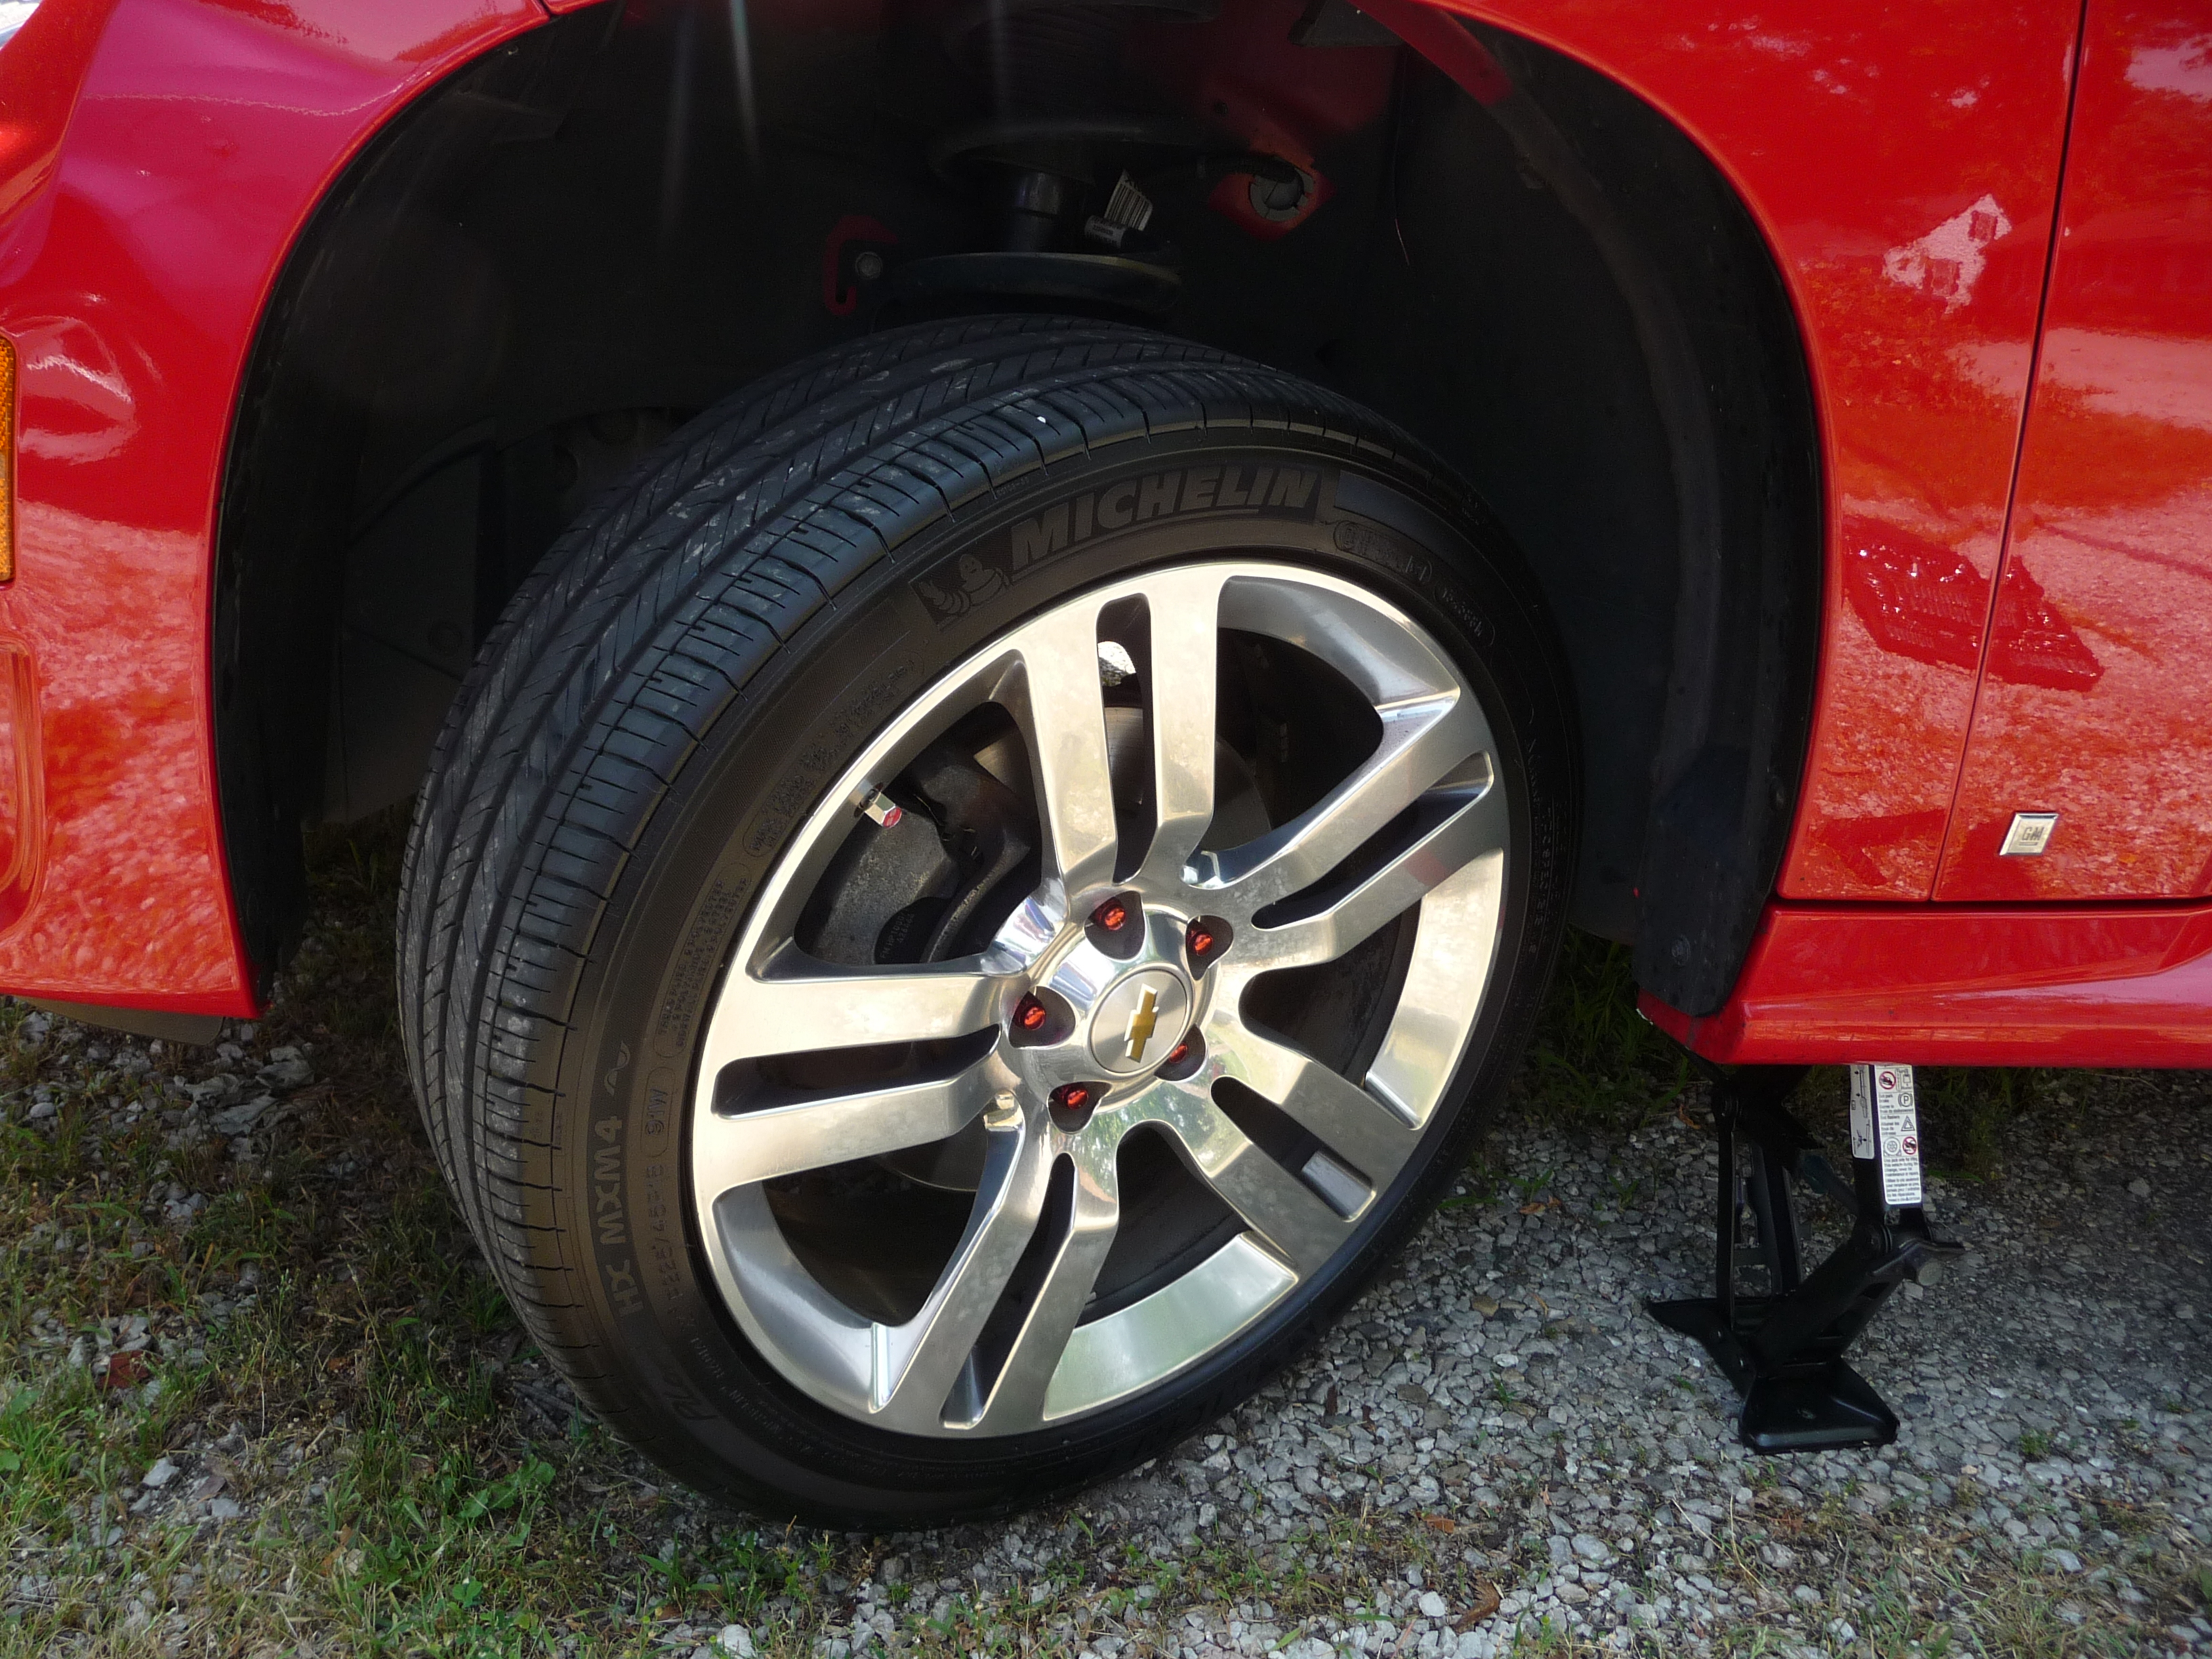
I started by jacking up the driver's side front and turning the wheel to the left in order to create some more room to get my arms in:
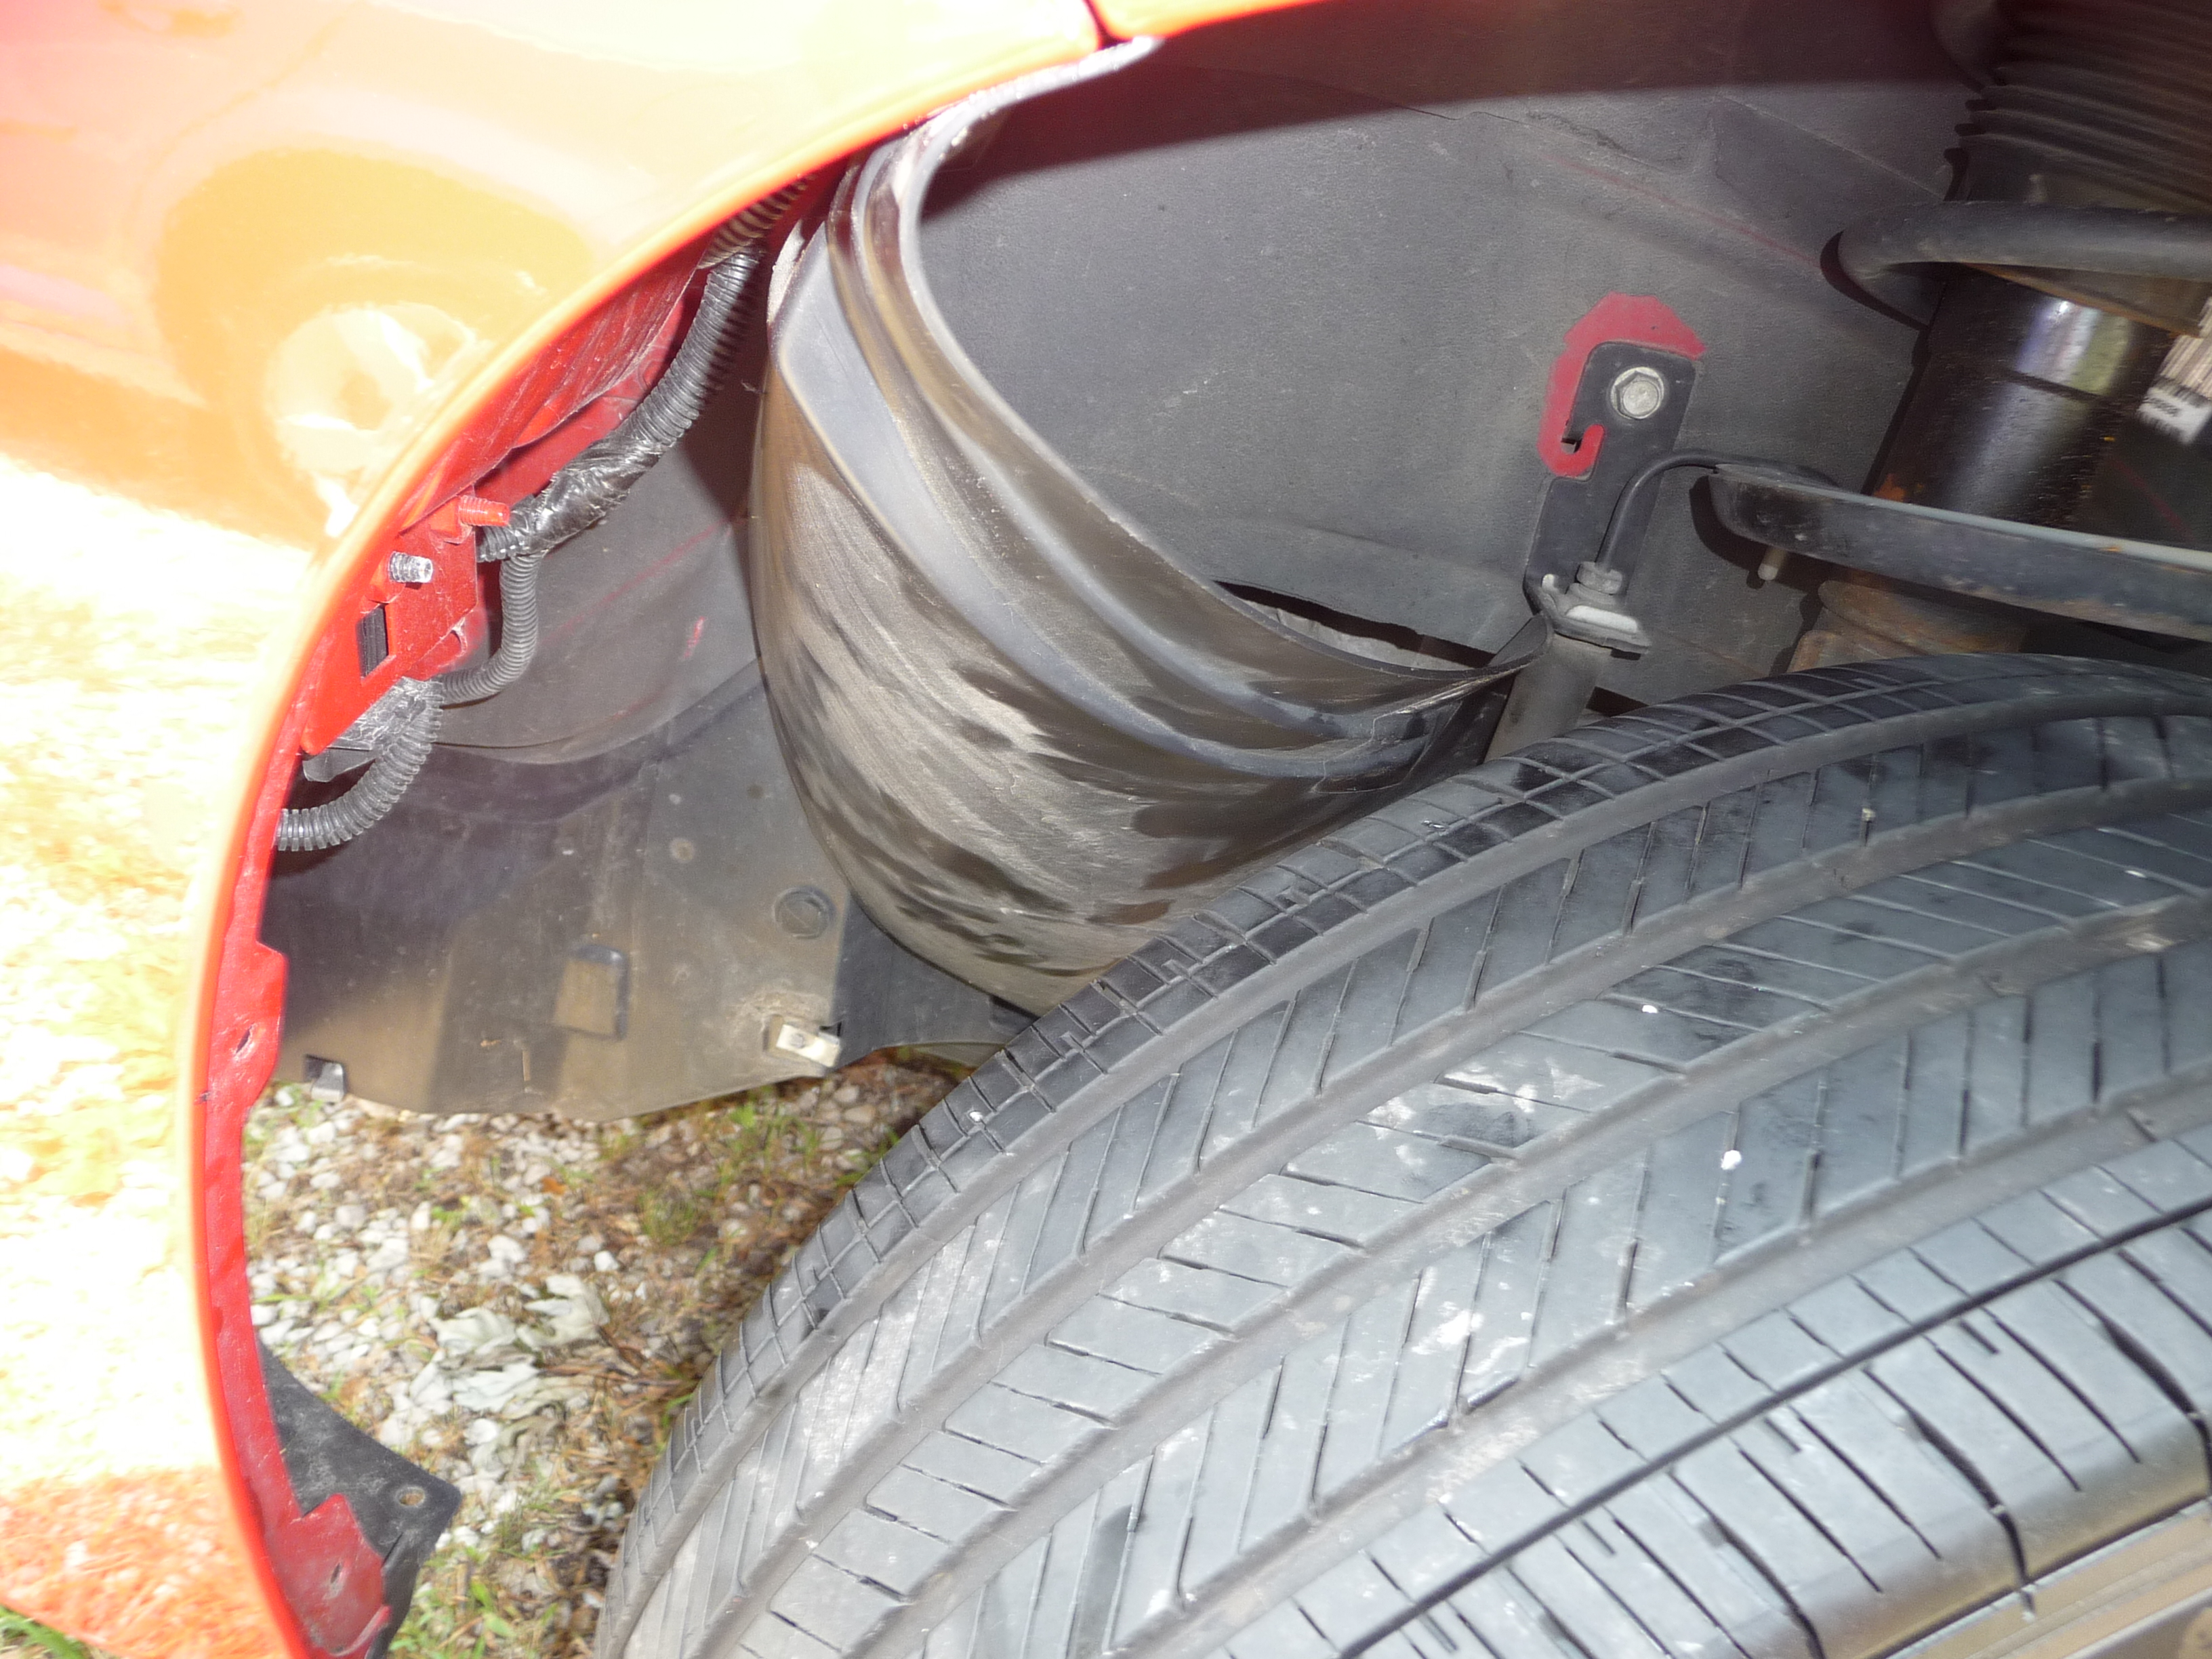
Next I removed 3 bolts (10mm I believe they were) and about 5 or 6 plastic pins which just pull out. Be careful not to bend or break these as you can reuse them as long as they don't get bent out of shape. Once the wheel well trim is free you can simply bend it back and out of the way. I pinned mine behind the suspension so it wouldn't come back at me:
Here is a view of the stock horn as it is installed from the factory (Silver round thing center frame attached with the silver bracket shown):

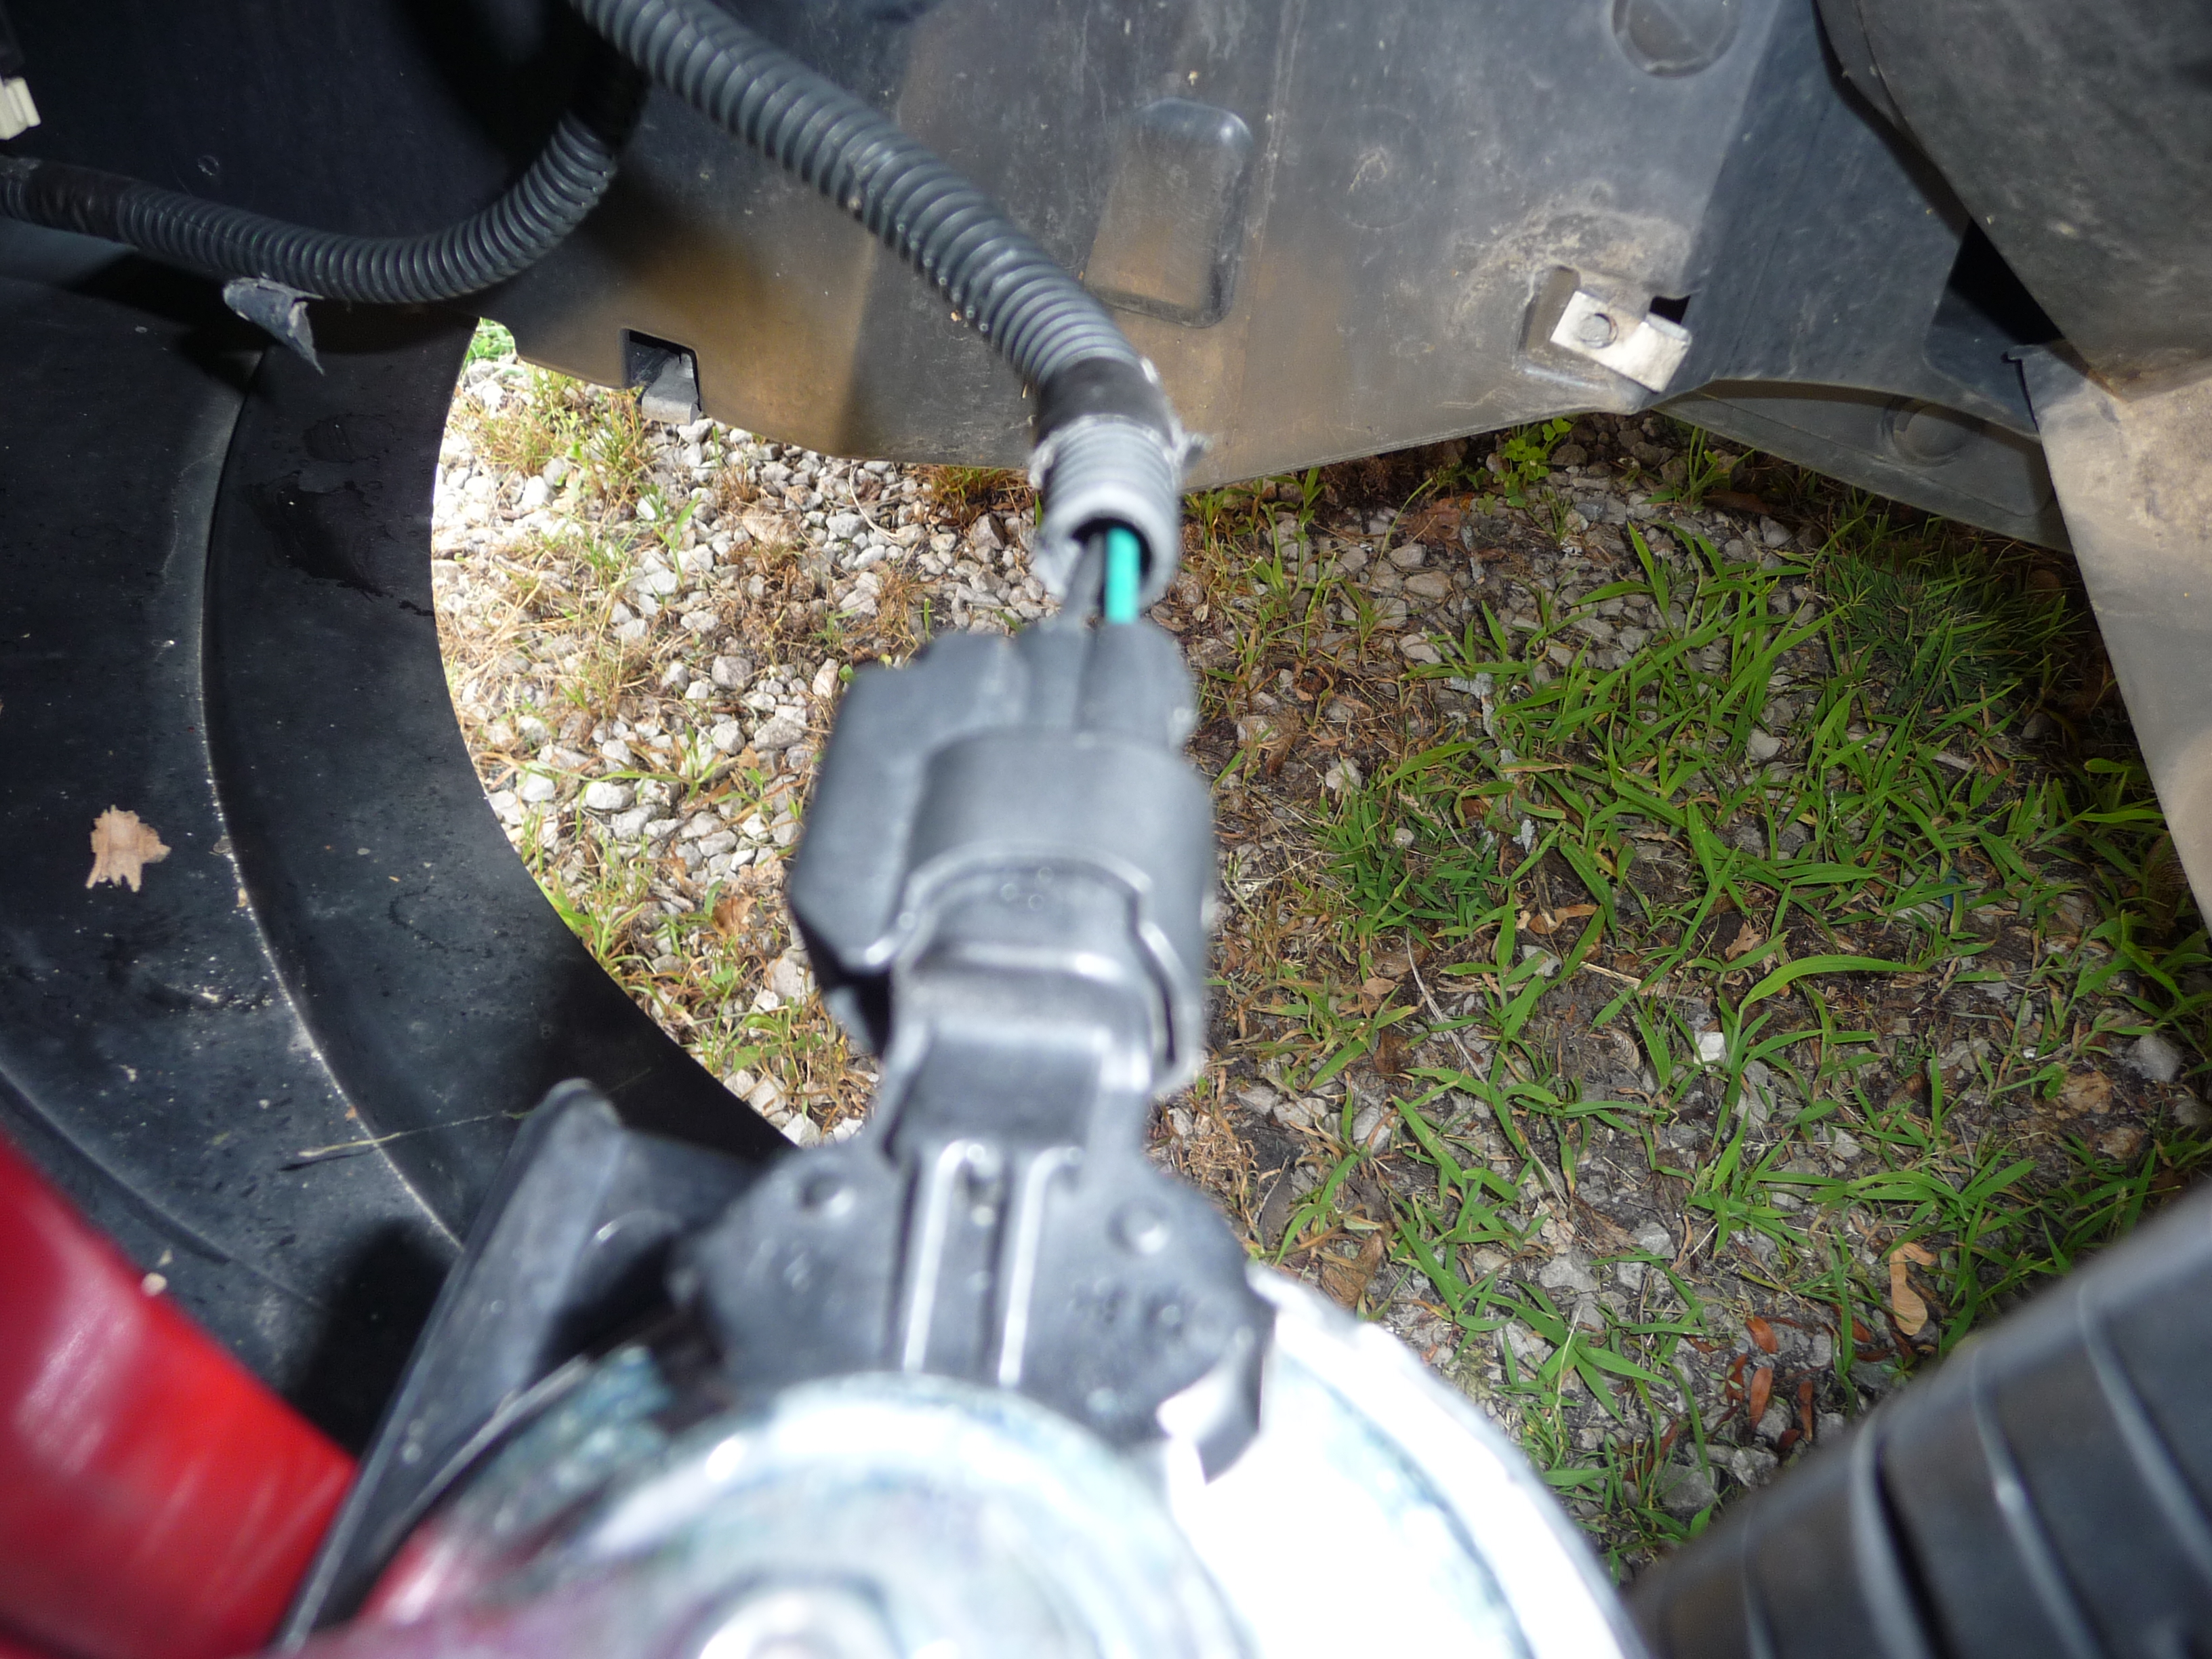
Removing the one bolt at the end of the bracket closest to the vehicle allows the stock horn to come out. You can see that the stock horn is connected with a sort of plug. Simply pull back the plastic tube covering the wires and cut the black and green wires to this plug (best to cut them a few inches back from the horn in case you need to rewire it in at some later time) You have removed the old horn:
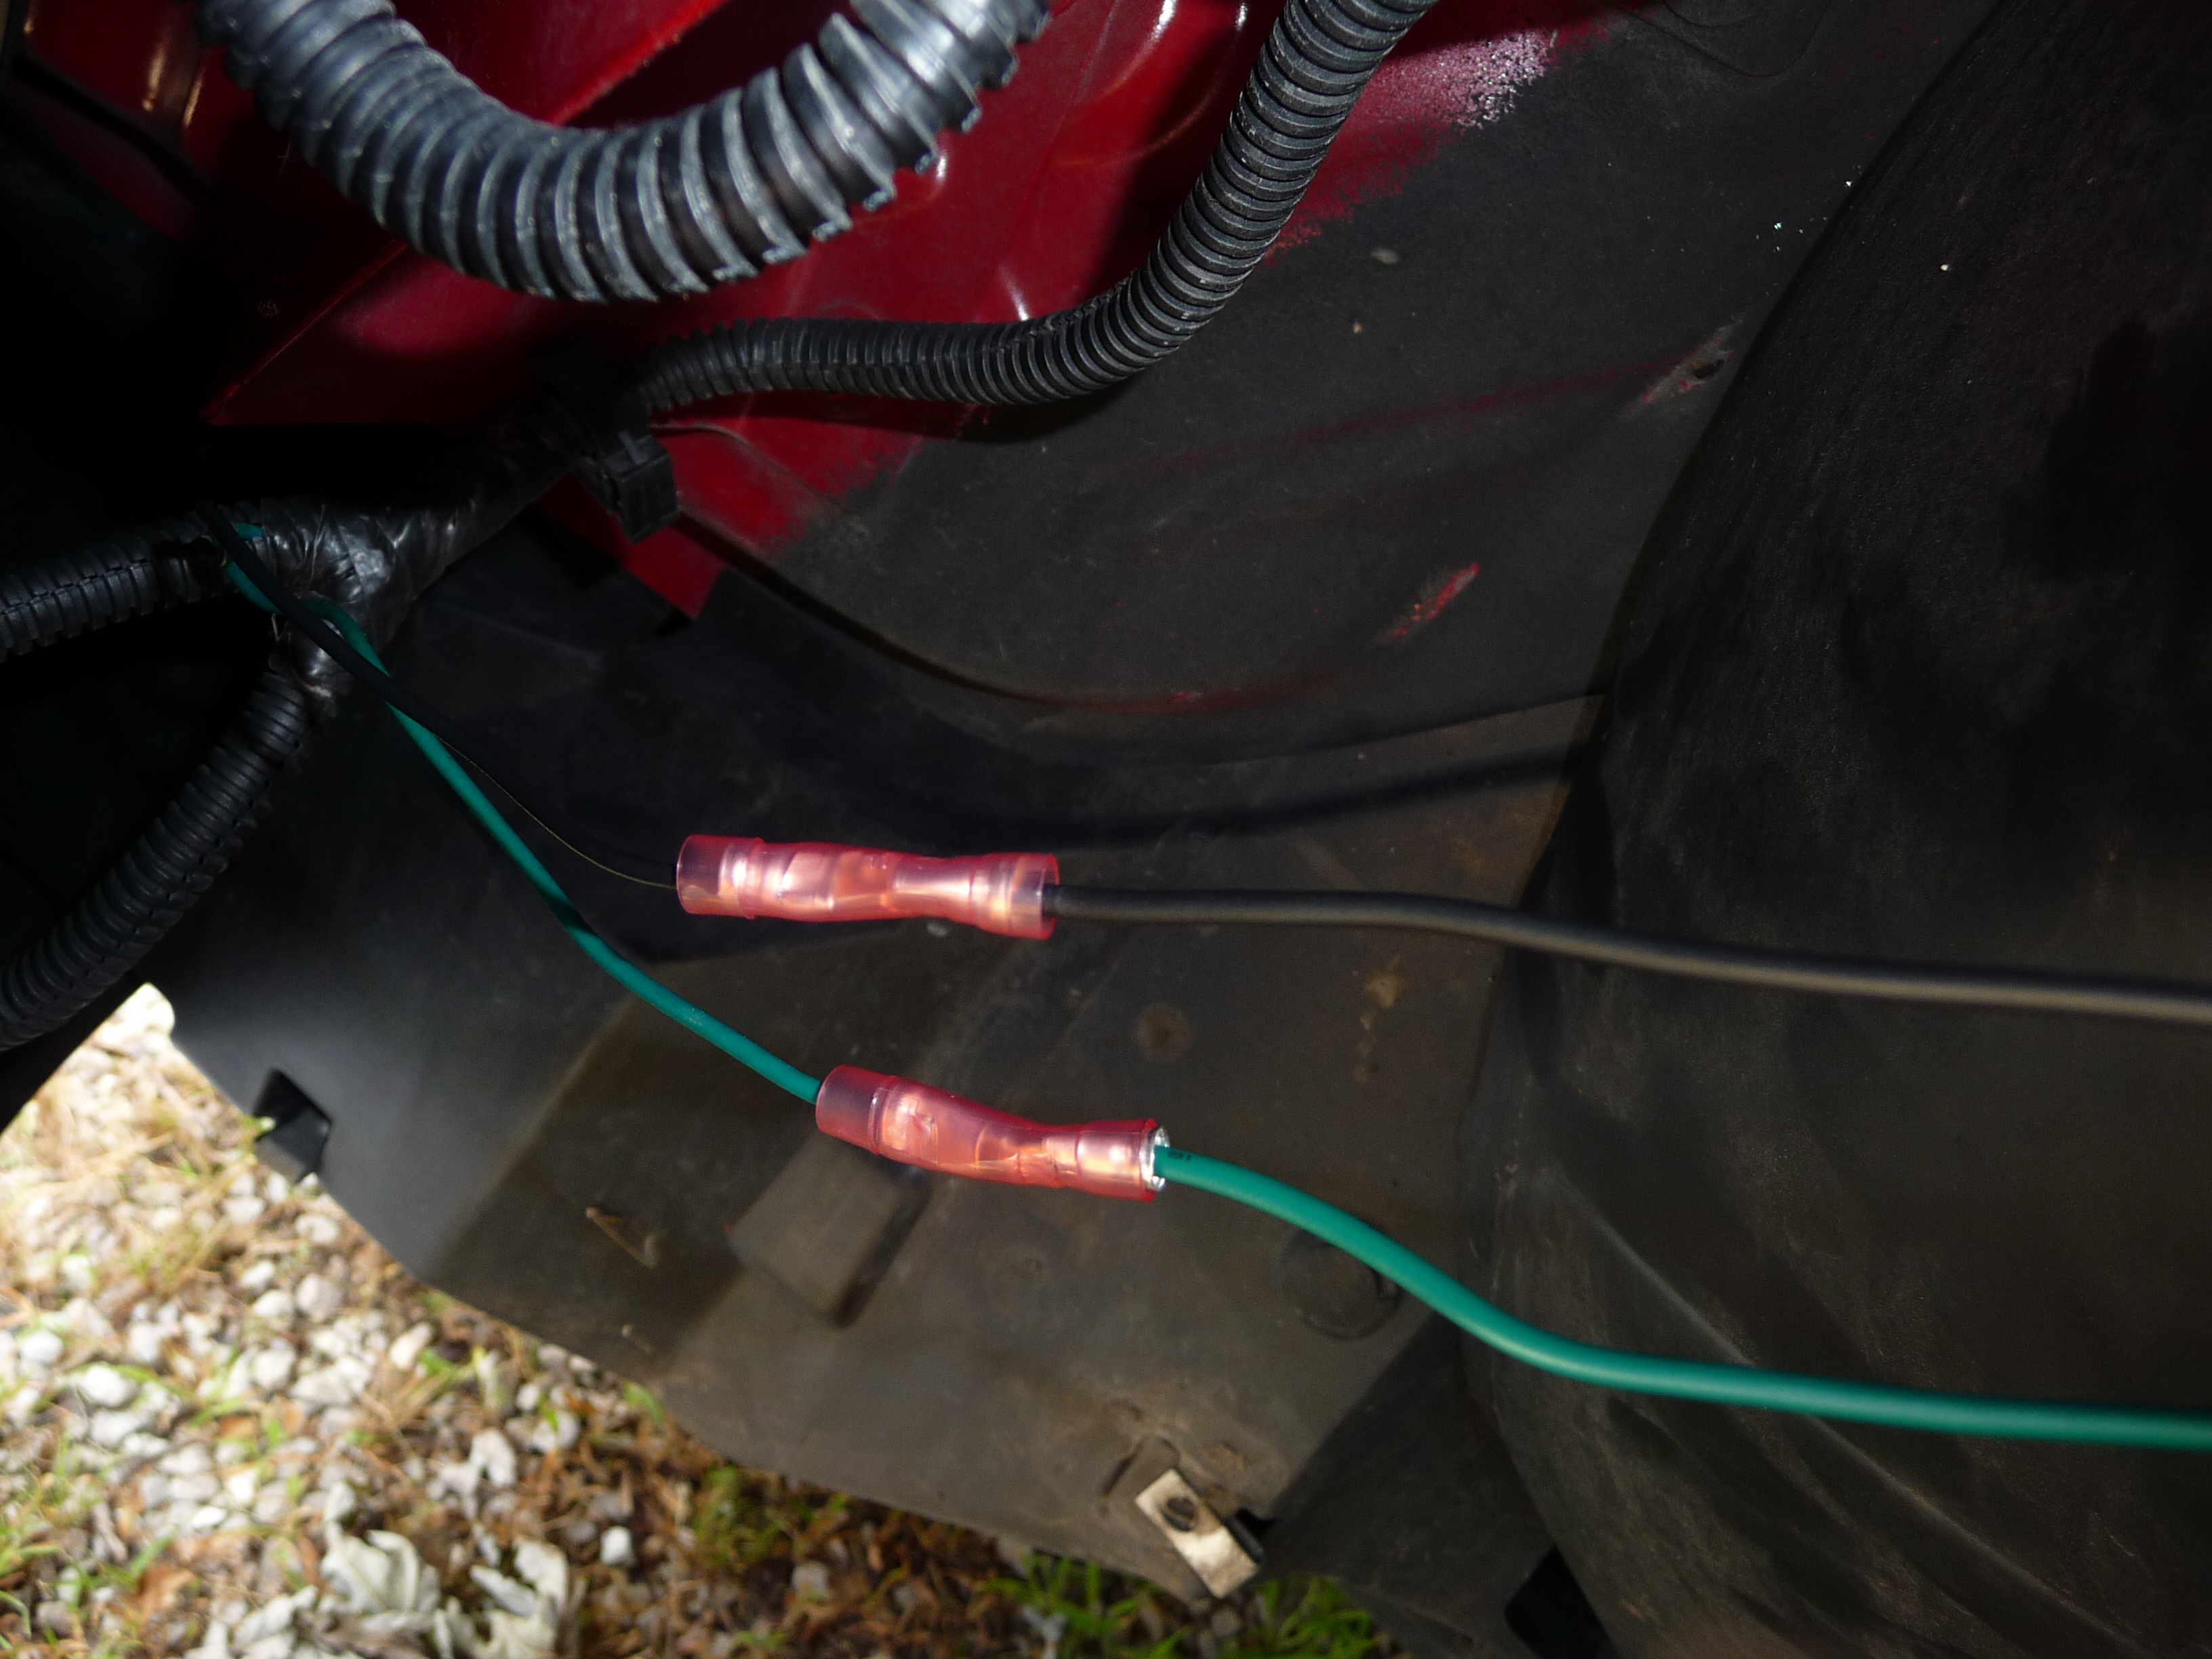
I decided to add in about 8 inches of wire at this point in case I needed it. The wires are 18-gauge (thanks to members of this site for that info) and simple butt splices make more room to get things reinstalled:
The FIAMM el Grande comes with two brackets which you can bolt right onto the end of your factory bracket where the stock horn used to sit. To do this you will need to purchase a bolt, washer and nut from the hardware store. Here I have installed the horns on their respective brackets and attached those brackets to the original one on my SS:
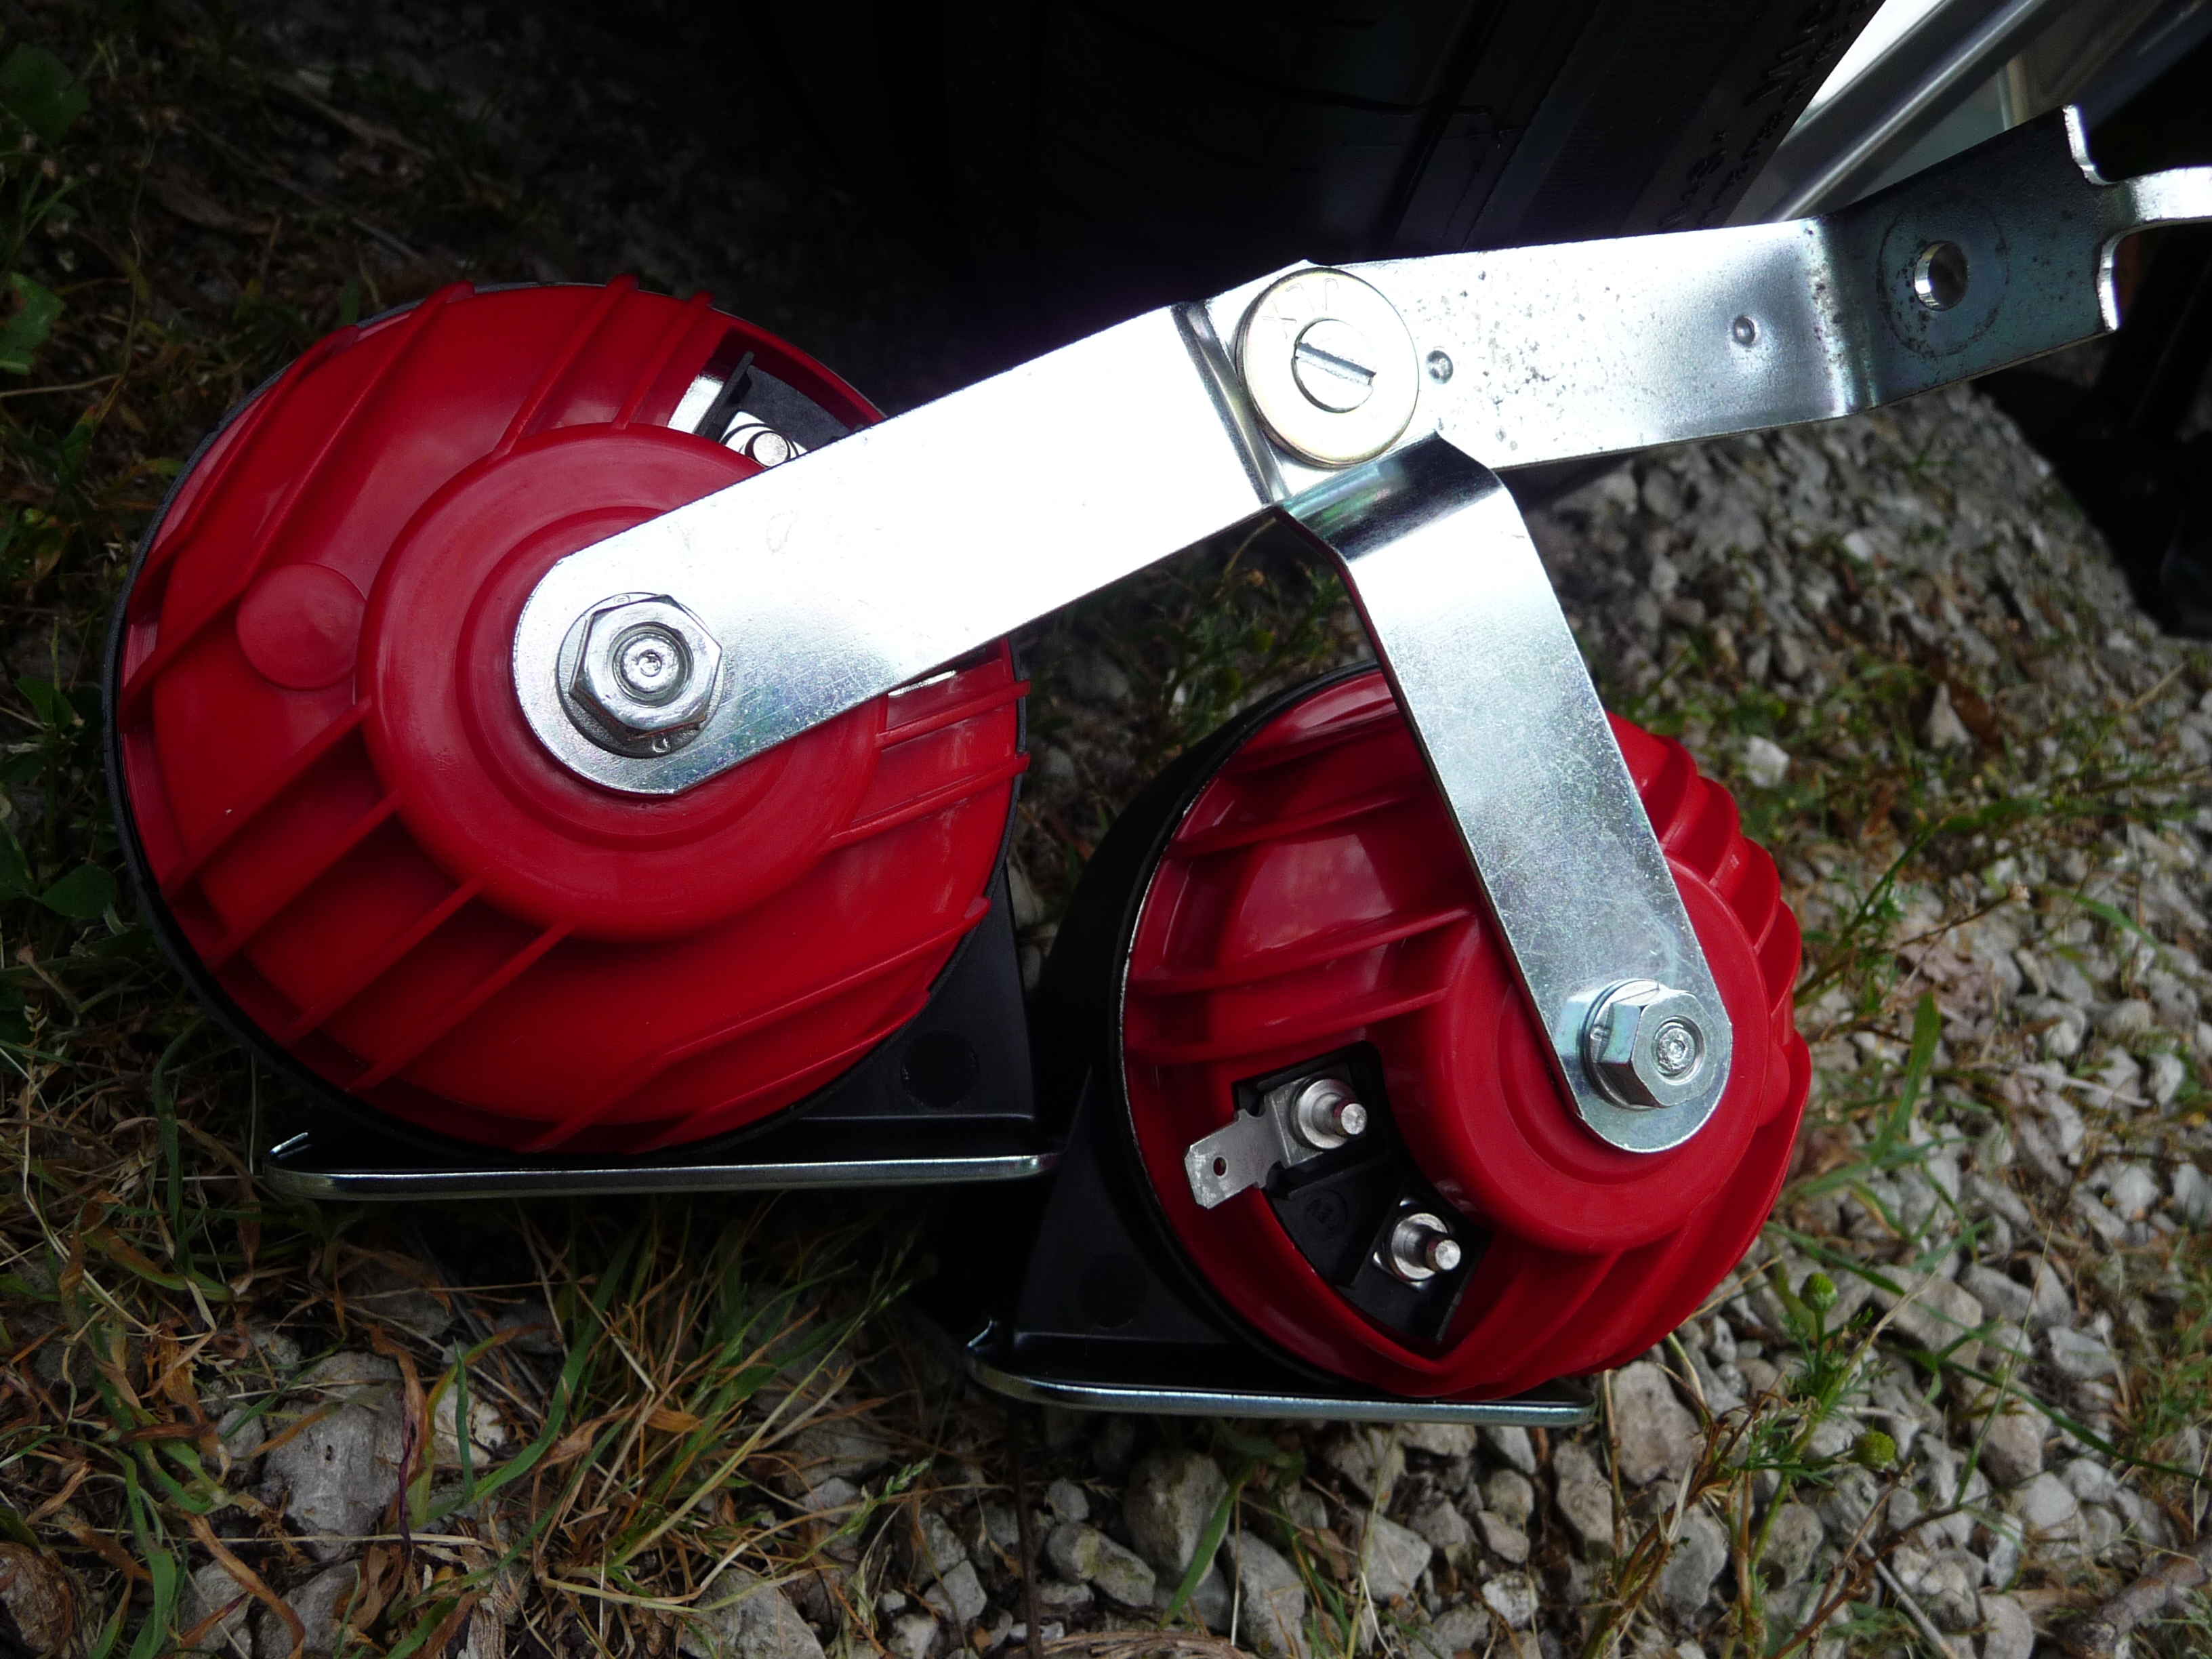
Once I had the assembly put together I put it up inside where it needed to go and eyed everything up. There is plenty of room in there for the two horns and the original bracket can sit right back in the original factory holes. Make sure that you aim the openings of the horns towards the ground to avoid water getting inside and staying there:
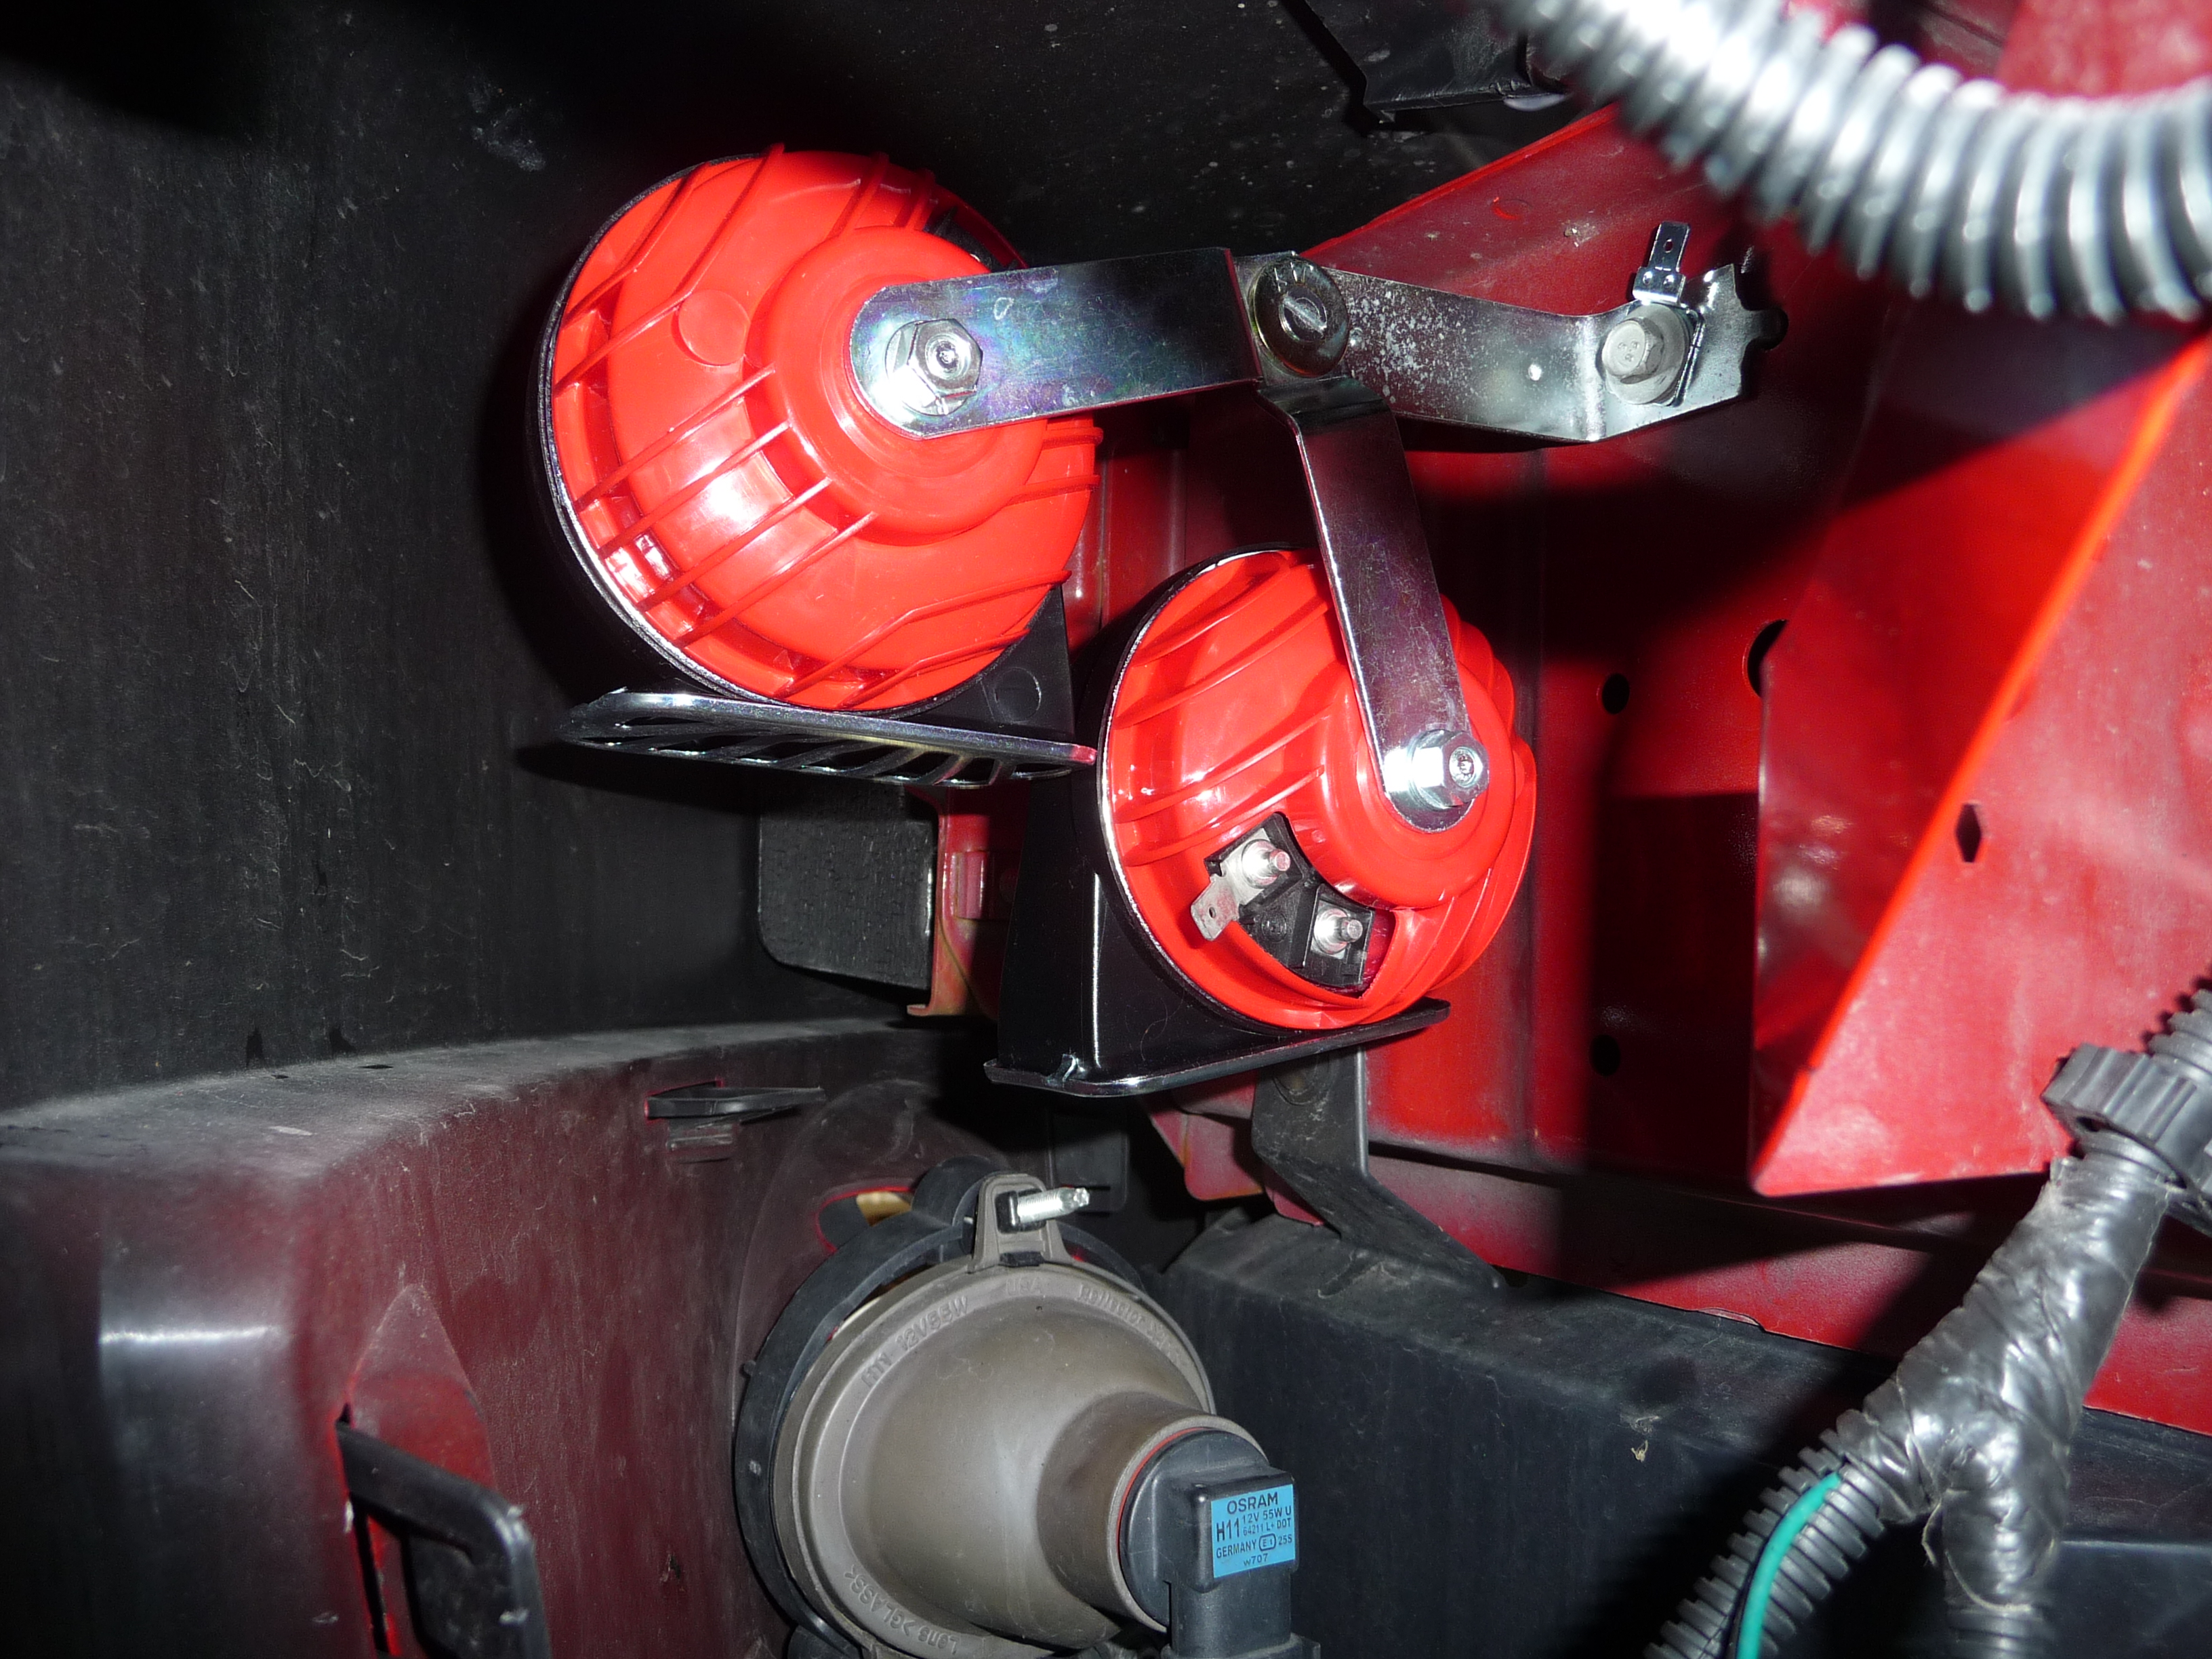
Once I had a good idea of where they were going to sit and what angles I needed the brackets to be at I wired them in. To do this you will need some female wire quick disconnects to slide onto the posts and give juice to the horns. You will also need to run one wire from the positive post of one horn to the other to power the second horn as shown below. I grounded my system to the bolt that held the original horn bracket in place:
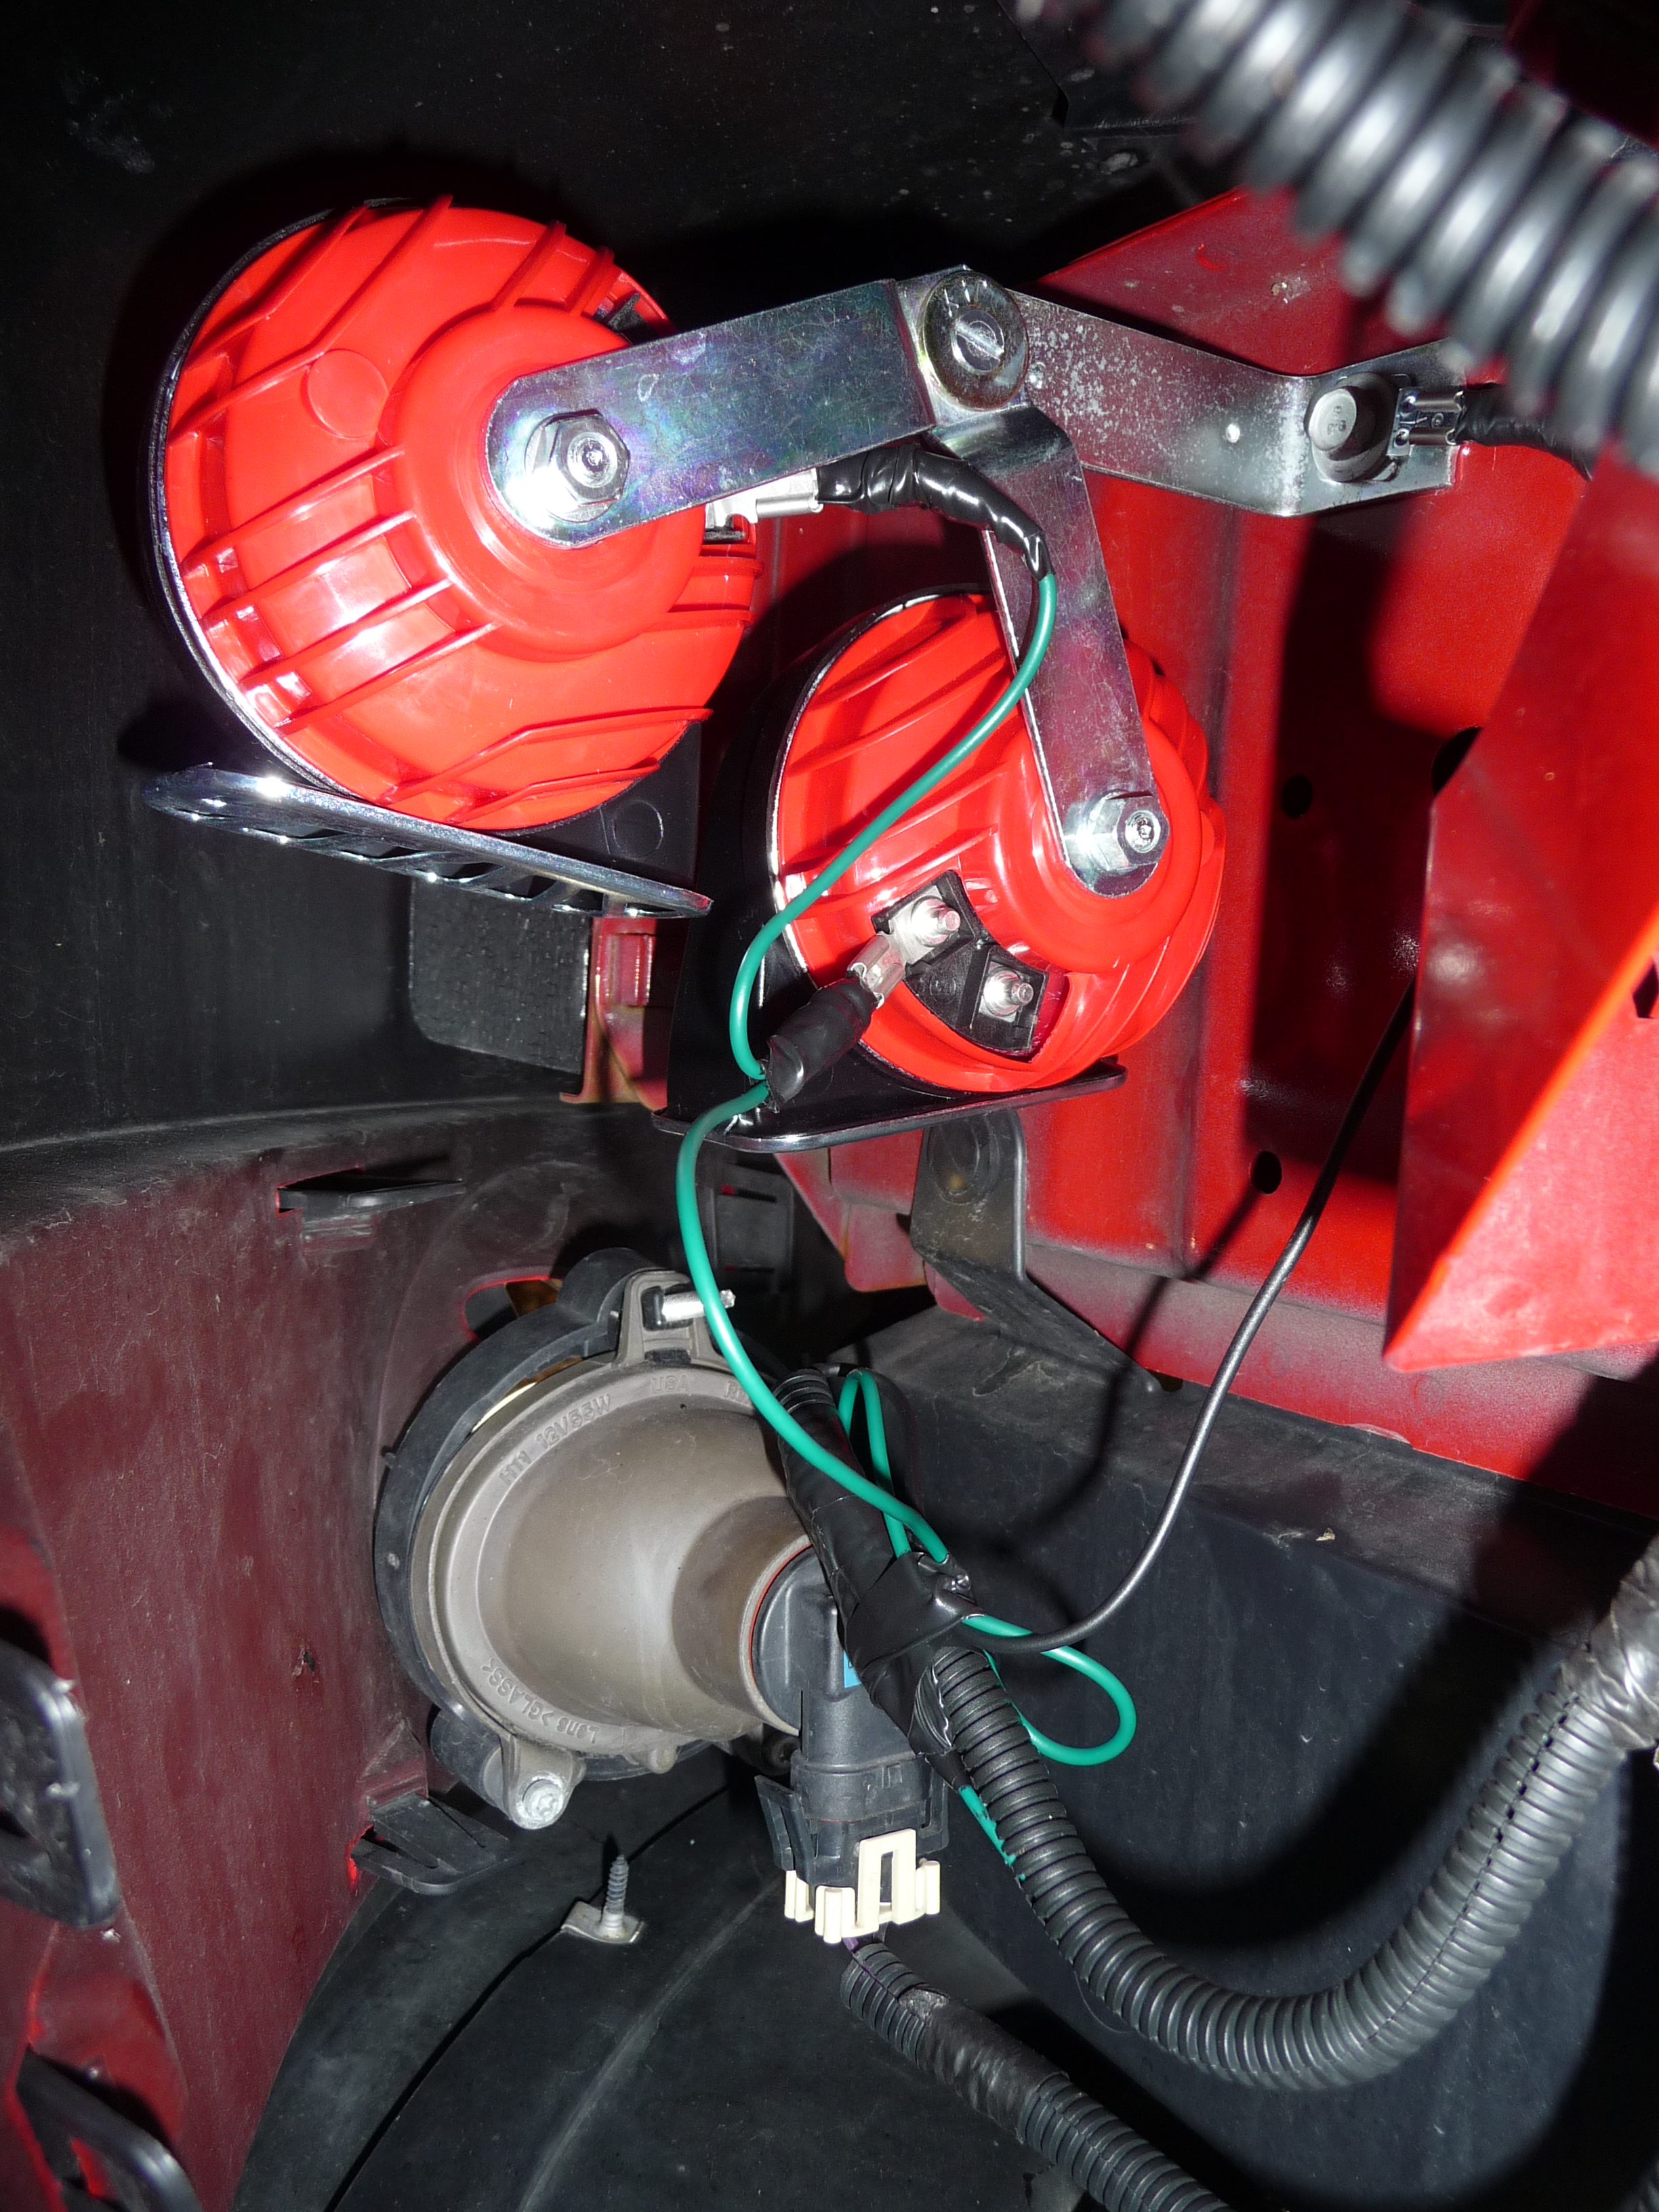
And that was all there was to it. Tape all connections up good and put the wheel well liner back in place. Take it off the jack stand and go about your happy honkin' way!
Between this thread and one by steelwoolghandi which can be found here: How To Install A New Horn you should be able to accomplish this with little effort and headache.
I decided I wanted to get a more masculine note for the horn in my SS. I considered several models and after reading posts here on this site and viewing some YouTube videos I decided to purchase the FIAMM el Grande Dual Note Horns .
To begin, the horn is located up under the plastic wheel well trim on the driver's side front end. You do not need to remove the front tire to do this replacement however it would help since you sometimes have to contort in crazy ways if you leave it on like I did.
Items you will need to purchase in addition to the horn kit if using this same style:
Electrical Tape
18-gauge wire (I chose green and black to stay consistent with the stock wiring)
Female Quick Disconnect wire ends
18-gauge wire splices
Bolt, Nut and Washer for installing add'l bracket.
Here begins the How To:
I started by jacking up the driver's side front and turning the wheel to the left in order to create some more room to get my arms in:
Next I removed 3 bolts (10mm I believe they were) and about 5 or 6 plastic pins which just pull out. Be careful not to bend or break these as you can reuse them as long as they don't get bent out of shape. Once the wheel well trim is free you can simply bend it back and out of the way. I pinned mine behind the suspension so it wouldn't come back at me:
Here is a view of the stock horn as it is installed from the factory (Silver round thing center frame attached with the silver bracket shown):
Removing the one bolt at the end of the bracket closest to the vehicle allows the stock horn to come out. You can see that the stock horn is connected with a sort of plug. Simply pull back the plastic tube covering the wires and cut the black and green wires to this plug (best to cut them a few inches back from the horn in case you need to rewire it in at some later time) You have removed the old horn:
I decided to add in about 8 inches of wire at this point in case I needed it. The wires are 18-gauge (thanks to members of this site for that info) and simple butt splices make more room to get things reinstalled:
The FIAMM el Grande comes with two brackets which you can bolt right onto the end of your factory bracket where the stock horn used to sit. To do this you will need to purchase a bolt, washer and nut from the hardware store. Here I have installed the horns on their respective brackets and attached those brackets to the original one on my SS:
Once I had the assembly put together I put it up inside where it needed to go and eyed everything up. There is plenty of room in there for the two horns and the original bracket can sit right back in the original factory holes. Make sure that you aim the openings of the horns towards the ground to avoid water getting inside and staying there:
Once I had a good idea of where they were going to sit and what angles I needed the brackets to be at I wired them in. To do this you will need some female wire quick disconnects to slide onto the posts and give juice to the horns. You will also need to run one wire from the positive post of one horn to the other to power the second horn as shown below. I grounded my system to the bolt that held the original horn bracket in place:
And that was all there was to it. Tape all connections up good and put the wheel well liner back in place. Take it off the jack stand and go about your happy honkin' way!

 07-07-2010, 01:07 PM
#3
Senior Member

Join Date: 01-04-2010
Location: Imported from Detroit
Posts: 1,584
Looks good. I'm going to have to double check... I don't remember seeing my horn in there... I mounted my HID ballast right below that area.
Is that where you purchased your horns at?
Got a video aka sound clip of them?
Is that where you purchased your horns at?
Got a video aka sound clip of them?
07-07-2010, 10:38 PM
#4
Senior Member
Thread Starter
Join Date: 01-19-2008
Location: Chicago, IL (Waukegan)
Posts: 1,658
I got my horns from Amazon.com for under $20. Added another small item that I had been needing to get the total over $25 and got free shipping.
Yep the horn was right above the fog lamp on the driver's side so if you did a replacement to HID lights then you probably just worked around it and didn't notice it.
Unfortunately I do not own a video camera or way to get my own personal sound clip on this thread but here is a youtube video for a similar horn install:
http://www.youtube.com/watch?v=Ab5qKXyFCrg
 07-07-2010, 11:19 PM
#6
Senior Member

Join Date: 04-26-2009
Location: NE Texas
Posts: 1,222
That's exactly where it is. I mounted my ballasts in probably the same place and didn't notice the horn until I started looking for a spot to ground a wire
07-08-2010, 08:10 AM
#7
Senior Member
Join Date: 01-04-2010
Location: Imported from Detroit
Posts: 1,584
Of corse its understandable... you're forcing your hands into that small spot... it's a tight BS place to do anything...
I'll have to check out that video when I'm not at work... no youtube while I'm here... all blocked.

Thread
Thread Starter
Forum
Replies
Last Post
cj krause
General HHR
15
03-24-2006 02:55 PM