Replacing Lower Control Arms
 03-15-2017, 01:27 PM
#101
Platinum Member
Thread Starter

Join Date: 04-09-2006
Location: Vancouver, BC, Canada
Posts: 7,032

 03-15-2017, 01:30 PM
#102
Administrator

Join Date: 10-13-2011
Location: Welland,Ont Canada
Posts: 36,485
I'll be in Florida in April, gonna have a few meet and greets, get a picture of Oldblue and Gregg and maybe Beachbum1 in the Bradenton area.
Gee, Sweetie and I have always wanted to go to BC, it's not that far!
Gee, Sweetie and I have always wanted to go to BC, it's not that far!
03-15-2017, 03:07 PM
#103
Senior Member

Join Date: 09-16-2013
Location: Tampa, Florida
Posts: 1,408
03-15-2017, 03:09 PM
#104
Senior Member
Join Date: 09-16-2013
Location: Tampa, Florida
Posts: 1,408
Next month wow it's creeping up fast! Gregg would love a pic with Oldblue!!
06-21-2017, 09:44 PM
#105
Senior Member

Join Date: 12-14-2007
Location: Toronto ON Canada
Posts: 2,964
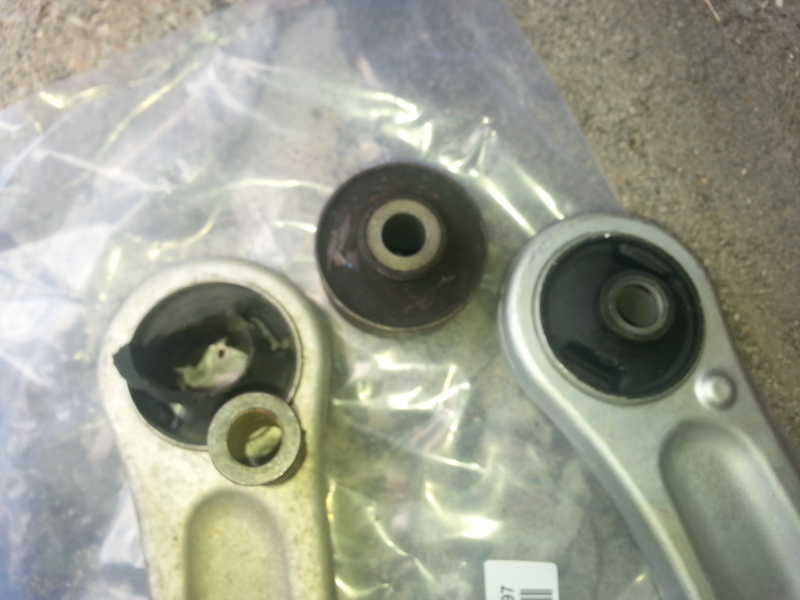
I did my passenger side arm today, hopefully have time to do drivers side tomorrow. I used the moog complete control arms, but also ordered their problem solver solid bushings to press into the original control arms. I will have to find a place to do that since I dont have required tools. It would be great if they had a version with the sturdier bushing installed.
I was hoping it would stop the swaybar contacting the arm, but still seems to be touching, I will investigate more tomorrow.
I also had trouble sliding the rear bushing end in. I ended up using a 3/8 extension through the bushing to keep it vertical while pushing it into the bracket , then lined up with the hole and shoved the bolt in, but couldnt catch threads. Then I did the front bushing and ball joint loosely. Now secure, I could jack up the ball joint to help align the rear bushing, still had to use the 3/8 extension to pry the arm inward a bit against the frame rail before the threads would catch.
So, more wrestling than I thought, but got one done.
06-21-2017, 10:25 PM
#106
Technical Moderator

Join Date: 01-23-2009
Location: Fredericksburg, Virginia
Posts: 24,680
I don't know if I posted this hint in this thread or not.
If you take the top strut nuts off life is much easier when you get to putting the ball joints in to the knuckle.
It was my experience that 12 inch sway bar links caused the banging, cleared up after I put the correct 10 inch links on. There is also a plastic stop on the sway bar inside the bushings, they can slip out of position.
06-21-2017, 10:37 PM
#107
Senior Member
Join Date: 12-14-2007
Location: Toronto ON Canada
Posts: 2,964
I don't know if I posted this hint in this thread or not.
If you take the top strut nuts off life is much easier when you get to putting the ball joints in to the knuckle.
It was my experience that 12 inch sway bar links caused the banging, cleared up after I put the correct 10 inch links on. There is also a plastic stop on the sway bar inside the bushings, they can slip out of position.
If you take the top strut nuts off life is much easier when you get to putting the ball joints in to the knuckle.
It was my experience that 12 inch sway bar links caused the banging, cleared up after I put the correct 10 inch links on. There is also a plastic stop on the sway bar inside the bushings, they can slip out of position.
I also got the 10" links in the same order in case that will help. Now I just need time, this is the first chance in about a year for me to get this done.
06-22-2017, 07:57 AM
#108
Administrator
Join Date: 10-13-2011
Location: Welland,Ont Canada
Posts: 36,485
It's a lot easier with an air impact wrench!
Why not order the problem solver bushings K200792?
Front Lower Control Arm Bushing | Chevrolet Cavalier
Why not order the problem solver bushings K200792?
Front Lower Control Arm Bushing | Chevrolet Cavalier
06-22-2017, 11:07 AM
#109
Senior Member
Join Date: 12-14-2007
Location: Toronto ON Canada
Posts: 2,964
It's a lot easier with an air impact wrench!
Why not order the problem solver bushings K200792?
Front Lower Control Arm Bushing Chevrolet Cavalier
Why not order the problem solver bushings K200792?
Front Lower Control Arm Bushing Chevrolet Cavalier
An air impact would have helped today, my old electric was struggling, I had to fight the big bolt all the way out. Then I found a nick in the last full thread, like it may have taken a hit when I had it done under warranty.
I cleaned that up but testing it without the control arm in place it isnt threading in smoothly at all. I'm afraid putting it back together may strip the captive nut, which is already a little loose in the frame. I dont like the idea of jamming it up there with the impact, i always start by hand. Right now im taking a rain break.