Slide_Rite's HHR - Pics, Mods & More!


 04-24-2012, 09:05 PM
#22
Senior Member
Thread Starter

Join Date: 03-20-2012
Location: Dallas, TX
Posts: 292
@ chefhhr; I am super anxious to get it all done! The headlights are gonna mess up the look so gotta figure out something with that and the door handles to really bring it together.
@ Joe Schulte; that is a nice arsenal man, would like to have my own "zombie emergency kit" like that.
Thanks man, I really appreciate that...but nah, that's homemade. 
Just get yourself some black contact paper, then you can easily decide if you want to mount it on your window or the brake light. I was planning to put it on the light, but then I removed it. When I saw it, I instantly knew it would be so much better on the window. I used a piece of paper against the window from the inside and traced out the exact opening to get the size for the font I chose. Then just print out whatever you want in the font of your choice, tape it the contact paper, cut it out and apply!
I layered three pieces together to make sure the area's I didn't cut out stayed pitch black. It worked pretty well and since it's on the window, all the light given off from the bulbs is concentrated through the cutout instead of escaping or scattering around it, like it can when the vinyl is on the light.
I can't believe I didn't take pics of any of the process....doh! I might have to make another just to document it as I go, haha!
@ Joe Schulte; that is a nice arsenal man, would like to have my own "zombie emergency kit" like that.
Just get yourself some black contact paper, then you can easily decide if you want to mount it on your window or the brake light. I was planning to put it on the light, but then I removed it. When I saw it, I instantly knew it would be so much better on the window. I used a piece of paper against the window from the inside and traced out the exact opening to get the size for the font I chose. Then just print out whatever you want in the font of your choice, tape it the contact paper, cut it out and apply!
I layered three pieces together to make sure the area's I didn't cut out stayed pitch black. It worked pretty well and since it's on the window, all the light given off from the bulbs is concentrated through the cutout instead of escaping or scattering around it, like it can when the vinyl is on the light.
I can't believe I didn't take pics of any of the process....doh! I might have to make another just to document it as I go, haha!
04-25-2012, 07:38 AM
#24
Senior Member

Join Date: 03-09-2012
Location: Atlanta
Posts: 1,430
Slide - If you are like me, the chrome is driving you nuts! I may have mentioned already, but for the handles, beauty bar, and grill...I took a sanding block that I picked up from Home Depot and sanded down each piece to give it more of a brushed aluminum look. It looks great in person...much better than the bright chrome. Another idea I had with the handles is using plasti dip. Everyone rags on it, but I used it on my chrome mirror caps and it looks like a factory finish! The stuff is so easy to use and if it comes out looking bad, just peel it off.
04-25-2012, 03:09 PM
#25
Senior Member
Thread Starter
Join Date: 03-20-2012
Location: Dallas, TX
Posts: 292
Slide - If you are like me, the chrome is driving you nuts! I may have mentioned already, but for the handles, beauty bar, and grill...I took a sanding block that I picked up from Home Depot and sanded down each piece to give it more of a brushed aluminum look. It looks great in person...much better than the bright chrome. Another idea I had with the handles is using plasti dip. Everyone rags on it, but I used it on my chrome mirror caps and it looks like a factory finish! The stuff is so easy to use and if it comes out looking bad, just peel it off.
04-25-2012, 03:19 PM
#26
Senior Member
Join Date: 03-09-2012
Location: Atlanta
Posts: 1,430
Plasti dip is amazing! It was great for the mirror caps, but I'm not sure how it would work over time with the door handles. The nice thing about it is if it starts to come off, just reapply with a new coat. I've got just a little left so I may have to experiment with it. For now the brushed look on the handles and beauty bar are working for me since my wheels have a polished lip on them.
04-25-2012, 11:00 PM
#27
Platinum Member

Join Date: 01-09-2007
Location: SE USA
Posts: 15,856
Thanks sleeper, that's pretty awesome to hear! Yep, the "cupped" cuts make it so easy to tell pieces are missing. Just didn't look good to me at all...and being slightly OCD, there is no way I could leave them be.
I noticed when I was sanding down my satin mirror caps that it made them look like brushed aluminum. Thought that was a pretty cool option...but it still wouldn't match with rest. Now the plasti-dip option might be a good one for now until I decide on something else. I'll have to look into that stuff a little more. Thanks!
I noticed when I was sanding down my satin mirror caps that it made them look like brushed aluminum. Thought that was a pretty cool option...but it still wouldn't match with rest. Now the plasti-dip option might be a good one for now until I decide on something else. I'll have to look into that stuff a little more. Thanks!
For getting a nice 'brushed aluminum' look, I use a scotch pad.. Just right, & if you sand in same direction, the look is awesome..
04-27-2012, 07:12 AM
#28
Senior Member
Join Date: 03-09-2012
Location: Atlanta
Posts: 1,430
I didn't think of using a scotch pad! The key like you said is sanding in the same direction.
 05-16-2012, 11:24 AM
#30
Senior Member
Thread Starter
Join Date: 03-20-2012
Location: Dallas, TX
Posts: 292
Finally!
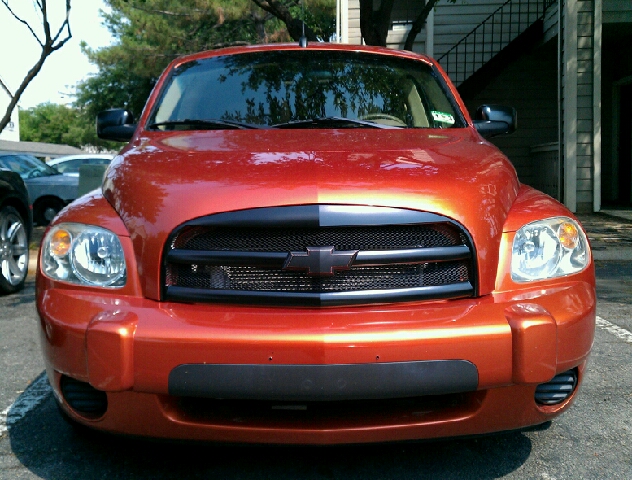
Finally got my grill done. Decided to wait out the full cure time indicated by the manufacturer...back of the rattle can states 5-7 days for optimal durability and adhesion. Waited that out and was rewarded with a week of rain off and on...lol! So now...some pics.
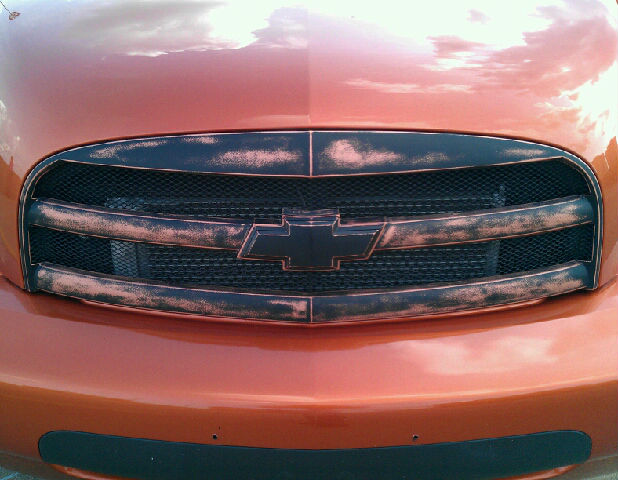
My "vintage" style grill...and yes, this IS how I wanted it to turn out...haha!
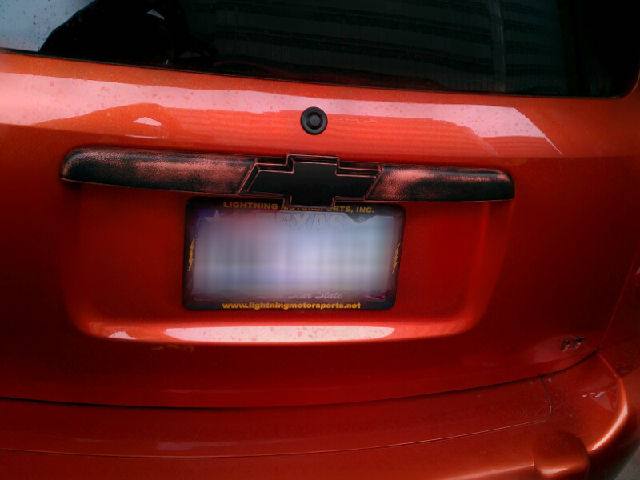
The rear, with the matching beauty bar and rear wiper delete.
Now just gotta add the lower mesh, change the headlights, and alter the door handles to bring it together.
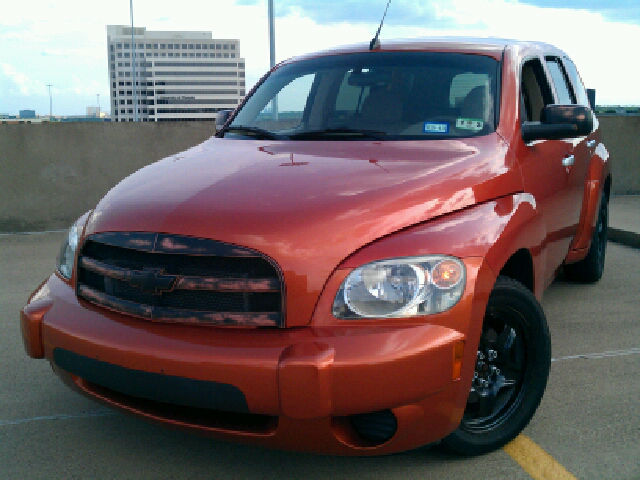
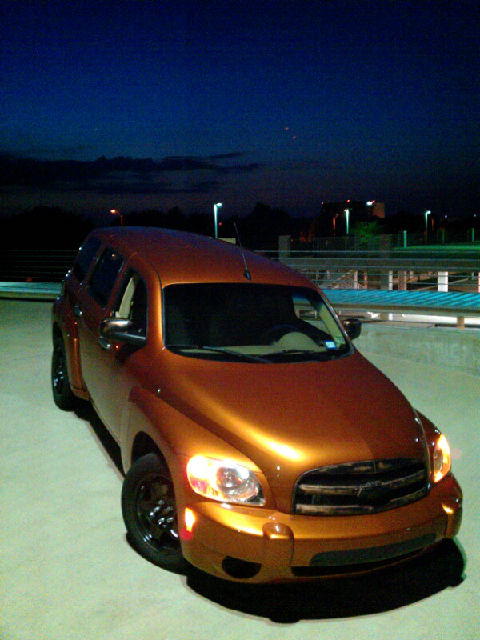
And one more...just because I am a photo whore. It's amazing how different the color is at night.
My "vintage" style grill...and yes, this IS how I wanted it to turn out...haha!
The rear, with the matching beauty bar and rear wiper delete.
Now just gotta add the lower mesh, change the headlights, and alter the door handles to bring it together.
And one more...just because I am a photo whore. It's amazing how different the color is at night.