Official TSB and Recall Thread
 04-23-2009, 11:29 AM
#61
Founding Member
Thread Starter

Join Date: 11-23-2007
Location: Texas
Posts: 8,210
Pip4631
#PIP4631: P0172 Setting After Engine Replacement - (Apr 21, 2009)
Subject: P0172 Setting After Engine Replacement
Models: 2007-2009 Chevrolet HHR
2007-2009 Chevrolet Malibu
2007-2009 Pontiac G6
2007-2009 Pontiac Solstice
2007-2009 Saturn Aura
2007-2009 Saturn Sky
2007-2009 Saturn Vue
With 2.4L RPO LE5
--------------------------------------------------------------------------------
The following diagnosis might be helpful if the vehicle exhibits the symptom(s) described in this PI.
Condition/Concern:
A technician may find DTC P0172 setting after engine replacement. Additionally since Saturn warranty history is not listed in VIS, some retailers may not be aware the engine was replaced.
Recommendation/Instructions:
Some service replacement engines such as the 2.4L RPO (LE5) available in 2007-2009 MY vehicles come equipped with fuel injectors and rail attached that may NOT be applicable for the vehicle. Service engines have injectors installed for a SPECIFIC calibration which may NOT be applicable for every vehicle combination. This is specifically called out on the engine tag from SPO; however the technician may have not seen the instructions. When the injectors are not swapped as described, dtc P0172 may set. To remedy this concern swap the original injectors (or equivalent) onto the replacement engine. Please refer to the engine tag for directions when replacing an engine.
An example of the LE5 tag information is printed below.
PART NO. 19181849
TITLE: Engine Installation for LE5 without SAI
This service engine is based on the 2009 LE9 with out SAI Engine for Chevrolet HHR vehicle (with automatic transmission).
For use in other LE5 and LAT applications, the following components must be transferred from the existing engine:
• Dipstick tube and dipstick for Saturn Sky, Pontiac Solstice, and Hybrid Saturn Aura, Vue, Chevrolet Malibu vehicles
• Fuel rail assembly and fuel injectors for all 2007 - 2009 vehicles and all rear wheel drive applications
• Flywheel for all manual transmission applications
• Crankshaft balancer for all rear wheel drive and LAT BAS hybrid applications
• Front engine lift bracket for all applications, except Chevrolet HHR vehicles
• Vehicles with hydraulic power steering pump, transfer the belt tensioner and balancer/dampner.
Reference parts catalog if new replacement parts are required.
Last edited by ChevyMgr; 06-03-2009 at 09:42 AM.
 04-27-2009, 09:20 AM
#62
Founding Member
Thread Starter
Join Date: 11-23-2007
Location: Texas
Posts: 8,210
Pip4632
#PIP4632: Engine Noise With Low Oil Pressure - keywords adjuster bearing cam camshaft cap change damage filter hot idle indicator lamp lash lifter light LOF mechanical no P0011 P0014 P0016 P0017 rattle tick - (Apr 23, 2009)
Subject: Engine Noise with Low Oil Pressure
Models: 2009 Chevrolet HHR
2009 Chevrolet Malibu
2009 Pontiac G6
2009 Pontiac Solstice
2009 Saturn Sky
2009 Saturn Aura
2009 Saturn Vue
With 2.4L RPO LE5
2009 Chevrolet HHR
With 2.4L RPO LE9
--------------------------------------------------------------------------------
The following diagnosis might be helpful if the vehicle exhibits the symptom(s) described in this PI.
Condition/Concern:
On rare occasions, a technician may comment of engine noise (such as lifter noise, rattle etc.) or cam phaser/solenoid DTC accompanied by low oil pressure.
Recommendation/Instructions:
Engineering has determined that a machining concern with the oil pan pick up tube sealing surface may cause a low oil pressure condition. If upon checking the oil pressure (per eSI Oil Pressure Diagnosis and Testing) and the minimum spec of 50-80 psi @ 1000 rpm is not achieved (provided all mechanical causes have been eliminated) the oil pan may need to be replaced. Suspect engines were installed in vehicles within the following build dates (11/1/2008 to 12/31/2008).
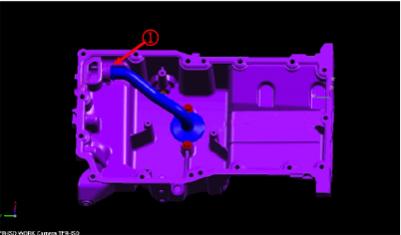
(1) Suspect Area
Note: It may not be possible to identify the concern visually (the ID of the oil pan pick up tube sealing surface is too large). However if all mechanical causes have been eliminated and the vehicle was built within the dates above, replace the oil pan.
Subject: Engine Noise with Low Oil Pressure
Models: 2009 Chevrolet HHR
2009 Chevrolet Malibu
2009 Pontiac G6
2009 Pontiac Solstice
2009 Saturn Sky
2009 Saturn Aura
2009 Saturn Vue
With 2.4L RPO LE5
2009 Chevrolet HHR
With 2.4L RPO LE9
--------------------------------------------------------------------------------
The following diagnosis might be helpful if the vehicle exhibits the symptom(s) described in this PI.
Condition/Concern:
On rare occasions, a technician may comment of engine noise (such as lifter noise, rattle etc.) or cam phaser/solenoid DTC accompanied by low oil pressure.
Recommendation/Instructions:
Engineering has determined that a machining concern with the oil pan pick up tube sealing surface may cause a low oil pressure condition. If upon checking the oil pressure (per eSI Oil Pressure Diagnosis and Testing) and the minimum spec of 50-80 psi @ 1000 rpm is not achieved (provided all mechanical causes have been eliminated) the oil pan may need to be replaced. Suspect engines were installed in vehicles within the following build dates (11/1/2008 to 12/31/2008).
(1) Suspect Area
Note: It may not be possible to identify the concern visually (the ID of the oil pan pick up tube sealing surface is too large). However if all mechanical causes have been eliminated and the vehicle was built within the dates above, replace the oil pan.
Last edited by ChevyMgr; 06-03-2009 at 09:42 AM.
05-04-2009, 11:14 AM
#63
Founding Member
Thread Starter
Join Date: 11-23-2007
Location: Texas
Posts: 8,210
Pit4693b
#PIT4693B: Power Window Inoperative After Start Up - (Sep 13, 2010)
Subject: Power Window Inoperative After Start Up
Models: 2008-2011 Chevrolet HHR
2007-2011 Chevrolet Silverado without DL3 and/or AN3
2009-2011 Chevrolet Traverse without AXC or AXE
2007-2011 GMC Acadia without AXC or AXE
2007-2011 GMC Sierra without DL3 and/or AN3
2007-2010 Saturn Outlook without AXC or AXE
--------------------------------------------------------------------------------
The following diagnosis might be helpful if the vehicle exhibits the symptom(s) described in this PI.
Condition/Concern:
Some owners may comment if they push down on the driver's power window switch, shortly before cranking the engine, the drivers power window may be inoperative for a short time after the engine starts. The driver�s power window switch has [Prime ]stuck switch software[Prime ] built into the switch, which disables the switch in the event of a switch sticking in a position other than neutral. If the power window switch is pressed shortly before cranking the engine, the software may recognize it as a stuck switch and disable the switch. The power window switch will reset itself automatically once the switch is in the neutral position (released) for 2 seconds. Notice: If the switch is released and reapplied before the 2 seconds has elapsed, it will remain inoperative until the switch is released for a full 2 seconds.
Recommendation/Instructions:
This is a normal characteristic and no repairs should be made.
Last edited by ChevyMgr; 09-14-2010 at 08:27 AM.
05-06-2009, 10:39 AM
#64
Founding Member
Thread Starter
Join Date: 11-23-2007
Location: Texas
Posts: 8,210
Pit4864
#PIT4864: Adding Bluetooth Option RPO UPF - keywords accessories accessory add battery blue blue-tooth body cal calibration factory gen7 gen8 generation heat nav navigation non nonapproved oem onstar options - (May 5, 2009)
Subject: Adding Bluetooth Option RPO UPF
Models: 2007-2010 All Passenger Car and Trucks
--------------------------------------------------------------------------------
The following diagnosis might be helpful if the vehicle exhibits the symptom(s) described in this PI.
Condition/Concern:
Technical assistance has received several calls from dealers requesting assistance to upfit their vehicle to include the Bluetooth feature RPO UPF.
Recommendation/Instructions:
There are no provisions to up-fit vehicles with this option. This feature is ONLY available on vehicles built with option UPF or offered within an equipment option group (i.e LTZ or SLE type package). Please do not call Technical Assistance, PARTECH or Techline Customer Support Centers with questions on how to add this feature.
Last edited by ChevyMgr; 06-03-2009 at 09:42 AM.
05-07-2009, 08:59 AM
#65
Founding Member
Thread Starter
Join Date: 11-23-2007
Location: Texas
Posts: 8,210
Pip4638
#PIP4638: Dificult To Shift Or Unable To Select All Gears - keywords shifter - (May 6, 2009)
Subject: Difficult To Shift Or Unable To Select All Gears
Models: 2008-2010 Chevrolet Cobalt SS, HHR SS
Equipped With RPO MU3 Manual Transmission
--------------------------------------------------------------------------------
The following diagnosis might be helpful if the vehicle exhibits the symptom(s) described in this PI.
Condition/Concern:
Customers may comment that the transmission is difficult to shift and or it cannot be shifted into all gears. This condition may be caused by a locator pin left in place (see photo below) that was meant to be removed at the assembly plant or a shift cable out of position.
Recommendation/Instructions:
Inspect the transmission and shift linkage if the locator pin is still in place remove the pin and discard, retest transmission operation. If the pin is not found in position inspect the shift cables for being properly seated in the cable bracket, if the cables are out of the bracket reseat the cable or cables and test operation. If neither of the above conditions are found follow SI to properly diagnose the transmission shifting concern. Also reference the latest version of PIC4992 to aid in hard to shift concerns.
Last edited by ChevyMgr; 06-03-2009 at 09:44 AM.
05-11-2009, 09:38 AM
#66
Founding Member
Thread Starter
Join Date: 11-23-2007
Location: Texas
Posts: 8,210
Pip3404d
#PIP3404D: Machining Debris On The Oil Filter Element - Replace Engine Oil And Filter - keywords aluminum change chips contamination metal shaving - (May 7, 2009)
Subject: Machining Debris on the Oil Filter Element - Replace Engine Oil and Filter
Models: 2005 Chevrolet Cavalier
2005-2009 Chevrolet Cobalt, Cobalt SS
2006-2009 Chevrolet HHR
2005-2009 Chevrolet Malibu
2005 Chevrolet Malibu Classic
2007-2009 Pontiac G5
2006-2009 Pontiac G6
2005 Pontiac Grand Am, Sunfire
2005-2006 Pontiac Pursuit (Canada Only)
2006-2009 Pontiac Solstice
2007-2009 Pontiac Solstice GXP
2007-2009 Saturn Aura, Aura Hybrid
2005-2007 Saturn Ion
2005-2007 Saturn Ion Redline
2005 Saturn L Series
2007-2009 Saturn Sky, Sky Redline
2005-2009 Saturn Vue
2007-2009 Saturn Vue Hybrid
With any of the following engines:
2.0L Engine (LSJ)
2.0L Engine (LNF)
2.2L Engine (L61)
2.2L Engine (LAP)
2.2L Engine (LE8)
2.4L Engine (LE5)
2.4L Engine (LAT)
2.4L Engine (LE9)
--------------------------------------------------------------------------------
The following diagnosis might be helpful if the vehicle exhibits the symptom(s) described in this PI.
Condition/Concern:
On rare occasions, machining debris (aluminum) may be found on the oil filter element during the vehicle's first oil change. This debris consists of small boring chips and milling burrs from the oil passage that is between the oil pump and oil filter.
Recommendation/Instructions:
If this condition is encountered, replace the engine oil and filter. No additional repairs should be attempted since this debris does not affect the reliability or durability of the engine.
Last edited by ChevyMgr; 06-03-2009 at 09:44 AM.
05-14-2009, 08:56 AM
#67
Founding Member
Thread Starter
Join Date: 11-23-2007
Location: Texas
Posts: 8,210
pic5149
#PIC5149: Check Engine Light With P258B DTC - (May 13, 2009)
Subject: "Check Engine" light with P258B DTC
Models: 2008 - 2009 Chevrolet HHR-SS
--------------------------------------------------------------------------------
The following diagnosis might be helpful if the vehicle exhibits the symptom(s) described in this PI.
Condition/Concern:
Some dealers have reported that after installation of the OHB Brake kit per TSB 09-05-22-001A, a CHECK ENGINE light will be on and DTC P258B will be set. Following eSI diagnostics may lead dealers to try reprogramming the ECM or EBCM and also replace the Vacuum pump.
Recommendation/Instructions:
Dealers should check the vacuum line from the vacuum pump to the inline "T" on the main vacuum line to the booster. There is a check valve built into this line near the pump. If the technician can blow through the line in both directions, replace this section of vacuum line. If airflow is blocked in one direction then continue with diagnosis. If the hose is replaced, prior to installation, confirm that airflow is blocked in one direction on the new hose.
Last edited by ChevyMgr; 06-03-2009 at 09:49 AM.
05-14-2009, 09:06 AM
#68
Founding Member
Thread Starter
Join Date: 11-23-2007
Location: Texas
Posts: 8,210
Pip4469E
#PIP4469E: DTC P0011 P0014 P0016 P0017 Setting Or Hesitation / Stall Engine RPO LAF LAP LAT LNF LE5 LE8 LE9 - (Jul 31, 2009)
Subject: DTC P0011, P0014, P0016, P0017 Setting or Hesitation/Stall Engine RPO LAF LAP LAT LNF LE5 LE8 LE9
Models: 2009 Chevrolet Cobalt
With RPO LAP 2.2L, LNF 2.0L
AND
2009 Chevrolet HHR
With RPO LNF 2.0L, LE8 2.2L, LE9 2.4L
AND
2009 Pontiac G5
With RPO LAP 2.2L
AND
2009 Chevrolet Malibu
2009 Pontiac G6
2009 Pontiac Solstice
2009 Saturn Sky
2009 Saturn Aura
2009 Saturn Vue
With RPO LE5 2.4L
AND
2009 Saturn AURA Hybrid
2009 Saturn VUE Hybrid
2009-2010 Chevrolet Malibu Hybrid
With RPO LAT 2.4L
AND
2010 Chevrolet Equinox
2010 GMC Terrain
With RPO LAF 2.4L SIDI
--------------------------------------------------------------------------------
This PI was superseded to add the 2009 2.4L LAT and the 2010 2.4L LAF/LAP also to add DTCs P0016/P0017 and hesitation/stall as keywords. Please discard PIP4469D.
--------------------------------------------------------------------------------
The following diagnosis might be helpful if the vehicle exhibits the symptom(s) described in this PI.
Condition/Concern:
In rare instances a technician may comment that they find DTC's for cam phaser operation and or have noticed a hesitation/stumble typically on a PDI or with very low mileage. They may have followed eSI diagnostics and the dtc/condition has returned. They may have replaced the ECM with no change and/or they may find one or more of the DTCs listed below.
P0011-Intake Camshaft Position (CMP) System Performance
P0014-Exhaust Camshaft Position (CMP) System Performance
P0016-Crankshaft Position - Intake Camshaft Position Not Plausible
P0017-Crankshaft Position - Exhaust Camshaft Position Not Plausible
Recommendation/Instructions:
Engineering has determined that casting sand and or non-ferrous (aluminum) machining debris in the camshaft phasers/solenoid valves can cause a hesitation/stumble and or these DTCs to set intermittently. This condition/DTCs typically will set very early in the vehicle's life or at PDI. When the technician follows the eSI diagnostic chart for these codes they may be led to ECM replacement; however additional diagnostics should be made before replacement of any parts. After inspection of the solenoid valve and wiring per eSI confirms correct electrical operation, check for debris. The technician should inspect each CMP actuator solenoid valve assembly for torn screens or debris on the screens, then clean and replace as necessary. If the dtc continues to reset after thorough inspection and cleaning of the solenoid valves, replace the affected camshaft actuator(s) depending upon the dtc(s) that set.
Note: When debris is found change the oil and filter before returning to service, in some instances it may be necessary to change the oil/filter multiple times. The filter can be inspected afterwards to ensure no additional debris is present.
Last edited by ChevyMgr; 08-03-2009 at 11:37 AM.
05-14-2009, 04:18 PM
#69
Founding Member
Thread Starter
Join Date: 11-23-2007
Location: Texas
Posts: 8,210
09-03-16-002
Service Information 2008 Chevrolet HHR | HHR (VIN A) Service Manual | Document ID: 2272292
--------------------------------------------------------------------------------
#09-03-16-002: Dealership Service Consultant Procedure as Vehicle Comes Into Service Drive for Tire Pressure Monitor (TPM) System Message, Light and Customer Information - (May 4, 2009)
Subject: Dealership Service Consultant Procedure as Vehicle Comes into Service Drive for Tire Pressure Monitor (TPM) System Message, Light and Customer Information
Models: 2006-2010 Cars and Light Duty Trucks (Including Saturn and Saab)
Attention: The information found in this bulletin is to be used as a dealership service consultant procedure for customers coming into the service lane with an illuminated "low tire light" or comments on a check tire pressure/low tire pressure/add air to tire or service tire monitor system message. Maintaining proper tire pressures is an Owner�s Maintenance item and is not covered under warranty.
--------------------------------------------------------------------------------
Customer Concerns and Confusion with the Tire Pressure Monitoring (TPM) System
The following procedure should be used by dealership service consultants when a customer comes into the service drive with a "low tire light" on or comments on a check tire pressure/low tire pressure/add air to tire or service tire monitor system message. The service consultant should perform the following steps:
Procedure
Turn the key to ON, without starting the engine.
� If the low tire light comes on and stays on solid with a check tire pressure/low tire pressure/add air to tire message (on vehicles equipped with DIC), advise the customer:
- The system is working properly.
- Properly adjusting all tire air pressures to the recommended levels and driving the vehicle will turn the light off (refer to the Tire and Loading Information label on the driver side door).
- More detailed information can be found in the Owner Manual.
- Service is not covered under warranty - this maintenance is the responsibility of the owner.
- Give the customer a copy of the attached "GM Customer TPMS Information".
� If the Tire Pressure Monitor (TPM) light blinks for one minute then stays on solid with a service tire monitor system message (on vehicles equipped with DIC):
- A TPM system problem exists. The vehicle should be written up accordingly and sent to your service department for further DTC diagnosis and service.
- If dashes (--) are displayed in only one or two of the tire pressure readouts, it is likely caused by a previous TPM system relearn that was performed incorrectly due to interference from another vehicle�s TPM system during the relearn process (refer to the Important statement later in this bulletin regarding TPM relearn with a Tech 2�).
- If dashes (--) are displayed in all four of the tire pressure readouts, there is a system problem. Follow the appropriate SI service procedures.
� If a customer indicates the low tire light comes on for a few minutes when the vehicle is started, then goes off after driving a while, advise the customer:
- The system is working properly.
- Most likely, air pressure in one or more of the tires is low enough to turn the light on when tires are cold. After driving for a while, tires will heat up, allowing tire air pressure to increase above the threshold causing the light to go off. Properly adjusting all tire air pressures to the recommended levels will correct this (Refer to the Tire and Loading Information Label on the driver side door).
- More detailed information can be found in the Owner Manual.
- Service is not covered under warranty - this maintenance is the responsibility of the owner.
- Give the customer a copy of the attached "GM Customer TPMS Information".
For more detailed information, refer to Corporate Bulletin Number 07-03-16-004 and TPMS Training Course 13044.12T2.
Tire Pressure Light
At key on, without starting the vehicle:
Steady Solid Glowing TPM Indicator
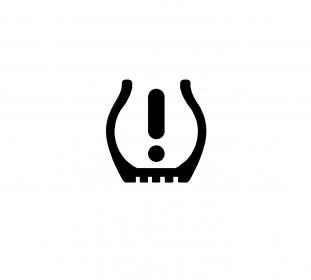
If the TPM indicator appears as a steady glowing yellow lamp (as above), the system is functioning properly and you should add air to the tires to correct this condition.
Blinking TPM Indicator
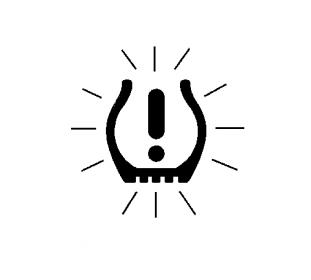
If the TPM indicator appears as a BLINKING yellow lamp for one minute and then stays on solid, diagnostic service is needed.
The Effect of Outside Temperature on Tire Pressures
Important: As a rule of thumb, tire pressure will change about 7 kPa (1 psi) for every 6�C (10�F) decrease in temperature - Tire pressure will drop when it gets colder outside, and rise when it gets warmer.
Under certain situations such as extreme outside temperature changes, the system may bring on a solid light with a check tire pressure message. This should be considered normal and the system is working properly. The light will turn off upon adding the proper amount of air to the tires (refer to the Tire & Loading Information label in the driver�s door opening). When properly adjusting tire air pressure, the following steps are important to help optimize the system and prolong bringing a tire pressure light on:
� Use an accurate, high quality tire pressure gauge.
� Never set the tire pressure below the specified placard value regardless of tire temperature or ambient temperature.
� Tire pressure should be set to the specified placard pressure at the lowest seasonal temperature the vehicle will encounter during operation.
� When adding proper tire air pressure, it is important to remember fluctuations in outside air temperatures and tire temperatures effect tire air pressures.
� After you have added the proper tire pressure, if the vehicle has a DIC (after the system has updated), check to see if DIC displays are the same readings as the tire pressure gauge used (adjust as necessary).
� Only perform a TPM sensor re-learn after a tire rotation or system part replacements and use the Tech 2� to initiate the relearn whenever possible to avoid invalid sensor I.D. learns.
Important: Always take outside temperature and tire temperature into consideration to properly set tire pressures. For example, on colder days (20�F/-7�C), if setting the tire pressure when the vehicle has been indoors (60�F/16�C) or the tires are warm from being driven, it will be necessary to compensate for the low outside temperature by adding 21-27 kPa (3-4 psi) more than the placard pressure. At some later time, when the vehicle has been parked outside for a while, the tires will cool off and the pressures will drop back into the placard range.
Important: Recently, nitrogen gas (for use in inflating tires) has become available to the general consumer through some retailers. The use of nitrogen gas to inflate tires is a technology used in automobile racing. Tires inflated with nitrogen gas may exhibit less of a pressure change in response to outside temperature changes. Nitrogen gas inflation is compatible with GM TPM sensors. For additional information, refer to Corporate Service Bulletin 05-03-10-020B.
Important: All Models (except the Pontiac Vibe): Each tire monitor sensor is learned to a specific vehicle corner. When performing a TPM relearn (only after a tire rotation or replacement of a TPM sensor or module), always use the Tech 2� to initiate the J 46079 relearn process. Tech 2�-initiated relearns lock out other vehicle TPM signals that may be broadcasting in the area. Only signals initiated by the J 46079 tool will be accepted. This method avoids storing false TPM I.D.s and will prevent customers from returning with dashes (--) displayed in tire pressure readouts and/or a flashing tire pressure monitor (TPM) light. Checking the four TPM I.D.s with the Tech 2� prior to and following relearn to verify they are the same can prevent invalid I.D. learns.
Customer TPMS Information
Dear GM Customer:
Customer care is at the top of our priority list at GM. We value our customers and want to make certain of a great ownership experience. To assist you in better understanding your vehicle, please make note of the following information relative to tire air pressure and the vehicle system that monitors air pressure performance.
Tire air pressure is a maintenance item in which the owner is responsible. Your vehicle is equipped with a Tire Pressure Monitoring System (TPMS) designed to provide you with adequate information to maintain proper tire air pressure. Proper tire air pressure is important to optimize safety, fuel economy, vehicle performance, and tire wear.
Changes in weather, including warm or cold outdoor temperatures, can cause air in your tires to expand or contract. Should this occur, your vehicle�s TPMS may give you a low tire signal/alert along with the following message: Check Tire Pressure/Low Tire Pressure/Add Air To Tire.
Your GM Dealer has determined that the TPMS on your vehicle is working properly. The light will turn off upon adding the proper amount of air to the tires (per the Tire & Loading Information label in the driver�s door opening) followed by driving the vehicle a short distance. The low tire light is similar to the low fuel indicator and adding fuel or air to the vehicle will turn off the light.
For more information, refer to the Owner Manual or go to www.CheckMyTires.org.
--------------------------------------------------------------------------------
#09-03-16-002: Dealership Service Consultant Procedure as Vehicle Comes Into Service Drive for Tire Pressure Monitor (TPM) System Message, Light and Customer Information - (May 4, 2009)
Subject: Dealership Service Consultant Procedure as Vehicle Comes into Service Drive for Tire Pressure Monitor (TPM) System Message, Light and Customer Information
Models: 2006-2010 Cars and Light Duty Trucks (Including Saturn and Saab)
Attention: The information found in this bulletin is to be used as a dealership service consultant procedure for customers coming into the service lane with an illuminated "low tire light" or comments on a check tire pressure/low tire pressure/add air to tire or service tire monitor system message. Maintaining proper tire pressures is an Owner�s Maintenance item and is not covered under warranty.
--------------------------------------------------------------------------------
Customer Concerns and Confusion with the Tire Pressure Monitoring (TPM) System
The following procedure should be used by dealership service consultants when a customer comes into the service drive with a "low tire light" on or comments on a check tire pressure/low tire pressure/add air to tire or service tire monitor system message. The service consultant should perform the following steps:
Procedure
Turn the key to ON, without starting the engine.
� If the low tire light comes on and stays on solid with a check tire pressure/low tire pressure/add air to tire message (on vehicles equipped with DIC), advise the customer:
- The system is working properly.
- Properly adjusting all tire air pressures to the recommended levels and driving the vehicle will turn the light off (refer to the Tire and Loading Information label on the driver side door).
- More detailed information can be found in the Owner Manual.
- Service is not covered under warranty - this maintenance is the responsibility of the owner.
- Give the customer a copy of the attached "GM Customer TPMS Information".
� If the Tire Pressure Monitor (TPM) light blinks for one minute then stays on solid with a service tire monitor system message (on vehicles equipped with DIC):
- A TPM system problem exists. The vehicle should be written up accordingly and sent to your service department for further DTC diagnosis and service.
- If dashes (--) are displayed in only one or two of the tire pressure readouts, it is likely caused by a previous TPM system relearn that was performed incorrectly due to interference from another vehicle�s TPM system during the relearn process (refer to the Important statement later in this bulletin regarding TPM relearn with a Tech 2�).
- If dashes (--) are displayed in all four of the tire pressure readouts, there is a system problem. Follow the appropriate SI service procedures.
� If a customer indicates the low tire light comes on for a few minutes when the vehicle is started, then goes off after driving a while, advise the customer:
- The system is working properly.
- Most likely, air pressure in one or more of the tires is low enough to turn the light on when tires are cold. After driving for a while, tires will heat up, allowing tire air pressure to increase above the threshold causing the light to go off. Properly adjusting all tire air pressures to the recommended levels will correct this (Refer to the Tire and Loading Information Label on the driver side door).
- More detailed information can be found in the Owner Manual.
- Service is not covered under warranty - this maintenance is the responsibility of the owner.
- Give the customer a copy of the attached "GM Customer TPMS Information".
For more detailed information, refer to Corporate Bulletin Number 07-03-16-004 and TPMS Training Course 13044.12T2.
Tire Pressure Light
At key on, without starting the vehicle:
Steady Solid Glowing TPM Indicator
If the TPM indicator appears as a steady glowing yellow lamp (as above), the system is functioning properly and you should add air to the tires to correct this condition.
Blinking TPM Indicator
If the TPM indicator appears as a BLINKING yellow lamp for one minute and then stays on solid, diagnostic service is needed.
The Effect of Outside Temperature on Tire Pressures
Important: As a rule of thumb, tire pressure will change about 7 kPa (1 psi) for every 6�C (10�F) decrease in temperature - Tire pressure will drop when it gets colder outside, and rise when it gets warmer.
Under certain situations such as extreme outside temperature changes, the system may bring on a solid light with a check tire pressure message. This should be considered normal and the system is working properly. The light will turn off upon adding the proper amount of air to the tires (refer to the Tire & Loading Information label in the driver�s door opening). When properly adjusting tire air pressure, the following steps are important to help optimize the system and prolong bringing a tire pressure light on:
� Use an accurate, high quality tire pressure gauge.
� Never set the tire pressure below the specified placard value regardless of tire temperature or ambient temperature.
� Tire pressure should be set to the specified placard pressure at the lowest seasonal temperature the vehicle will encounter during operation.
� When adding proper tire air pressure, it is important to remember fluctuations in outside air temperatures and tire temperatures effect tire air pressures.
� After you have added the proper tire pressure, if the vehicle has a DIC (after the system has updated), check to see if DIC displays are the same readings as the tire pressure gauge used (adjust as necessary).
� Only perform a TPM sensor re-learn after a tire rotation or system part replacements and use the Tech 2� to initiate the relearn whenever possible to avoid invalid sensor I.D. learns.
Important: Always take outside temperature and tire temperature into consideration to properly set tire pressures. For example, on colder days (20�F/-7�C), if setting the tire pressure when the vehicle has been indoors (60�F/16�C) or the tires are warm from being driven, it will be necessary to compensate for the low outside temperature by adding 21-27 kPa (3-4 psi) more than the placard pressure. At some later time, when the vehicle has been parked outside for a while, the tires will cool off and the pressures will drop back into the placard range.
Important: Recently, nitrogen gas (for use in inflating tires) has become available to the general consumer through some retailers. The use of nitrogen gas to inflate tires is a technology used in automobile racing. Tires inflated with nitrogen gas may exhibit less of a pressure change in response to outside temperature changes. Nitrogen gas inflation is compatible with GM TPM sensors. For additional information, refer to Corporate Service Bulletin 05-03-10-020B.
Important: All Models (except the Pontiac Vibe): Each tire monitor sensor is learned to a specific vehicle corner. When performing a TPM relearn (only after a tire rotation or replacement of a TPM sensor or module), always use the Tech 2� to initiate the J 46079 relearn process. Tech 2�-initiated relearns lock out other vehicle TPM signals that may be broadcasting in the area. Only signals initiated by the J 46079 tool will be accepted. This method avoids storing false TPM I.D.s and will prevent customers from returning with dashes (--) displayed in tire pressure readouts and/or a flashing tire pressure monitor (TPM) light. Checking the four TPM I.D.s with the Tech 2� prior to and following relearn to verify they are the same can prevent invalid I.D. learns.
Customer TPMS Information
Dear GM Customer:
Customer care is at the top of our priority list at GM. We value our customers and want to make certain of a great ownership experience. To assist you in better understanding your vehicle, please make note of the following information relative to tire air pressure and the vehicle system that monitors air pressure performance.
Tire air pressure is a maintenance item in which the owner is responsible. Your vehicle is equipped with a Tire Pressure Monitoring System (TPMS) designed to provide you with adequate information to maintain proper tire air pressure. Proper tire air pressure is important to optimize safety, fuel economy, vehicle performance, and tire wear.
Changes in weather, including warm or cold outdoor temperatures, can cause air in your tires to expand or contract. Should this occur, your vehicle�s TPMS may give you a low tire signal/alert along with the following message: Check Tire Pressure/Low Tire Pressure/Add Air To Tire.
Your GM Dealer has determined that the TPMS on your vehicle is working properly. The light will turn off upon adding the proper amount of air to the tires (per the Tire & Loading Information label in the driver�s door opening) followed by driving the vehicle a short distance. The low tire light is similar to the low fuel indicator and adding fuel or air to the vehicle will turn off the light.
For more information, refer to the Owner Manual or go to www.CheckMyTires.org.
05-15-2009, 10:05 AM
#70
Founding Member
Thread Starter
Join Date: 11-23-2007
Location: Texas
Posts: 8,210
Some advice on presenting a TSB to your dealership:
Most dealer service departments have been numbed to customers presenting TSBs from forums. Most of the TSBs that people bring with them don't even pertain to either their vehicle, their model or their year of vehicle. EVERYONE seems to be on some type of forum and dealers don't really care to hear what the customer has read on the internet.
That being said, if you want to copy and paste a TSB from this thread to show your dealer, I would suggest you just say you found it on the internet. Make sure it is relevant to your vehicle, model and year.
Last edited by ChevyMgr; 06-03-2009 at 09:50 AM.

