Fuel Pump Replacement
 07-13-2011, 12:47 AM
#1
Senior Member
Thread Starter

Join Date: 05-24-2008
Location: Imperial,CA
Posts: 114
Fuel Pump Replacement
Ok. I finally installed the new fuel pump and it wasn't too bad. I live in the desert so the temp in my garage was around 100° and so it slowed me down a little. I did make one mistake and I hope I can fix it. I crossed one two wires that connect to the level senor. I'll explain why if you keep reading. I've never done a how to write up so if this doesn't make to much sense just pm me and I'll try and help.
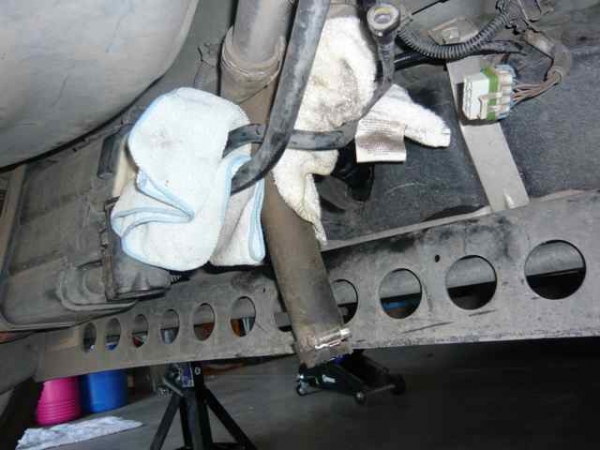
Here I had already lifted the car disconnect the battery. I secured the front tires and started removing the electrical wires, connectors and the main fuel line to the tank. You will get some fuel leaking from the connectors and so that's why had those rags there. I also had a fire extinguisher next to me the whole time....just in case
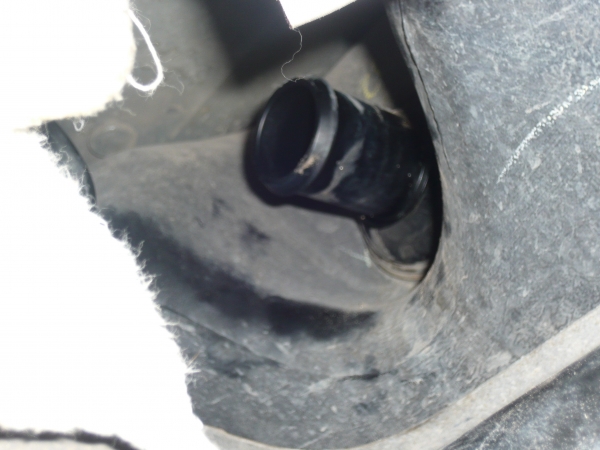
As you can see here this where the fuel enters the tank. Make sure you either place a rag or tape to cover the entry so when you lower the tank NOTHING dirty enters the fuel tank.
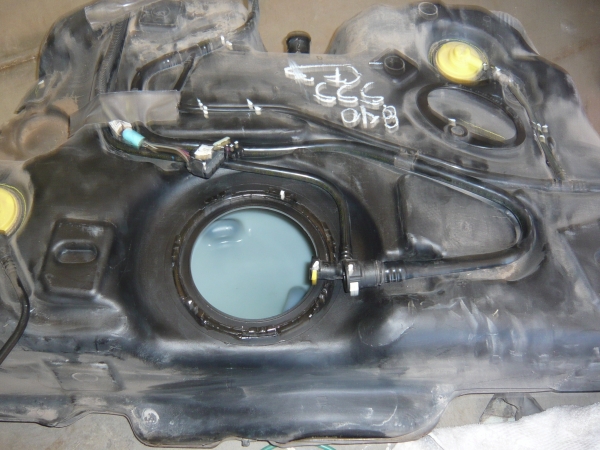
After I removed the fuel pump this is what it looks like. Make sure not to reuse the o-ring and be careful with all those connectors there. I placed a rag over the hole and brushed away any dirt near there so as not to contaminate it once I placed the new fuel pump.
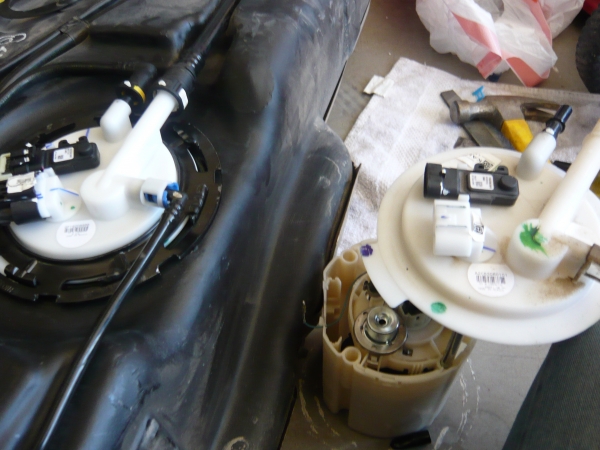
Here you can see the new pump next to the old one. If you can see that wire hanging out there. Well thats where I made my mistake. The old pump had two blue wires connecting to the level senor. A left and right one. The new fuel pump had a brown and purple wire coming out but it was in a way that wasn't positioned left and right but in the middle. If that make sense. I think might of crossed the wires because now I don't get a reading on how much gas I have. Once I'm running lower on gas I'll drop the tank again fix the wires and hopefully that will fix my problem.
(**** edited update from a following posting for clarification on wiring issue: Blue goes on the left and purple goes on the right. - edited by Whopper)

Here it's all connected and ready to slide under the car and lift back up into place. I think whole job took about 4 hours since I kept taking breaks to cool down in the house and hydrate with a couple of New Castle's. :
:
I hope this helps someone. I really didn't want to do this but my mechanic was moving to a new location and couldn't get to it for at least 3 weeks and the dealer was out of my price range right now. Too many miles for the warranty.
Here I had already lifted the car disconnect the battery. I secured the front tires and started removing the electrical wires, connectors and the main fuel line to the tank. You will get some fuel leaking from the connectors and so that's why had those rags there. I also had a fire extinguisher next to me the whole time....just in case
As you can see here this where the fuel enters the tank. Make sure you either place a rag or tape to cover the entry so when you lower the tank NOTHING dirty enters the fuel tank.
After I removed the fuel pump this is what it looks like. Make sure not to reuse the o-ring and be careful with all those connectors there. I placed a rag over the hole and brushed away any dirt near there so as not to contaminate it once I placed the new fuel pump.
Here you can see the new pump next to the old one. If you can see that wire hanging out there. Well thats where I made my mistake. The old pump had two blue wires connecting to the level senor. A left and right one. The new fuel pump had a brown and purple wire coming out but it was in a way that wasn't positioned left and right but in the middle. If that make sense. I think might of crossed the wires because now I don't get a reading on how much gas I have. Once I'm running lower on gas I'll drop the tank again fix the wires and hopefully that will fix my problem.
(**** edited update from a following posting for clarification on wiring issue: Blue goes on the left and purple goes on the right. - edited by Whopper)
Here it's all connected and ready to slide under the car and lift back up into place. I think whole job took about 4 hours since I kept taking breaks to cool down in the house and hydrate with a couple of New Castle's.
:I hope this helps someone. I really didn't want to do this but my mechanic was moving to a new location and couldn't get to it for at least 3 weeks and the dealer was out of my price range right now. Too many miles for the warranty.
Last edited by whopper; 08-04-2014 at 10:01 AM.


 Great writeup, thanks for posting it. Things like this just increase the knowledge database here, that's a good thing, and another valuable research tool for members both old and new.
 07-16-2011, 09:37 PM
#10
Senior Member
Thread Starter
Join Date: 05-24-2008
Location: Imperial,CA
Posts: 114
Well, I finally switched the two wires from fuel level senor and the gauge now works. Thanks Chevy Mgr for your help. Blue goes on the left and purple goes on the right.
@ Jay..thanks for the invite. I did go to one g2g two years ago and had a blast. I missed last years because I was out of town. I plan on attending this year though.
@ Jay..thanks for the invite. I did go to one g2g two years ago and had a blast. I missed last years because I was out of town. I plan on attending this year though.