Remove Chrome Smarter, Not Harder! WARNING: lots of pics!
 02-16-2009, 04:37 PM
#1
Member
Thread Starter

Join Date: 01-11-2009
Location: Calgary, AB
Posts: 77
Remove Chrome Smarter, Not Harder! WARNING: lots of pics!
Ok, as you may already know, I'm doin' up a 3-Bar Grill:
Link to that post (Operation: Grill):
https://www.chevyhhr.net/forums/appearance-modifications-discussions-6/operation-grill-21357/
So anyway, many have asked, "How did you get the chrome off?"
...and many have answered, "Peeled it off, slowly and painfully, it's the ONLY way..."
Well, I'm at the point where I need to remove the chrome, and I was not looking forward to the long hours and blood-shed. Then I thought, "Hey, how did they put this stuff on in the first place? Electro-Plating! ...and doesn't that work in reverse? Hmmmm..."
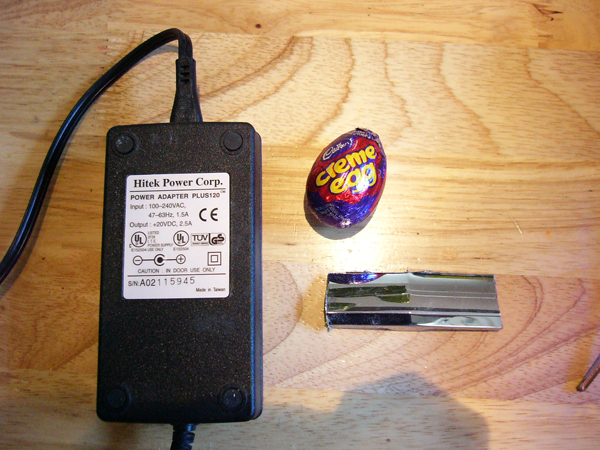
So I proceeded to set up a small scale experiment with a piece of the grill bar I had already cut off:
I started with one of these 20 volt, 2.5 Amp (Zap!) AC to DC adapters. I actually killed 2 of them, each after 10 seconds of reverse plating. Too much of a short circuit for them and they just fry, and it turns out that's way more power than I needed anyway!
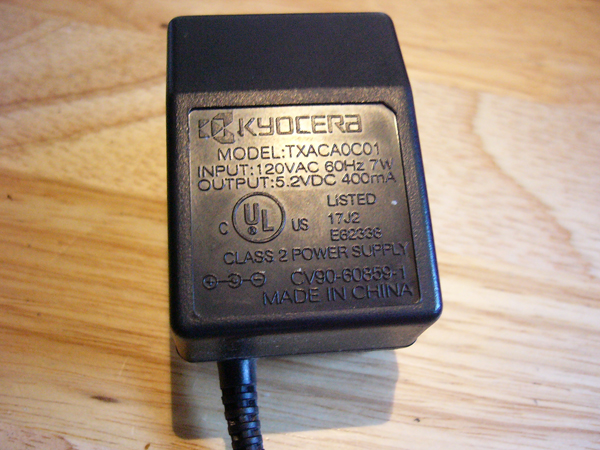
So I backed it off to one of these. It's a 5.2 volt, 400 mA phone charger:
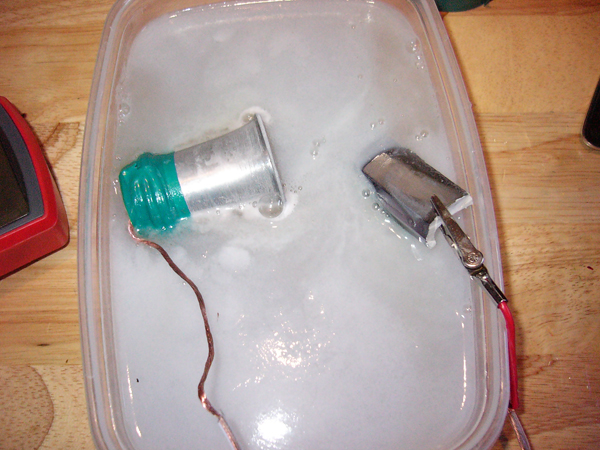
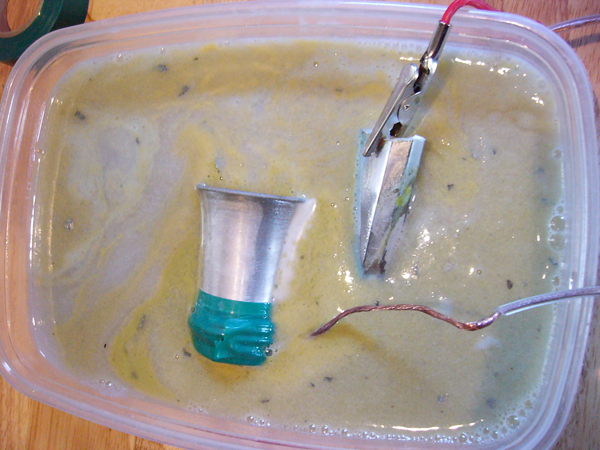
Here's the set up: A tupperware container for eletrolyte: I used 3 table spoons of pickling salt in about a pint of warm water, well disolved. Connect the POSITIVE terminal of the power supply to whatever you want "de-chromed". That is important, I did it backwards at first and was effectively aluminum plating the chrome piece. This becomes the circuit's "anode". Connect the negative terminal to a fairly large (for efficiency's sake) electrode, like my aluminum candle holder thingy here. I just bared a good length of copper wire and wrapped it around the sanded aluminum thing and taped it on there. Only do this with metal objects that you wouldn't mind seeing COMPLETELY DESTROYED!
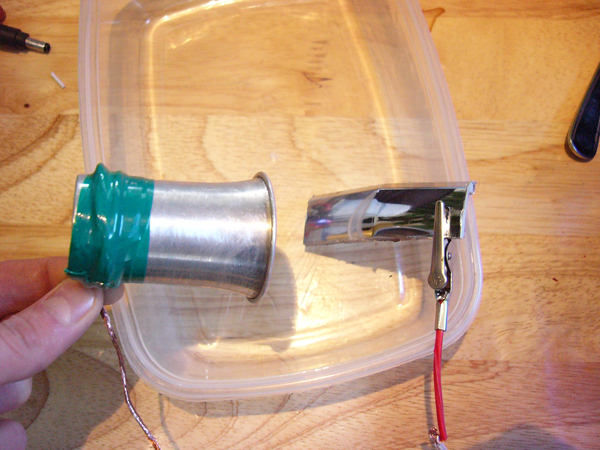
CAUTION: Make sure it's a well ventilated area, although this is creating a relatively small amount of Hydrogen and Oxygen, it does burn and/or explode if concentrated and ignited.
Here are the electrodes submerged with the power hooked up in reverse at first. You can see a lot of bubbles coming off the grill piece. That's pure hydrogen, so be carefull! Pure oxygen is being produced at about half the rate from the aluminum end. This is the result of dividing water molecules into it's elements(H2O makes 2H + O). You want to see the most bubbles coming from the non-grill electrode (negative terminal, cathode) to verify it's hooked up correctly.
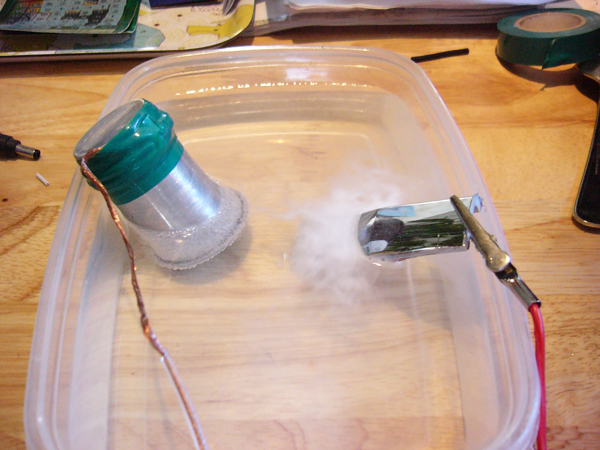
Here it is the right way, after about five minutes of bubbling. You can see more/larger bubbles at the aluminum side now:
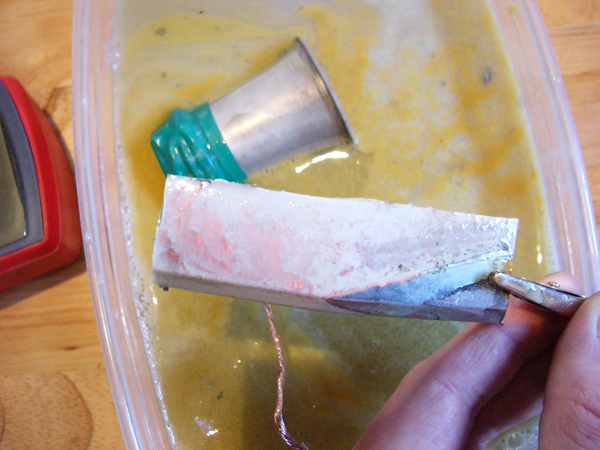
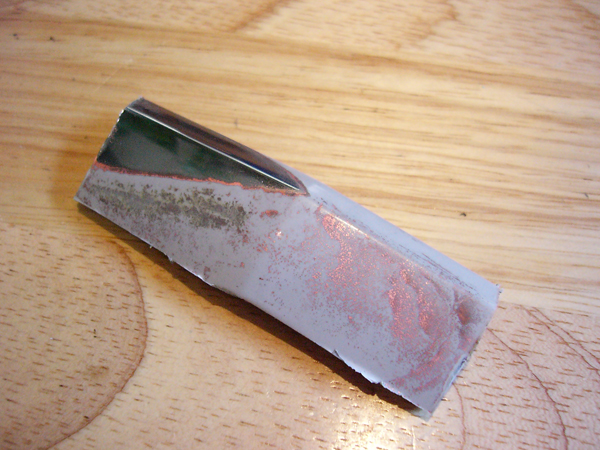
...and here's the result after five minutes of being hooked up correctly with 5 volts, 400 mA. This is so crazy... it just might work!:
The solutions begins to turn green from the thick copper layer underneith the chrome reacting with the salt water:

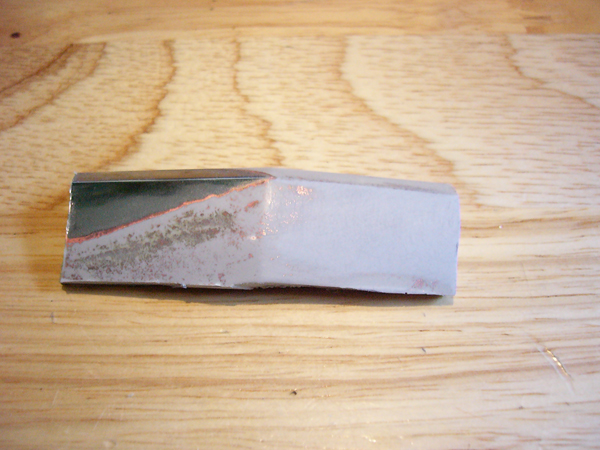
2 shots after 10 minutes:

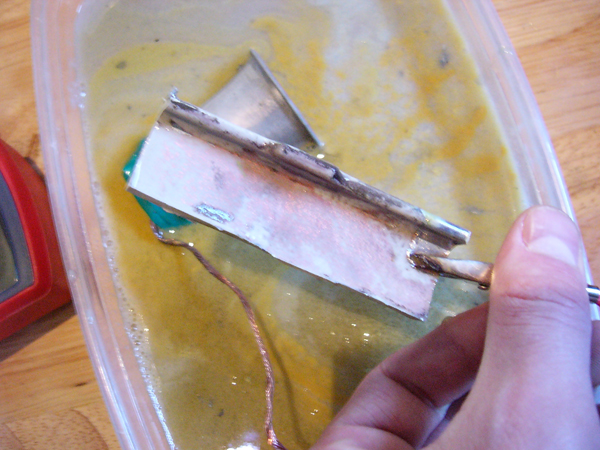
After 15 minutes I noticed that the chrome tends to come off faster on the side closest to the cathode, so I repositioned the electodes for the rest:
And here's all the chrome/copper floaties after 15 minutes:
And after 20 mins:


And finally, looks like in total it takes 25 minutes with this small scale set up:
Link to that post (Operation: Grill):
https://www.chevyhhr.net/forums/appearance-modifications-discussions-6/operation-grill-21357/
So anyway, many have asked, "How did you get the chrome off?"
...and many have answered, "Peeled it off, slowly and painfully, it's the ONLY way..."
Well, I'm at the point where I need to remove the chrome, and I was not looking forward to the long hours and blood-shed. Then I thought, "Hey, how did they put this stuff on in the first place? Electro-Plating! ...and doesn't that work in reverse? Hmmmm..."
So I proceeded to set up a small scale experiment with a piece of the grill bar I had already cut off:
I started with one of these 20 volt, 2.5 Amp (Zap!) AC to DC adapters. I actually killed 2 of them, each after 10 seconds of reverse plating. Too much of a short circuit for them and they just fry, and it turns out that's way more power than I needed anyway!
So I backed it off to one of these. It's a 5.2 volt, 400 mA phone charger:
Here's the set up: A tupperware container for eletrolyte: I used 3 table spoons of pickling salt in about a pint of warm water, well disolved. Connect the POSITIVE terminal of the power supply to whatever you want "de-chromed". That is important, I did it backwards at first and was effectively aluminum plating the chrome piece. This becomes the circuit's "anode". Connect the negative terminal to a fairly large (for efficiency's sake) electrode, like my aluminum candle holder thingy here. I just bared a good length of copper wire and wrapped it around the sanded aluminum thing and taped it on there. Only do this with metal objects that you wouldn't mind seeing COMPLETELY DESTROYED!
CAUTION: Make sure it's a well ventilated area, although this is creating a relatively small amount of Hydrogen and Oxygen, it does burn and/or explode if concentrated and ignited.
Here are the electrodes submerged with the power hooked up in reverse at first. You can see a lot of bubbles coming off the grill piece. That's pure hydrogen, so be carefull! Pure oxygen is being produced at about half the rate from the aluminum end. This is the result of dividing water molecules into it's elements(H2O makes 2H + O). You want to see the most bubbles coming from the non-grill electrode (negative terminal, cathode) to verify it's hooked up correctly.
Here it is the right way, after about five minutes of bubbling. You can see more/larger bubbles at the aluminum side now:
...and here's the result after five minutes of being hooked up correctly with 5 volts, 400 mA. This is so crazy... it just might work!:
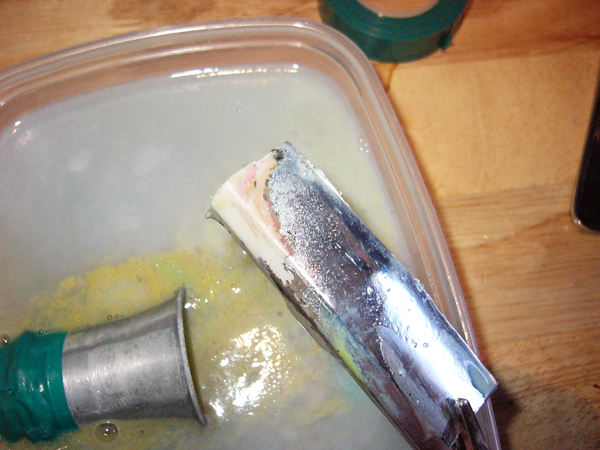
The solutions begins to turn green from the thick copper layer underneith the chrome reacting with the salt water:
2 shots after 10 minutes:
After 15 minutes I noticed that the chrome tends to come off faster on the side closest to the cathode, so I repositioned the electodes for the rest:
And here's all the chrome/copper floaties after 15 minutes:
And after 20 mins:
And finally, looks like in total it takes 25 minutes with this small scale set up:
Last edited by djnixtre; 02-16-2009 at 05:14 PM.
 02-16-2009, 04:40 PM
#2
Member
Thread Starter
Join Date: 01-11-2009
Location: Calgary, AB
Posts: 77
...continued
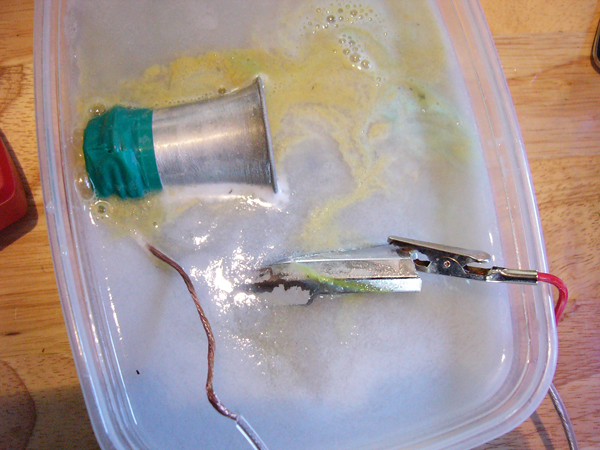
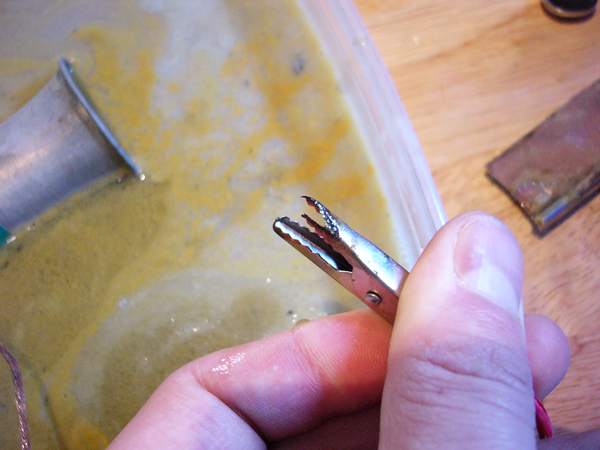
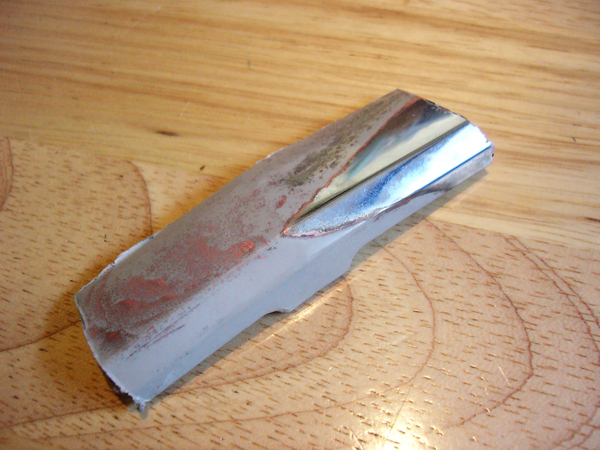
And this is what happens if your aligator clip gets under the water for like 5 minutes:
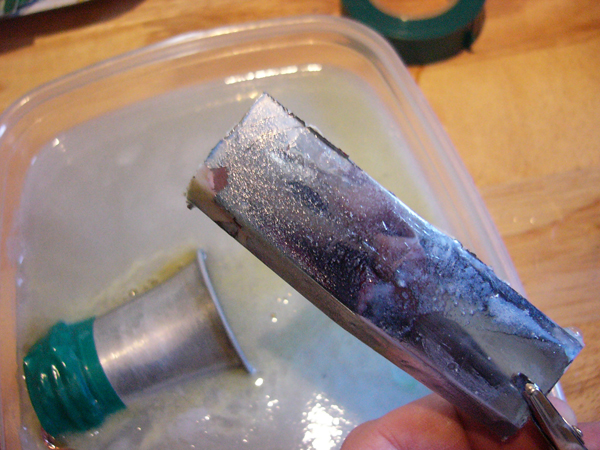
And here it is de-chromed, no elbow grease or blood required, all washed and dryed. Obviously the chrome corner was out of the solution the whole time, so it's still chromed, but it serves as a good comparison:
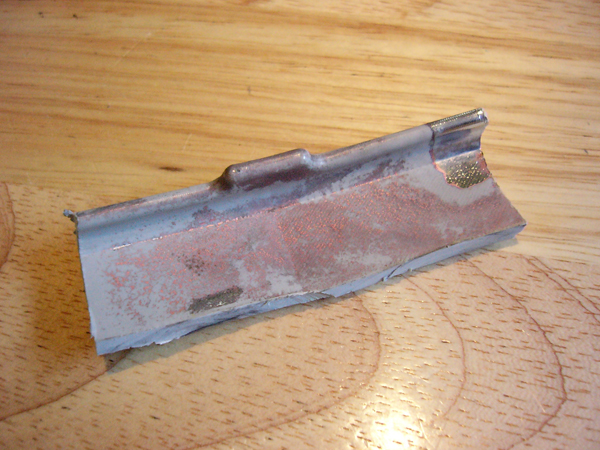
And on the right side here you can see what 6 seconds of sanding with 200 grit looks like:
Looks a lot like bare plastic!
So, in conclusion, it looks like there IS an alternative to pain stakingly peeling the chrome off with razor blades. I am probably going to try this with my rough-cut 3-Bar Grill, half at a time, in a tall bucket. Probably use some of that aluminum gutter guard as a large surface area cathode and form it up and down the inside wall of the bucket, probably on two sides at once. I'll put the grill in the middle, half submerged resting on a block of wood or something to insulate it from the gutter guard and throw the switch. I might need one more of my 20 volt 2.5 amp power supplies if it will hold up on this larger scale/load. But you can already see that only 5 volts goes a long way.
How's that for a better way!
PS: I wouldn't eat the remaining pea soup if I were you!
And here it is de-chromed, no elbow grease or blood required, all washed and dryed. Obviously the chrome corner was out of the solution the whole time, so it's still chromed, but it serves as a good comparison:
And on the right side here you can see what 6 seconds of sanding with 200 grit looks like:
Looks a lot like bare plastic!
So, in conclusion, it looks like there IS an alternative to pain stakingly peeling the chrome off with razor blades. I am probably going to try this with my rough-cut 3-Bar Grill, half at a time, in a tall bucket. Probably use some of that aluminum gutter guard as a large surface area cathode and form it up and down the inside wall of the bucket, probably on two sides at once. I'll put the grill in the middle, half submerged resting on a block of wood or something to insulate it from the gutter guard and throw the switch. I might need one more of my 20 volt 2.5 amp power supplies if it will hold up on this larger scale/load. But you can already see that only 5 volts goes a long way.
How's that for a better way!
PS: I wouldn't eat the remaining pea soup if I were you!
Last edited by djnixtre; 02-16-2009 at 05:33 PM.
02-16-2009, 06:28 PM
#3
Senior Member

Join Date: 06-27-2006
Location: Kingsville On
Posts: 732
What happened to the chocolate egg
Wow that looked easy I will have too set myself up one of those I work with vintage motorcycle parts.That my work better than sandblasting the chrome off.Looks to be a good way for chrome on plastic will give it a go with an old bike rim see if it will lift before it eats the steel rim.
Wow that looked easy I will have too set myself up one of those I work with vintage motorcycle parts.That my work better than sandblasting the chrome off.Looks to be a good way for chrome on plastic will give it a go with an old bike rim see if it will lift before it eats the steel rim.
02-16-2009, 06:31 PM
#4
Senior Member

Join Date: 01-15-2008
Location: michigan
Posts: 265
Boy, must be cabin fever setting in up North.... j/k
Outstanding how to!
Too late for many of the guys but for those of us who have been putting this project off... just in time. Could you make a "container" large enough to submerge the whole grille out of plywood, particle board, cardboard or whatever and just line it with visqueen or a plastic material? If there was a place to attach the electrode to the back side of the grille where it wouldn't show like the part you had to leave out of the solution you would have a completely stripped grille.
Thanks again and please show us how the final stripping comes out.
02-16-2009, 06:53 PM
#5
Member
Thread Starter
Join Date: 01-11-2009
Location: Calgary, AB
Posts: 77
What happened to the chocolate egg
Wow that looked easy I will have too set myself up one of those I work with vintage motorcycle parts.That my work better than sandblasting the chrome off.Looks to be a good way for chrome on plastic will give it a go with an old bike rim see if it will lift before it eats the steel rim.
Wow that looked easy I will have too set myself up one of those I work with vintage motorcycle parts.That my work better than sandblasting the chrome off.Looks to be a good way for chrome on plastic will give it a go with an old bike rim see if it will lift before it eats the steel rim.
PS: The chocolate egg may have been a casualty of "watching chrome electrolyze"
02-16-2009, 06:57 PM
#6
Senior Member
Join Date: 06-27-2006
Location: Kingsville On
Posts: 732
02-16-2009, 06:57 PM
#7
Member
Thread Starter
Join Date: 01-11-2009
Location: Calgary, AB
Posts: 77
Hmm. Problem is the connecting mech, ie: aligator clip, eats away way faster than the chrome, so the connection has to be out of the solution, or you will have connection no-more.
02-16-2009, 06:58 PM
#8
Member
Thread Starter
Join Date: 01-11-2009
Location: Calgary, AB
Posts: 77
Ya, I was thinking something like that. It's just like I said, half at a time might work better because the connector has to stay out as anything metal or conductive in the solution and connecting in the circiut is eaten away.
02-16-2009, 07:39 PM
#9
Senior Member

Join Date: 05-26-2008
Location: Westerville, Ohio
Posts: 618
Very nice! I peeled mine like GTOMike did. Used 15 straight edge razor blades and had only one minor finger cut in my 4 or so hours of labor.
You definetly need the rear middle support brace connected to all three remaining bars (top, middle and bottom) to stiffen the grill. Mike and I also attached wooden blocks on the middle grill bar for screws to tie in the screen and also add stiffness.
You definetly need the rear middle support brace connected to all three remaining bars (top, middle and bottom) to stiffen the grill. Mike and I also attached wooden blocks on the middle grill bar for screws to tie in the screen and also add stiffness.
02-16-2009, 08:13 PM
#10
Member
Thread Starter
Join Date: 01-11-2009
Location: Calgary, AB
Posts: 77
BTW: Looks like the aligator clip was probably under for 10 mins, when I repositioned the electrodes. Still ate away fast! Also, for part of the time at the end, it may have been the only thing, between it and the chrome, still in contact with the solution.
Just thinking that the grill would probably be bare in about 10 seconds with jumper cables to the car! If it didn't melt first... . 12 volts with 500+ Amps might be overkill... would probably just short out and fry across the middle of the grill or something. Might also get a nice hydrogen explosion.
Just thinking that the grill would probably be bare in about 10 seconds with jumper cables to the car! If it didn't melt first...