SS Oil Filler Cap Deconstructed (PICS)
 12-04-2016, 08:07 PM
#1
Moderator
Thread Starter

Join Date: 05-01-2014
Location: California
Posts: 7,808
SS Oil Filler Cap Deconstructed (PICS)
Sometime after installing oil catch cans, I started seeing oil deposits on the valve cover and surrounding area, around the oil filler cap. I had run for at least a few thousand miles already, so I wasn't sure that it was the fault of the catch cans.
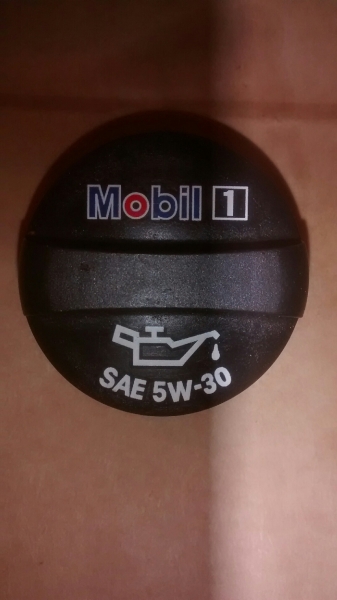
After some discussion in the catch can thread, Powermizer suggested that the oil filler cap itself may have gone bad. This is the cap that was on my engine.
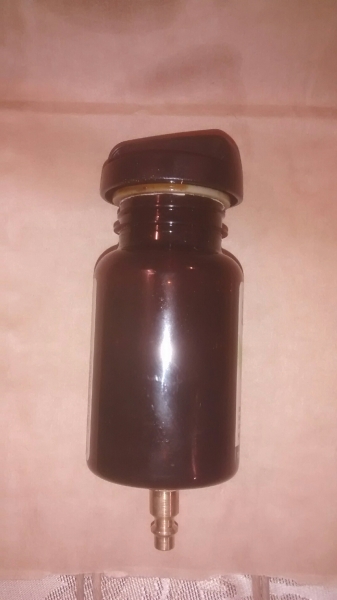
I found a supplement bottle with the right size neck to seal the O-ring, and drilled and tapped for 1/4" NPT. Installing an air fitting, I was able to test the filler cap. It is a vented cap, and air was escaping at even the lowest of pressure. Here is the test rig.
I wanted to see what kind of valve was inside, and if there was anything obviously wrong with it, so I opened up the cap.
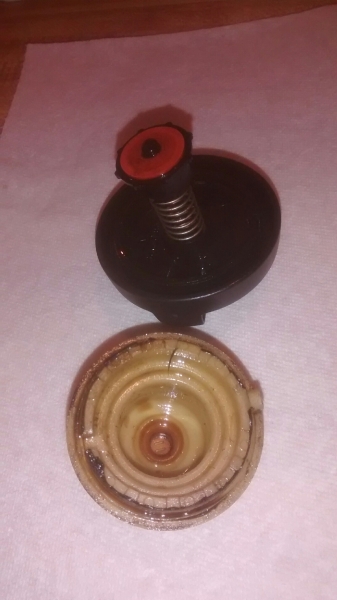
It is a spring loaded valve, with a rubber seal that the spring presses down against the hole in the bottom of the cap. This keeps unmetered air from entering the engine, but allows excess pressure to escape in an emergency.
There is a slight circular indentation in the rubber where it has been pressing against the hole. This is something I would expect to see, and I think it is probably not the problem. The rubber comes right off, so I can turn it over and use the other(non-dented) side if I wish. Then glue the cap back together, reinstall, and see if oil still accumulates on the valve cover.
I do have somewhat of a problem with cylinder wall/ring wear on cylinder #4, so the issue may be excessive crankcase pressure. I hope to do another cylinder leak down test soon, to determine if the wear has worsened. Figured someone may be interested to see what the filler cap looks like on the inside.
After some discussion in the catch can thread, Powermizer suggested that the oil filler cap itself may have gone bad. This is the cap that was on my engine.
I found a supplement bottle with the right size neck to seal the O-ring, and drilled and tapped for 1/4" NPT. Installing an air fitting, I was able to test the filler cap. It is a vented cap, and air was escaping at even the lowest of pressure. Here is the test rig.
I wanted to see what kind of valve was inside, and if there was anything obviously wrong with it, so I opened up the cap.
It is a spring loaded valve, with a rubber seal that the spring presses down against the hole in the bottom of the cap. This keeps unmetered air from entering the engine, but allows excess pressure to escape in an emergency.
There is a slight circular indentation in the rubber where it has been pressing against the hole. This is something I would expect to see, and I think it is probably not the problem. The rubber comes right off, so I can turn it over and use the other(non-dented) side if I wish. Then glue the cap back together, reinstall, and see if oil still accumulates on the valve cover.
I do have somewhat of a problem with cylinder wall/ring wear on cylinder #4, so the issue may be excessive crankcase pressure. I hope to do another cylinder leak down test soon, to determine if the wear has worsened. Figured someone may be interested to see what the filler cap looks like on the inside.
Last edited by RJ_RS_SS_350; 03-11-2017 at 11:10 PM.


 12-04-2016, 08:54 PM
#3
Senior Member

Join Date: 03-28-2008
Location: Oshawa
Posts: 1,115
I totally agree. I wouldn't want to depend on some glue to keep the cap in one piece with the heat that comes off the LNF.
12-04-2016, 09:26 PM
#4
Moderator
Thread Starter
Join Date: 05-01-2014
Location: California
Posts: 7,808
The lower piece cannot fall into or out of the engine if the upper piece were to come loose. The upper is only backing so the spring can keep the seal pressed against the hole, and a handle to assist with removal(and replacement). The only sealing surfaces are the internal rubber seal, and the O-ring. I would clean it thoroughly, use ABS cement, and if the bond did not seem strong, I wouldn't use it. It was glued together at the factory, and it didn't take much force to get it apart.
12-09-2016, 12:05 PM
#5
Moderator
Thread Starter
Join Date: 05-01-2014
Location: California
Posts: 7,808
I performed another cylinder leak down test, with the exact results as before, so the cylinder wear has not worsened. The routing of the catch can lines is good, and the lines are properly sloped so that there is no accumulation of fluid in the lines(so no blockage).
I turned the rubber seal over to the non-dented side. I also put a shim(about 1/4") between the spring and the black part of the cap, slightly increasing spring pressure exerted on the rubber seal.
I thoroughly cleaned the mating surfaces, and bonded them together with PVC cement. After clamping overnight, the bond tested good and strong, so I reinstalled the filler cap on the engine. After about 100 miles, there is no hint of oil leaking around the cap.
Back in April, I had reconfigured the routing of my catch can lines as a test. About a month later, I noticed the oil filler cap problem. After about 4,000 miles and 2 months, I realized that I had installed a check valve backwards.
This hindered the evacuation of crankcase pressure, which pushed past the seal in the filler cap. Perhaps the indentation in the seal kept it from resealing, even after the check valve problem was corrected.
Hopefully this is the end of this problem.
 06-09-2017, 08:46 PM
#8
Moderator
Thread Starter
Join Date: 05-01-2014
Location: California
Posts: 7,808
Well, it's been more than 3 months, but here's the update. The reconstructed oil filler cap did a good job of keeping oil from getting past the internal valve seal. However, when I checked under the hood tonight, the cement used to hold the halves together had let loose, just as some of you suspected may happen.
It was only down half a quart, which is still within the acceptable oil level. It must have just happened, glad I caught it. So now I'm back to the non-vented cap that I got before, from NAPA, until I can get a new OEM cap.
Good initial results, but overall failure. It was worth a try, but now I cannot recommend anyone to try this for themselves.