
Intercooler Piping upgrade!


Thread Starter
Senior Member
Joined: 02-19-2010
Posts: 1,529
From: Buffalo ny
Intercooler Piping upgrade!
What a pain in the rear...with big arms and hands, this project took some time. all is well finally...
had to remove bumper, take off radiator mounting brackets, and a bunch of plastic stuff


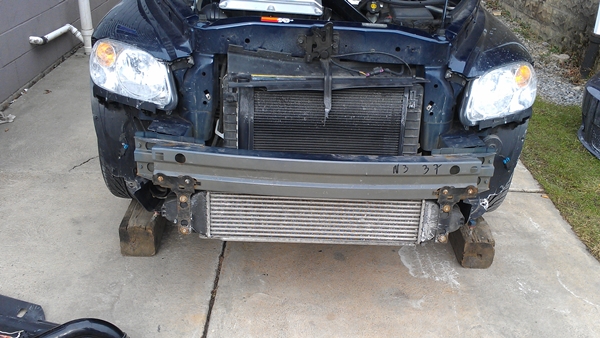
had to remove bumper, take off radiator mounting brackets, and a bunch of plastic stuff

Member
Joined: 01-06-2013
Posts: 37
From: Wellington, Ohio
I'm not being a smart a$$, but what exactly does this improve?? I just bought mine and am curious about upgrades, It looks really good just wondering if it takes in more air or runs cooler?? The install looks very clean!!

Senior Member
Joined: 02-05-2011
Posts: 1,056
From: south florida
Well if your running more boost then factory the pipe well expand and sometimes cracks. Plastic pipes and plastic end tanks on the intercooler plus heat with 24psi something well brake. Now some people have been lucky and others haven't. Chevyssguy had to replace his factory intercooler 3 times. lol

Thread Starter
Senior Member
Joined: 02-19-2010
Posts: 1,529
From: Buffalo ny
5 hours...two seperare days. There is a little bit less spool time with these pipes from what I've noticed. Also I think my factory pipes were leaking somewhere. I was back up to about 19 psi from about 16 or so with the plastic pipes. And yes in the future if more boost is needed(lol), factory pipes have broken before.
This would have taken less time if I just removed the bumper in the first place, because I only did remove it for the cold side, and then figured out how much easier the other side could have gone
This would have taken less time if I just removed the bumper in the first place, because I only did remove it for the cold side, and then figured out how much easier the other side could have gone
Member
Joined: 01-06-2013
Posts: 37
From: Wellington, Ohio
Thank you for the explanation, I did see a tsb about the inter cooler tubing developing cracks but never put two and two together. Very cool mod, I will put this on my list of stuff to fix in the future.

Thread
Thread Starter
Forum
Replies
Last Post