
Lower Control Arm - Vertical mount bushing replacement


Thread Starter
New Member
Joined: 01-01-2015
Posts: 14
From: Mesa
Lower Control Arm - Vertical mount bushing replacement
Just wanted to condense everyone's hard work and research on this crucial topic. This info is current as of 11/25/2016.
I cannot overstate how effective the Rockauto.com website is when researching parts and price shopping. Killer prices and an outlined-based parts selection tool make this a must-visit site!
First of all, as noted by most, if not all owners - the failure of the Vertical Bushing is THE most common issue related to wandering, clunking, uneven tire wear, etc.
The lower control arm on the HHR (except for earliest models) is a cast (forged?) aluminum piece.
On the Cobalt, it is a stamped/welded steel piece.
There are three components mounted to the front lower control arm (simplified naming):
The preferred method is to replace any/all components with Moog 'Problem Solver' parts.
These parts have been re-engineered to overcome design issues with the original OEM components.
For instance (and this is the biggie), the original Vertical Control Arm bushing is simply a rubber-filled bushing, which is NOTORIOUS for failing rather quickly.
The Moog 'Problem Solver' substitute, P/N K200792, has a design similar to a Heim Joint.
In other words, instead of a squishy rubber disc that inevitable wears out, you have a 'ball-and-socket' design that lasts indefinitely, while provided a solid, smooth-operating pivot point for this area of the control arm.
Ironically, you can purchase a Moog lower control arm, complete with all 'Problem Solver' components pre-installed, but it is only available in the Cobalt steel control arm, NOT the preferred HHR aluminum part.
Footnote - Being the proverbial cheapskate, I opted to replace the Vertical Bushing with the Moog 'Problem Solver' part noted above, and had a local tire shop do the installation.
Latter in the day, I got a call from the service writer stating that the mechanic had had many instances of the aluminum arm 'breaking' when attempting to press a new bushing into place, and stated that the arm was cast with the bushing in-place. I looked at the guy, and pretty-much called BS!
Has anyone else had problems with the control arm cracking when installing these bushings?
I cannot overstate how effective the Rockauto.com website is when researching parts and price shopping. Killer prices and an outlined-based parts selection tool make this a must-visit site!
First of all, as noted by most, if not all owners - the failure of the Vertical Bushing is THE most common issue related to wandering, clunking, uneven tire wear, etc.
The lower control arm on the HHR (except for earliest models) is a cast (forged?) aluminum piece.
On the Cobalt, it is a stamped/welded steel piece.
There are three components mounted to the front lower control arm (simplified naming):
- Ball Joint - connects to steering knuckle
- Horizontal Bushing - long bushing at front of control arm - horizontal orientation
- Vertical Bushing - round, rubber-filled bushing, located at rear of control arm (the CULPRIT!)
- Replace entire assembly, control arm and all components installed
- Replace specific, offending components (cheapest solution)
The preferred method is to replace any/all components with Moog 'Problem Solver' parts.
These parts have been re-engineered to overcome design issues with the original OEM components.
For instance (and this is the biggie), the original Vertical Control Arm bushing is simply a rubber-filled bushing, which is NOTORIOUS for failing rather quickly.
The Moog 'Problem Solver' substitute, P/N K200792, has a design similar to a Heim Joint.
In other words, instead of a squishy rubber disc that inevitable wears out, you have a 'ball-and-socket' design that lasts indefinitely, while provided a solid, smooth-operating pivot point for this area of the control arm.
Ironically, you can purchase a Moog lower control arm, complete with all 'Problem Solver' components pre-installed, but it is only available in the Cobalt steel control arm, NOT the preferred HHR aluminum part.
Footnote - Being the proverbial cheapskate, I opted to replace the Vertical Bushing with the Moog 'Problem Solver' part noted above, and had a local tire shop do the installation.
Latter in the day, I got a call from the service writer stating that the mechanic had had many instances of the aluminum arm 'breaking' when attempting to press a new bushing into place, and stated that the arm was cast with the bushing in-place. I looked at the guy, and pretty-much called BS!
Has anyone else had problems with the control arm cracking when installing these bushings?

Thread Starter
New Member
Joined: 01-01-2015
Posts: 14
From: Mesa
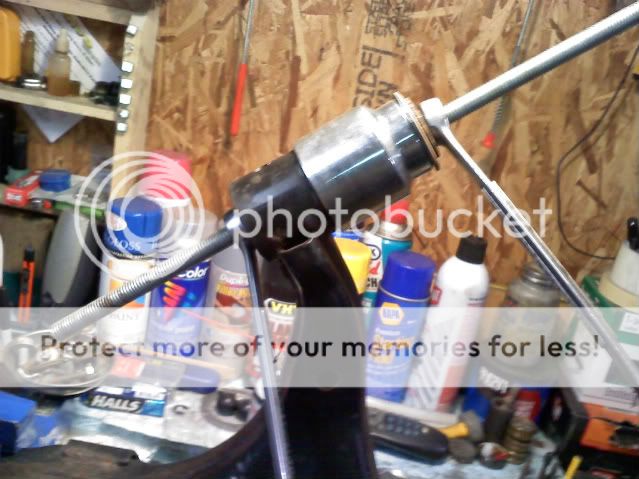
This Big O tech used a chisel to remove the old bushing. I almost s*&t when I saw the old part. And I gave the whole shop a tour of my Problem Solver bushing, highlighting the beveled side that actually slid in like butter.
Which brings me to the question of how much force is actually needed to press in a new bushing in the aluminum arm?
Which brings me to the question of how much force is actually needed to press in a new bushing in the aluminum arm?


Moderator
Joined: 01-23-2009
Posts: 26,532
From: Fredericksburg,VA
From the Commonly Used Parts forum:
https://www.chevyhhr.net/forums/comm...-thread-48833/
If you have a SS there are no parts available you MUST get the complete LCA from GM.
https://www.chevyhhr.net/forums/comm...-thread-48833/
Lower Control Arm Rebuild Parts
- Duralast Rear Bushing (autozone) P/N - FB782 (2.37" or 60.2mm outer diameter)
- MOOG "problem solver" Rear Bushing - K200792 - also K201285 which is zinc coated for use in aluminium LCAs
- MOOG Ball Joint - K80567 (require drilling out old one and bolting this in - FE1/3 ONLY - does NOT fit FE5)
- MOOG front LCA bushings - K200361

Thread
Thread Starter
Forum
Replies
Last Post
red2008
Brakes | Suspension | Shocks | Struts
10
May 10, 2014 05:32 AM
working on it
Brakes | Suspension | Shocks | Struts
6
Apr 23, 2012 08:08 PM
alexrckid
Brakes | Suspension | Shocks | Struts
11
Feb 26, 2012 07:46 PM