Cabin Air Filter Change
 11-15-2014, 11:45 PM
#1
Senior Member
Thread Starter

Join Date: 08-24-2012
Location: State of Confusion, U.S.A.
Posts: 177
Changed the cabin air filter in my HHR today & decided to make a documentary of the procedure (for all our “mechanically challenged” friends)...
1. )Open the glove box. (I've actually seen “Does the HHR have a cabin air filter? Where's it located? How is it changed? This is for THOSE people)
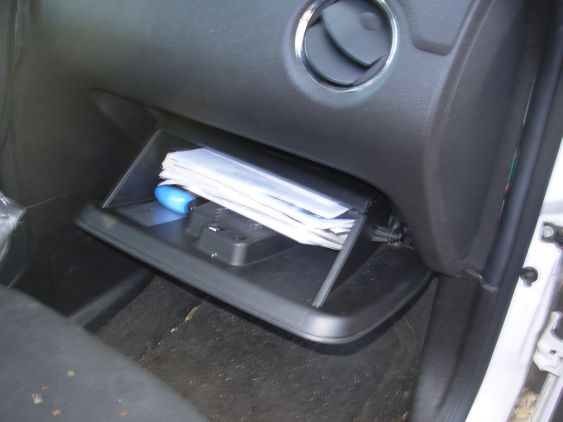
2. Remove contents. Or you'll find out about the HHR's "auto-dump" feature when the latches are released.
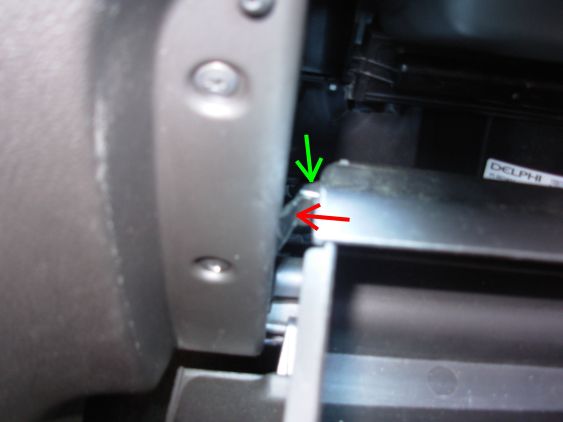
3. Right side latch. Easily reached with my fat finger to release. Push latch in red arrow direction to clear stop (green arrow)

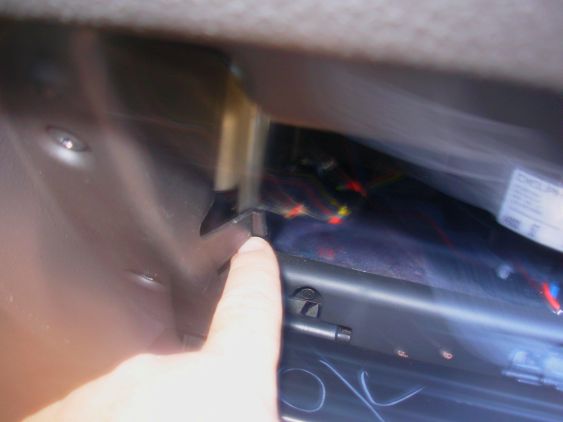
4. Left side latch. Not easily reached with my fat finger. Utilized “Special glove box latch release tool”, otherwise know as a “stick”. (or anything thin enough to get in there.) Push latch in red arrow direction to clear stop (green arrow)

5. Release both latches by pushing them away from the glove box body. Do one, pull lightly on box to get the stop past the latch, do other side.
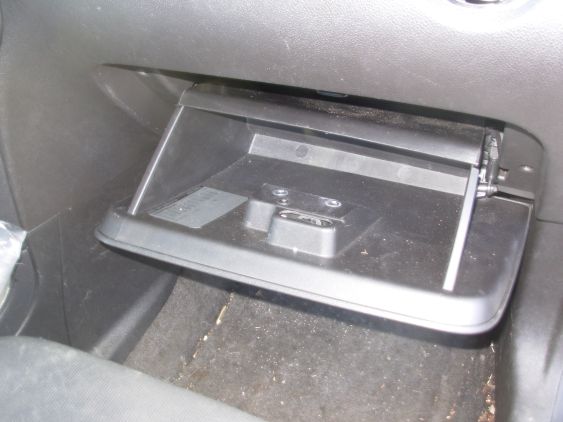
6. Glove box will assume the “auto-dump” position. (You DID empty it, right?)

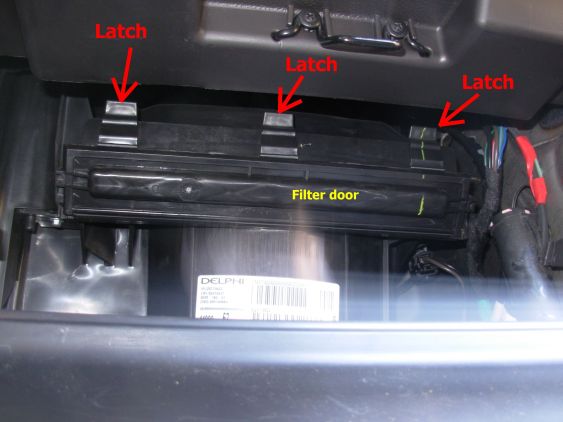
7. Fat finger pointing to latches.

8. Cabin air filter door. (3) latches at top of door. Pull latches (from the top) to release.
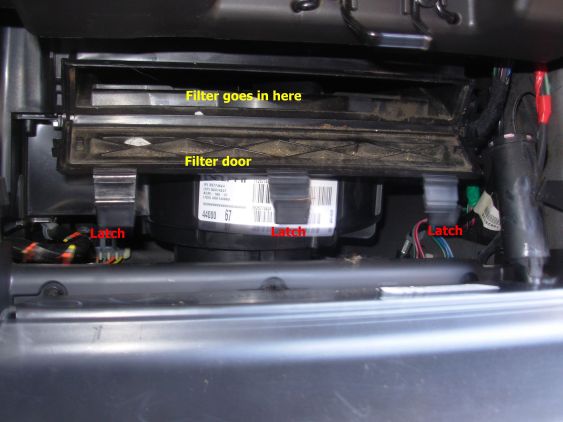
9. Door open, filter removed.
10. Insert filter. Filter is slightly rectangular ,make sure it reaches the sides of the opening.
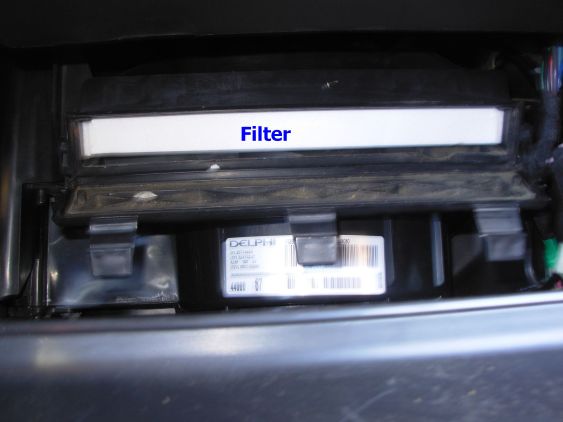
11. Close door, push up on latches till they snap into place.
12. Lift the glove box up till the stops on box go behind latches on side. Latches move out of the way by themselves , don't need to push them. I think that you folks can take it from here.
Congratulations! You are now a “Certified Chevrolet HHR Cabin air filter maintenance technician”! Yay!
p.s. If you can't/don't know how to change the air filter after reading (and looking at the pretty pictures) in this post , I will find a way to reach through your monitor and slap the ever-loving-snot out of you! (That is if DonBrew or a half a dozen other Users don't beat me to it!
  )
)
p.p.s . . . it was Saturday, I was bored
1. )Open the glove box. (I've actually seen “Does the HHR have a cabin air filter? Where's it located? How is it changed? This is for THOSE people)
2. Remove contents. Or you'll find out about the HHR's "auto-dump" feature when the latches are released.
3. Right side latch. Easily reached with my fat finger to release. Push latch in red arrow direction to clear stop (green arrow)
4. Left side latch. Not easily reached with my fat finger. Utilized “Special glove box latch release tool”, otherwise know as a “stick”. (or anything thin enough to get in there.) Push latch in red arrow direction to clear stop (green arrow)
5. Release both latches by pushing them away from the glove box body. Do one, pull lightly on box to get the stop past the latch, do other side.
6. Glove box will assume the “auto-dump” position. (You DID empty it, right?)
7. Fat finger pointing to latches.
8. Cabin air filter door. (3) latches at top of door. Pull latches (from the top) to release.
9. Door open, filter removed.
10. Insert filter. Filter is slightly rectangular ,make sure it reaches the sides of the opening.
11. Close door, push up on latches till they snap into place.
12. Lift the glove box up till the stops on box go behind latches on side. Latches move out of the way by themselves , don't need to push them. I think that you folks can take it from here.
Congratulations! You are now a “Certified Chevrolet HHR Cabin air filter maintenance technician”! Yay!
p.s. If you can't/don't know how to change the air filter after reading (and looking at the pretty pictures) in this post , I will find a way to reach through your monitor and slap the ever-loving-snot out of you!
(That is if DonBrew or a half a dozen other Users don't beat me to it! p.p.s . . . it was Saturday, I was bored


 Nice job!
 01-03-2015, 08:09 AM
#5
Senior Member

Join Date: 06-29-2008
Location: Northern PA
Posts: 119
Just did mine again yesterday. I had to get one of those special latch release tools as well. I forgot how tight the space is for us full fingered guys. These bad boys aren't cheap filters, either.
I prefer to use the "auto-dump" feature, BTW. It makes me clean out the stuff I needed to get rid of in the first place.
Oh, don't forget these filters are directional. There's an arrow on the side to indicate proper orientation.
I prefer to use the "auto-dump" feature, BTW. It makes me clean out the stuff I needed to get rid of in the first place.
Oh, don't forget these filters are directional. There's an arrow on the side to indicate proper orientation.


