New 'HHR specific' splash guards installed:
 07-31-2009, 08:56 AM
#1
Senior Member
Thread Starter

Join Date: 05-13-2009
Location: Western North Carolina
Posts: 466
New 'HHR specific' splash guards installed:
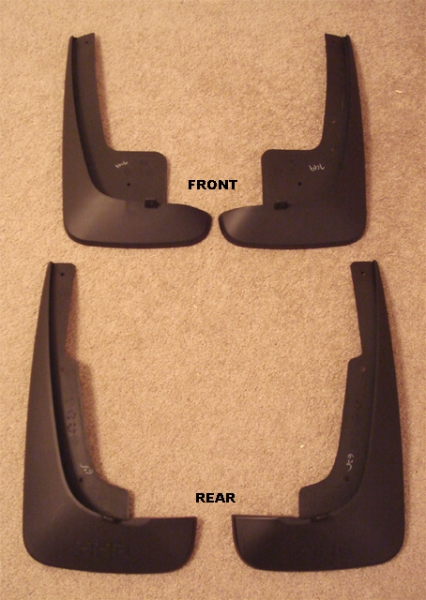
I wanted to get some splash guards for the front. I found a complete set (front & rear) HHR specific (GM p/n 88968231) for $28.50 including shipping!
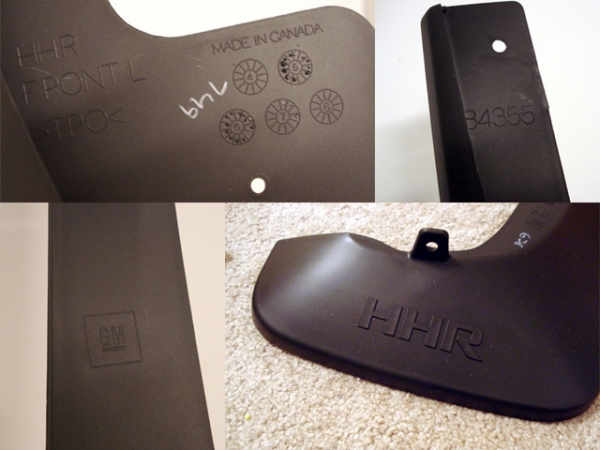
Here are some of the details molded into the plastic. Go Canada, eh? Now I need to get a colored vinyl HHR logo to put on there.
Instructions- page 1:
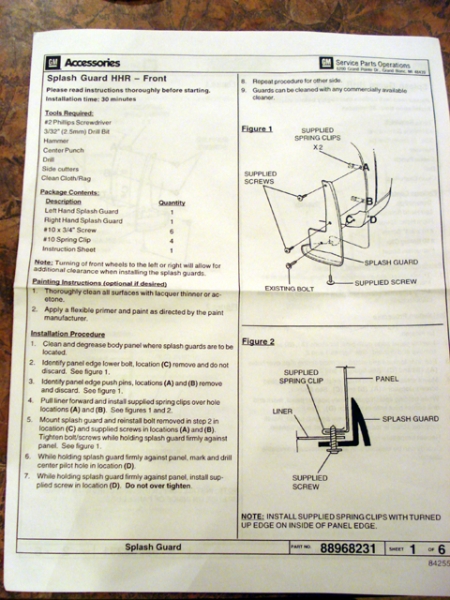
Page 2:

With the holes already pre-drilled, this was an EASY install. They fit perfectly & look great!
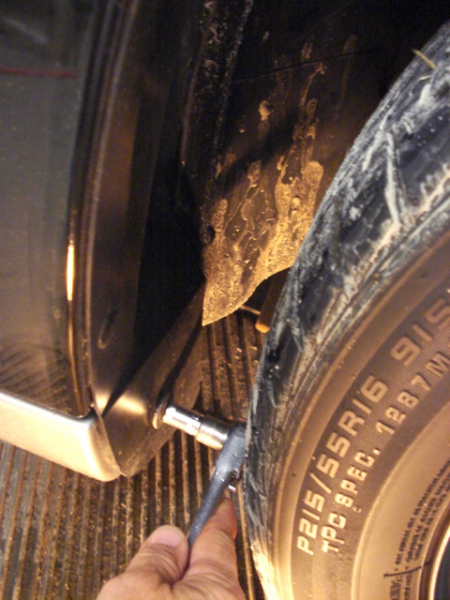
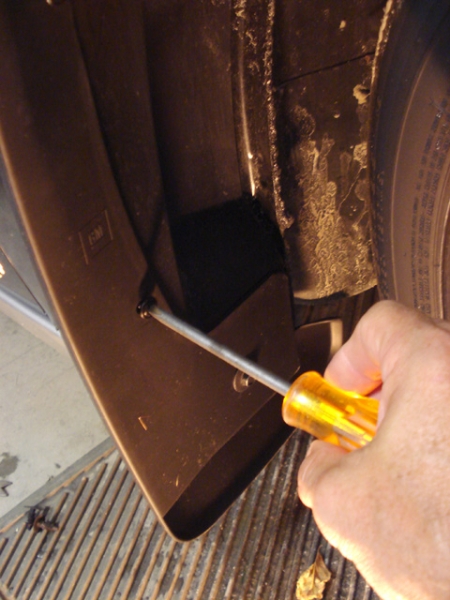
First step is to remove this 10mm bolt:
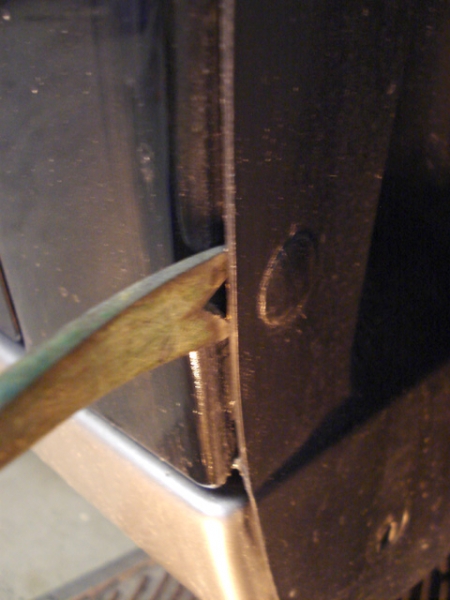
Then remove the trim panel clips using your favorite garden tool. Remember, dont twist too hard:
Here's the bag of hardware that came with the fronts. They give you extra!

This is the bag for the fronts. The rear set hardware had slightly smaller clips.
I modified the front set of clips. I smashed them a bit with pliers so they would hold on to the fender tabs better (during assembly):
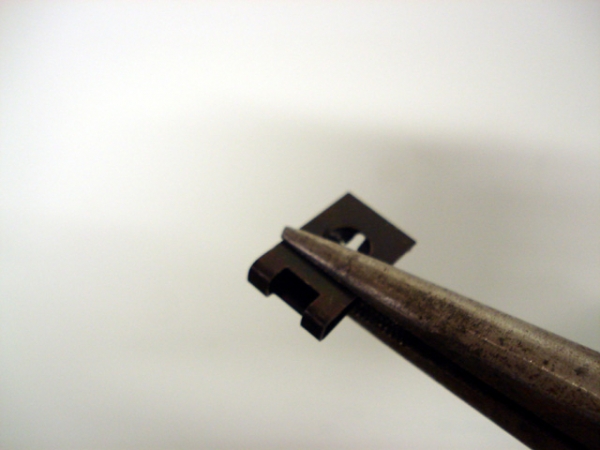
The clips & screws take the place of the trim panel clips.
After removing the trim panel clips, I cleaned all the dirt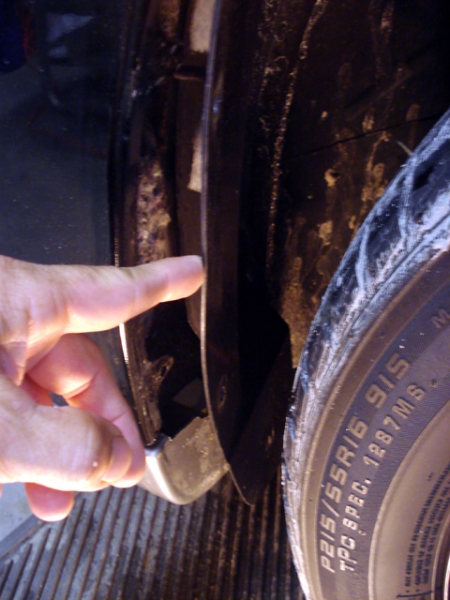
& installed the threaded clips onto their respective fender tabs.
I went ahead & mounted the rears to match the front. Guess I'll toss the old rear ones out? I used a short screwdriver for the rear so I wouldn't have to remove the wheels.
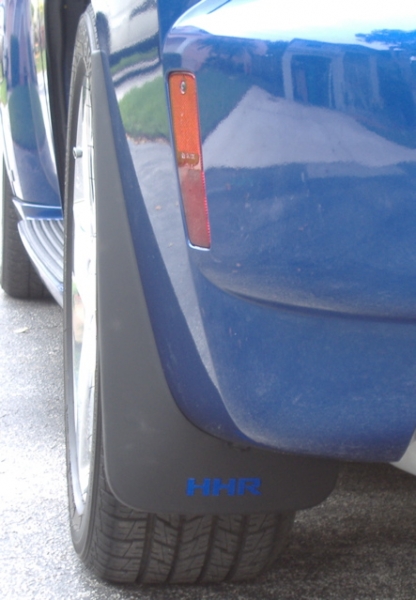
Here's the fronts installed:

Here's the rears:

Here's a comparison of the old & new rear flaps:

I'll get a better overall picture when the weather cooporates & I can wash my car .
.
Here are some of the details molded into the plastic. Go Canada, eh? Now I need to get a colored vinyl HHR logo to put on there.
Instructions- page 1:
Page 2:
With the holes already pre-drilled, this was an EASY install. They fit perfectly & look great!
First step is to remove this 10mm bolt:
Then remove the trim panel clips using your favorite garden tool. Remember, dont twist too hard:
Here's the bag of hardware that came with the fronts. They give you extra!
This is the bag for the fronts. The rear set hardware had slightly smaller clips.
I modified the front set of clips. I smashed them a bit with pliers so they would hold on to the fender tabs better (during assembly):
The clips & screws take the place of the trim panel clips.
After removing the trim panel clips, I cleaned all the dirt
& installed the threaded clips onto their respective fender tabs.
I went ahead & mounted the rears to match the front. Guess I'll toss the old rear ones out? I used a short screwdriver for the rear so I wouldn't have to remove the wheels.
Here's the fronts installed:
Here's the rears:
Here's a comparison of the old & new rear flaps:
I'll get a better overall picture when the weather cooporates & I can wash my car
.


 08-01-2009, 08:50 AM
#8
Senior Member

Join Date: 07-05-2008
Location: Akron Ohio
Posts: 5,464
These are the same ones many of us have modified for the SS.
The rear ones will bolt on with a slight mod to the bolt holes and the fronts need notched for the rockers. Neither is a major modification and easy to do.
I also use silicone to fill in the back and make gasket to preseven tht flap from moving and rubbing. Dirt and small stones and abrasives do get behind them and can and will rub. I used the silicone on my molded GM truck flaps for over 11 years and it protected them well.


