LED Headlight How To
 05-20-2011, 08:33 PM
#1
Senior Member
Thread Starter

Join Date: 01-25-2008
Location: Saint Louis
Posts: 188
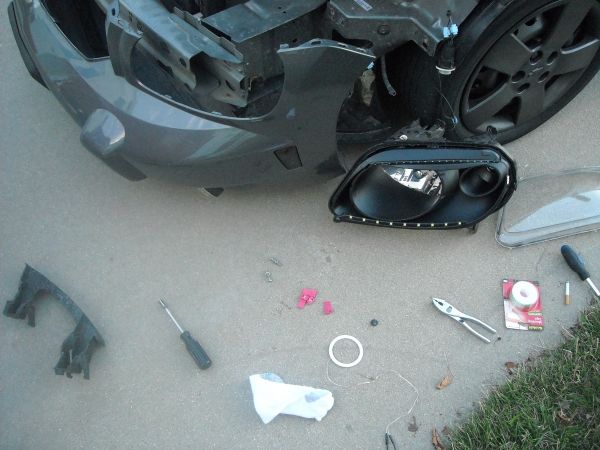
By now you should have your headlights open. If not goto "How to Paint Your Headlights" by 1Panel2NV.
When you put them in the oven sit time on wet cardboard or a wet paper bag to keep from burning the edges. The heat WILL NOT melt the glue like people think it just softens it. You have to pull it out piece by piece or cut it out with a butter knife. Have the temp around 250 for 15 to 30 at a time to warm the glue. There is no easy way to do this so take your time.
You want to use a pattern: warm up, pick away glue chunks, pry open and repeat. You WILL have do this over and over. Once you get your style down the second one will be easy and take half the time. Don't for get to drill holes to run the wires through.
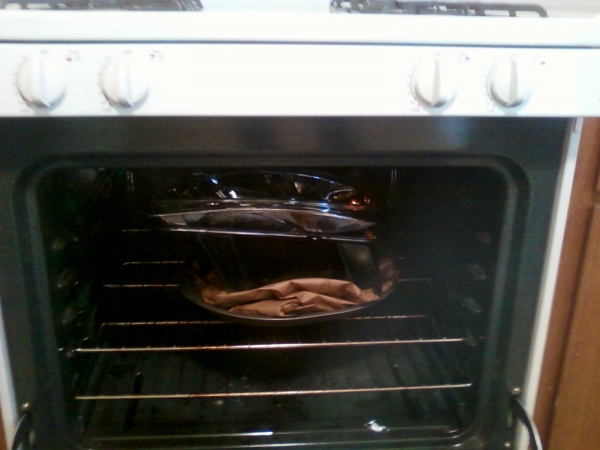
Wet Paper Keeps from burning the lights.

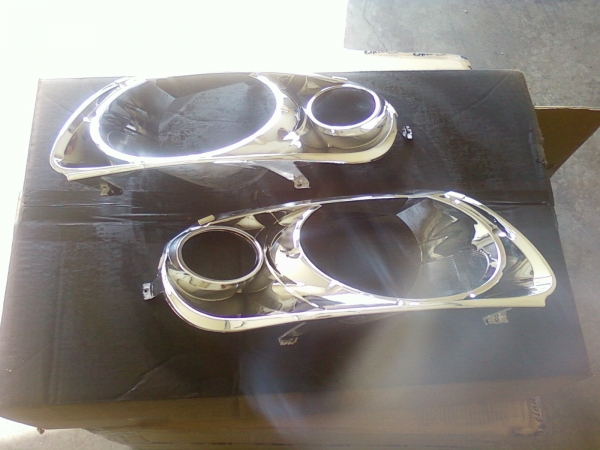
Sand, Prime and Paint
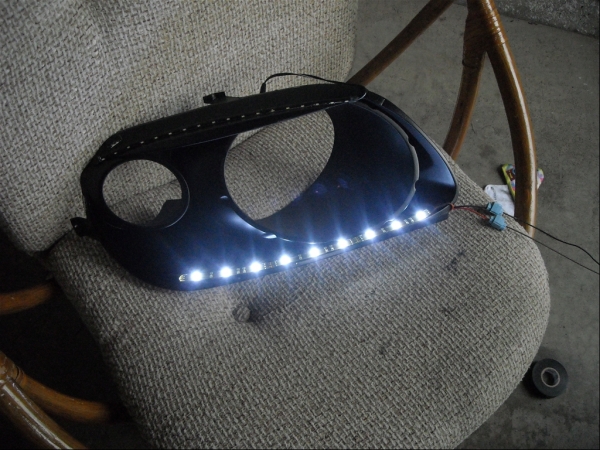
Add LED Strips
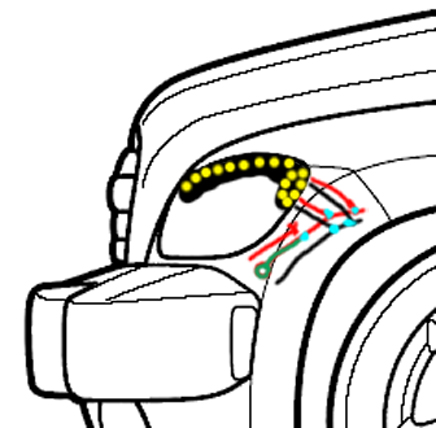
Wire taps are worth their weight in gold. They make splicing easy and you don't have to cut into factory wiring. The blue dots are wire taps in the diagrams
The blue dots are wire taps in the diagrams

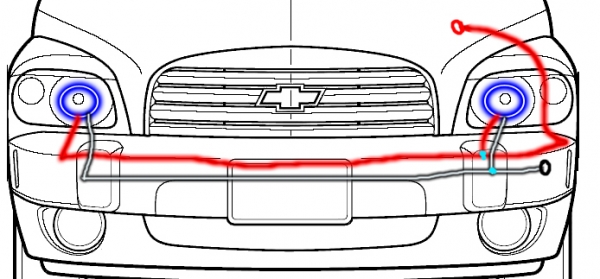
The angel eyes are the DRLs so are have constant power from the sunroof fuse in the BCM (right side under the radio).

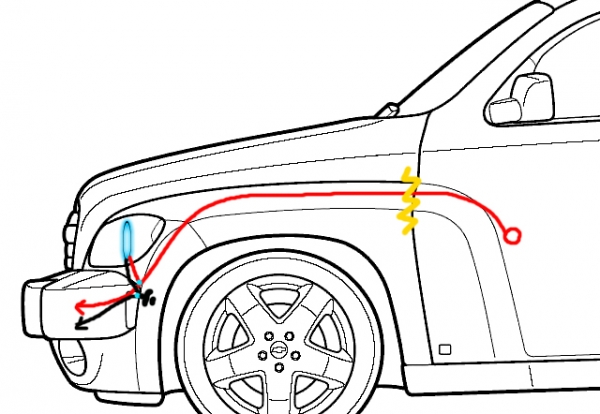
Run a �live� wire with constant accessory power from the BCM, through the firewall. To do this, tape the wire to a metal hanger and poke it through the rubber where the steering wheel is. This line will have to be about 10ft from inside the car and reach both headlights. The ground for this line can be tapped into a corner light or grounded to an unpainted surface on the frame.
*The circles are are where the power starts.
*The blue dots are wire taps.
*The yellow thunder bolt is the fire wall.
*The arrows are the power lines that run inside the bumper.
The "Audi style" running lights use the corner lights power. These lights are only on with the corner lights.
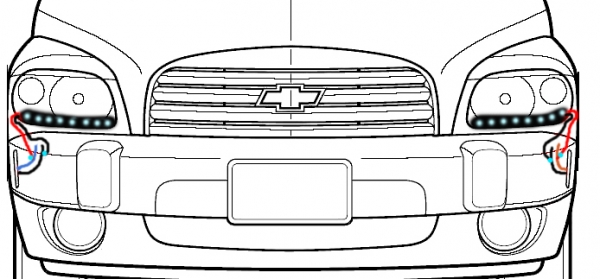
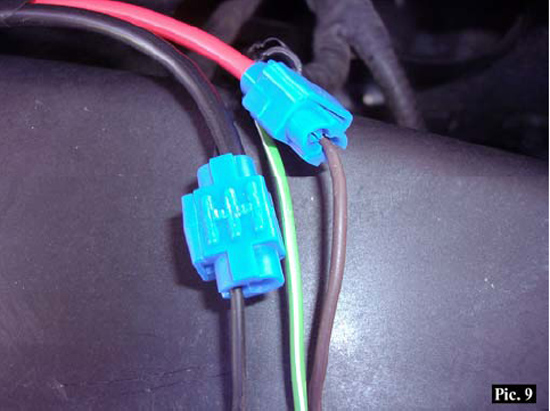
On the driver's side +Brown/-Black and and on the Passenger's side +Blue/-Black
The angel eye blinker and strip run off the blinkers. The middle line (green)is the blinking power line and the other line (red) is a constant power, same as the corner lights.
I don't have a how to on the projector since there is so many different ways to do it. Here are some pics of mine of the prototype headlight. I've cleaned them up and perfected them, but haven't taken any recent broken down pics.
I cut the back of the beam cup out with a drimmel and put the projector in. It's held in by "Great stuff" spray foam. The projector beam is aim with the headlight not to blind on comers.
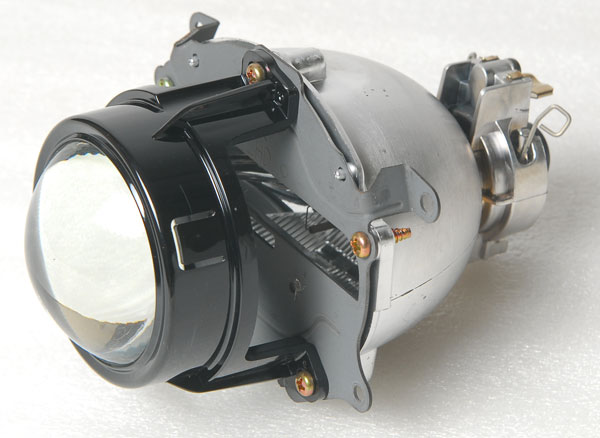
H1 projector I got from another set of headlights.
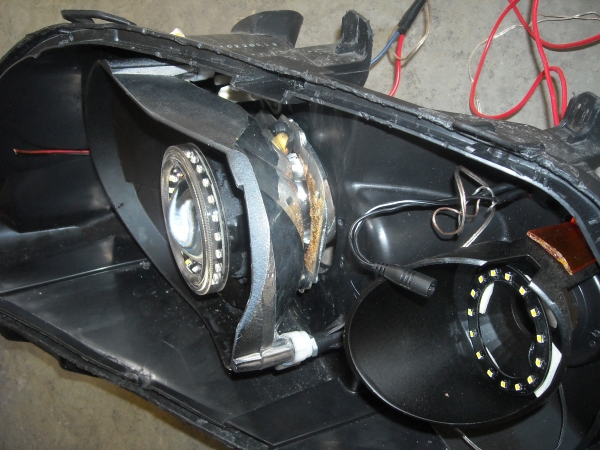
LED Angel Eye with Light Defuser. The LED rings come in 80mm and 60mm. The little one fits the blinker socket held in place with 3M tape. (Remember old pics, I have black RTB on them now)
That's basically the magic behind them. Any questions let me know.
GREY GHOST
When you put them in the oven sit time on wet cardboard or a wet paper bag to keep from burning the edges. The heat WILL NOT melt the glue like people think it just softens it. You have to pull it out piece by piece or cut it out with a butter knife. Have the temp around 250 for 15 to 30 at a time to warm the glue. There is no easy way to do this so take your time.
You want to use a pattern: warm up, pick away glue chunks, pry open and repeat. You WILL have do this over and over. Once you get your style down the second one will be easy and take half the time. Don't for get to drill holes to run the wires through.
Wet Paper Keeps from burning the lights.
Sand, Prime and Paint
Add LED Strips
Wire taps are worth their weight in gold. They make splicing easy and you don't have to cut into factory wiring. The blue dots are wire taps in the diagrams
The blue dots are wire taps in the diagrams
The angel eyes are the DRLs so are have constant power from the sunroof fuse in the BCM (right side under the radio).
Run a �live� wire with constant accessory power from the BCM, through the firewall. To do this, tape the wire to a metal hanger and poke it through the rubber where the steering wheel is. This line will have to be about 10ft from inside the car and reach both headlights. The ground for this line can be tapped into a corner light or grounded to an unpainted surface on the frame.
*The circles are are where the power starts.
*The blue dots are wire taps.
*The yellow thunder bolt is the fire wall.
*The arrows are the power lines that run inside the bumper.
The "Audi style" running lights use the corner lights power. These lights are only on with the corner lights.
On the driver's side +Brown/-Black and and on the Passenger's side +Blue/-Black
The angel eye blinker and strip run off the blinkers. The middle line (green)is the blinking power line and the other line (red) is a constant power, same as the corner lights.
I don't have a how to on the projector since there is so many different ways to do it. Here are some pics of mine of the prototype headlight. I've cleaned them up and perfected them, but haven't taken any recent broken down pics.
I cut the back of the beam cup out with a drimmel and put the projector in. It's held in by "Great stuff" spray foam. The projector beam is aim with the headlight not to blind on comers.
H1 projector I got from another set of headlights.
LED Angel Eye with Light Defuser. The LED rings come in 80mm and 60mm. The little one fits the blinker socket held in place with 3M tape. (Remember old pics, I have black RTB on them now)
That's basically the magic behind them. Any questions let me know.
GREY GHOST


 10-12-2011, 04:34 AM
#6
Senior Member
Thread Starter
Join Date: 01-25-2008
Location: Saint Louis
Posts: 188
The rings - superbrightleds.com (Locally in St.Louis!)
This old video is from Dec 2010. I did more upgrades since.
http://www.youtube.com/watch?v=kBjZ0s2TZaI

Thread
Thread Starter
Forum
Replies
Last Post