Checking and replacing the air filter
 09-23-2007, 07:13 PM
#1
Senior Member
Thread Starter

Join Date: 08-17-2006
Location: Ottawa, Ontario
Posts: 1,851
Checking and replacing the air filter
Here's what you need to check and/or replace the world's most secure air filter:
My socket set has a screwdriver handle that allows you to put sockets and a screwdriver bit adapter on it, so that is what I used.
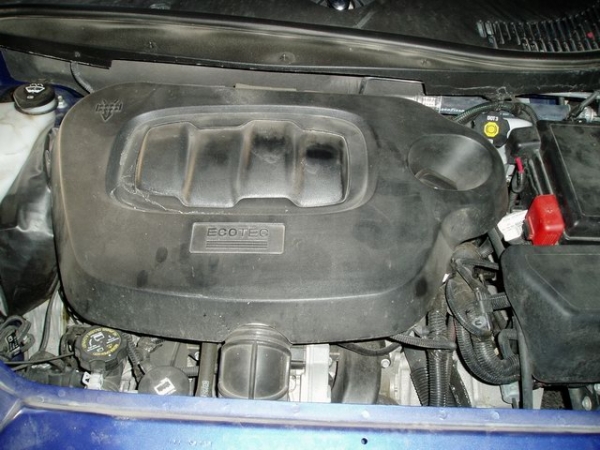
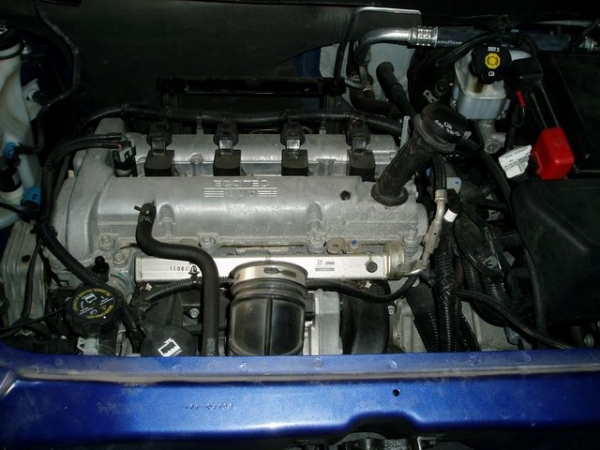
Pop the hood:
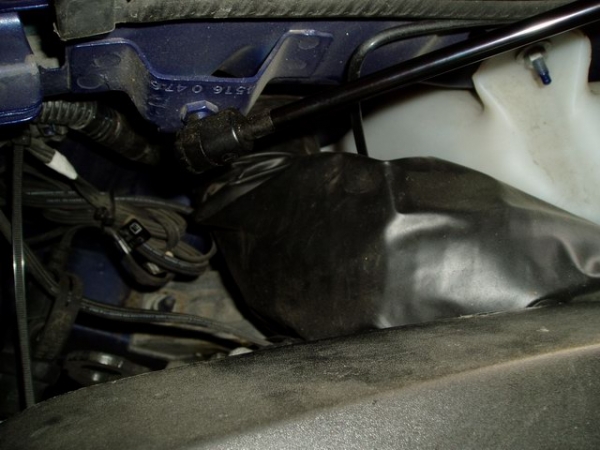
Disconnect the air intake tube from the passenger side fender well.
The air intake tube is connected to the fender by a large rubber grommet. Gently pull it out of the fender.
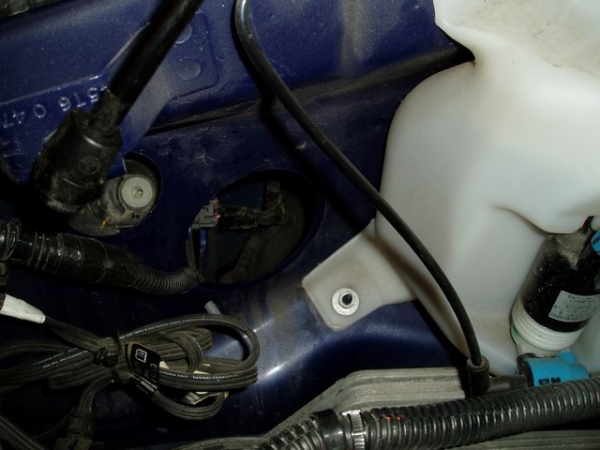
Cold air intake opening in the fender:
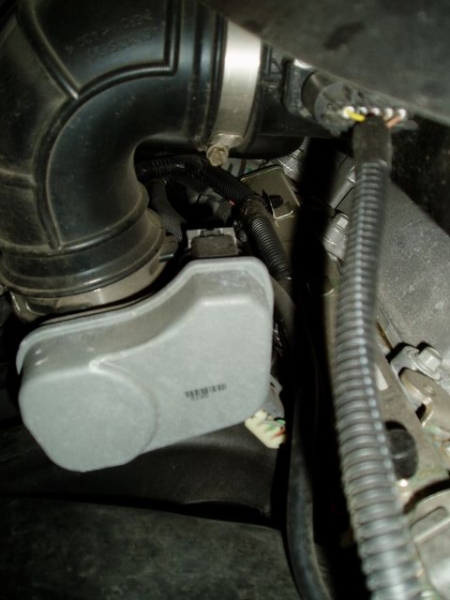
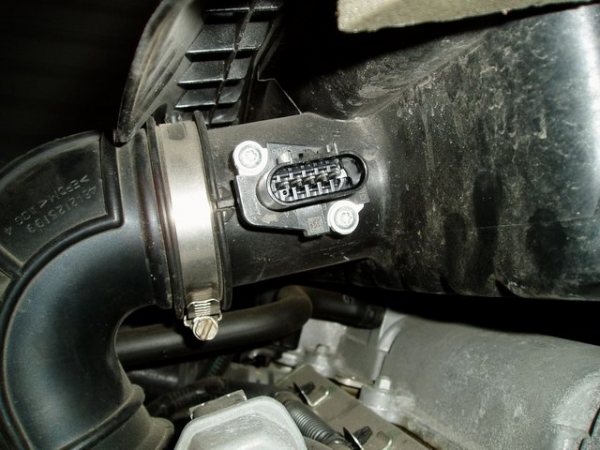
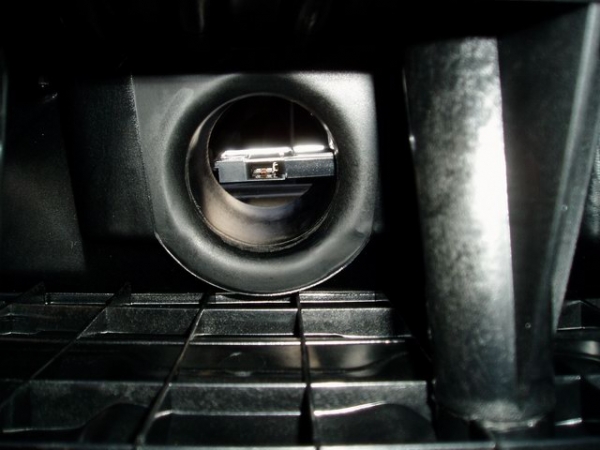
Disconnect the MAF sensor plug by pressing down on the top of the clip and pull it apart (upper right in the picture).
Loosen the 8mm nut on the band (top centre) so that the air tube can be separated from the air box.
Now that everything has basically been disconnected from the air box, grab the upper left and right of the airbox. Pull up and slightly forward.
You should feel the air box release from the two rear grommets. Grab the front left of the air box and pull up.
Again, you should feel the air box release from the front grommet.
Slip the air box over the oil fill neck and wiggle the air box out of the air intake tube at the front of the engine.
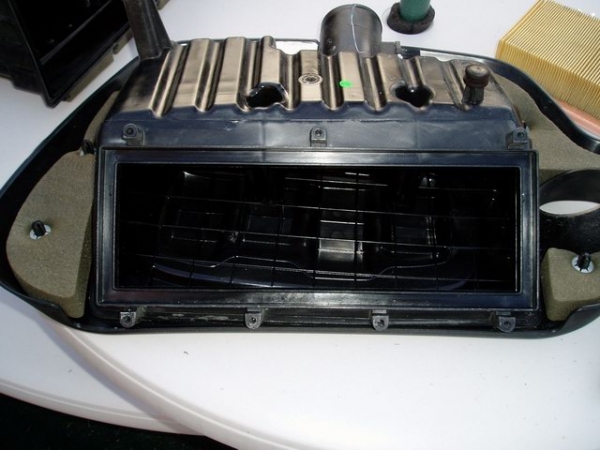
Now take the air box to a clean area and place it upside down.
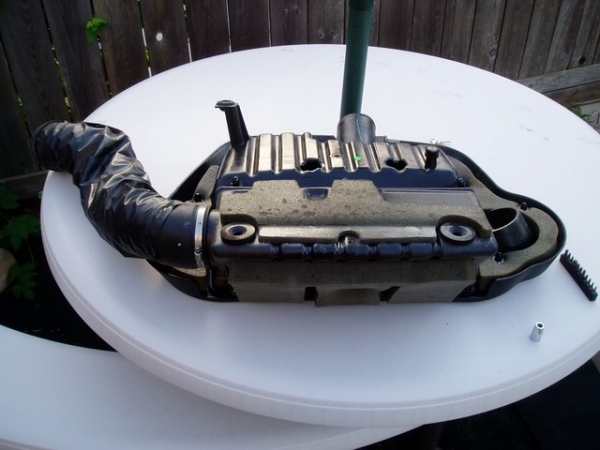
Using a T-25 Torx bit, remove the 7 (seven) T-25 Torx screws that connect the air filter cover to the air box.
Remove the air filter cover and voila, one highly secure air filter has been freed
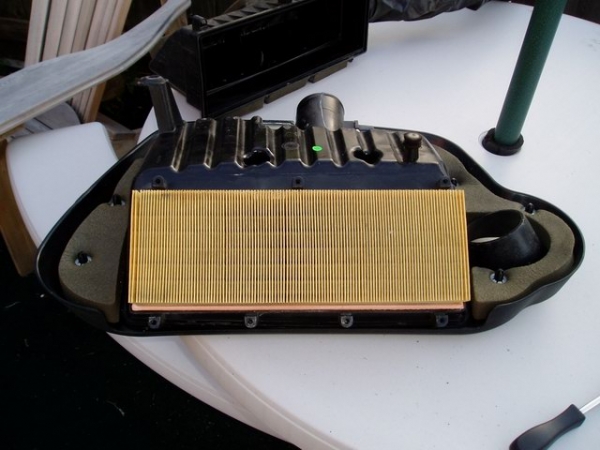
Take the air filter out to check it and also inspect the inside of the air box for any excess dirt, etc.
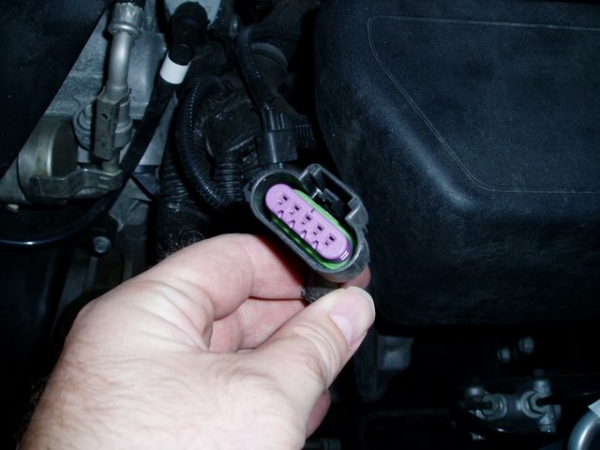
MAF Sensor
Clean any excess dirt from the air box, put the (new or old) air filter back in place. Tighten the 7 (seven) T-25 Torx screws.
Take the air box assembly back to your HHR and put it all back together.
Slip the air box back over the oil fill tube, reconnect the air box and the air tube at the front of the engine.
Line up the air box with the 3 (three) grommets and press down. You should feel the air box slide back into place on the grommets.
Reconnect the cold air hose to the fender well. The large rubber grommet should slip back into place.
Reattach the MAF sensor plug to the MAF sensor.
Tighten the 8mm nut on the band of the air tube at the front of the engine and you're good to go.
- 1 HHR

- 8mm socket
- T-25 Torx bit and adapter
- Replacement air filter (if replacing)
My socket set has a screwdriver handle that allows you to put sockets and a screwdriver bit adapter on it, so that is what I used.
Pop the hood:
Disconnect the air intake tube from the passenger side fender well.
The air intake tube is connected to the fender by a large rubber grommet. Gently pull it out of the fender.
Cold air intake opening in the fender:
Disconnect the MAF sensor plug by pressing down on the top of the clip and pull it apart (upper right in the picture).
Loosen the 8mm nut on the band (top centre) so that the air tube can be separated from the air box.
Now that everything has basically been disconnected from the air box, grab the upper left and right of the airbox. Pull up and slightly forward.
You should feel the air box release from the two rear grommets. Grab the front left of the air box and pull up.
Again, you should feel the air box release from the front grommet.
Slip the air box over the oil fill neck and wiggle the air box out of the air intake tube at the front of the engine.
Now take the air box to a clean area and place it upside down.
Using a T-25 Torx bit, remove the 7 (seven) T-25 Torx screws that connect the air filter cover to the air box.
Remove the air filter cover and voila, one highly secure air filter has been freed
Take the air filter out to check it and also inspect the inside of the air box for any excess dirt, etc.
MAF Sensor
Clean any excess dirt from the air box, put the (new or old) air filter back in place. Tighten the 7 (seven) T-25 Torx screws.
Take the air box assembly back to your HHR and put it all back together.
Slip the air box back over the oil fill tube, reconnect the air box and the air tube at the front of the engine.
Line up the air box with the 3 (three) grommets and press down. You should feel the air box slide back into place on the grommets.
Reconnect the cold air hose to the fender well. The large rubber grommet should slip back into place.
Reattach the MAF sensor plug to the MAF sensor.
Tighten the 8mm nut on the band of the air tube at the front of the engine and you're good to go.
Last edited by Black Rose; 09-23-2007 at 09:35 PM. Reason: Fixed typos


 09-23-2007, 09:53 PM
#4
Member

Join Date: 08-29-2007
Location: New Berlin, WI
Posts: 34
09-23-2007, 10:44 PM
#5
Senior Member

Join Date: 08-16-2007
Location: North Dakota
Posts: 136
Wow! Outside of the $250.00 cost for the K&N/AiRaid cold air intake, it looks like it is almost as easy to replace the stock box with an aftermarket one. The bonus being that after you replace the stock unit, filter changes/cleaning becomes much easier for the life of the car.
That really gives me something to think about. Thanks for posting up on this BlackRose.
That really gives me something to think about. Thanks for posting up on this BlackRose.