


Back to Match- CJ's 2 Tone


Thread Starter
Deceased
Joined: 10-03-2005
Posts: 2,351
From: Sachse, TX NE Dallas
Back to Match- CJ's 2 Tone
back was easier.
1 used a butter knife to take off yellow part only.
2 then scraped off silicone (different than front) and 3M tape on side of back
3 then took a small vise grips and grabbed posts at base and twisted off- both
4 applied 3M to both base on back and inside the new blue bowtie
5 used a black dry erase marker to get the exact middle of each on top
6 kneeled and watched lines on bottom to make sure they line up and dots on top, lightly touched it together, no pressure, looked to see if straight then pushed all the way down all over to seat it

1 used a butter knife to take off yellow part only.
2 then scraped off silicone (different than front) and 3M tape on side of back
3 then took a small vise grips and grabbed posts at base and twisted off- both
4 applied 3M to both base on back and inside the new blue bowtie
5 used a black dry erase marker to get the exact middle of each on top
6 kneeled and watched lines on bottom to make sure they line up and dots on top, lightly touched it together, no pressure, looked to see if straight then pushed all the way down all over to seat it

Thread Starter
Deceased
Joined: 10-03-2005
Posts: 2,351
From: Sachse, TX NE Dallas
Originally Posted by KY Dave
Mine is blue, just like yours. I love that look. Where did you get them????




Senior Member
Joined: 12-18-2005
Posts: 1,791
From: Middle Village, NY
Looks great. I tried to get the gold bow tie off, before you posted instructions. Look what NOT to do:
[IMG]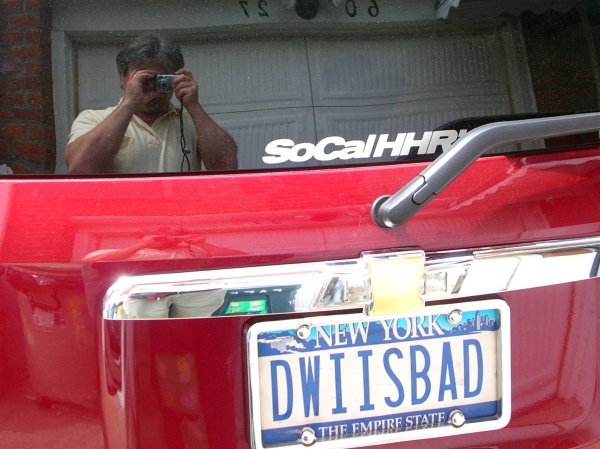 [/IMG]
What happened is I rushed. I got excited seeing how good yours was, and I tried to remove it with a screwdriver and no heat gun. Then, I had to take my son to a doctors appointment, so when I got home at 4, I was anxious to finish getting the pieces off. I applied heat and it came off great, but I decided to remove the base. Again, I rushed (bust my chops now, CH) and I removed the inside panal looking for the mounting nut. Once off, I began thinking again and realized there was no access there. So, I tried removing the hatch switch. Again, no access, so I went back to my trusty heat gun and got the base off. Now, I am left with a larger, nearly perfectly flat spot to work with. The only imperfections are 2 small post holes and one casting depression. I just picked up some spot putty, and as soon as I can break away from my wife and kids, will smooth it out then decide what to put there. My local parts stores had nothing. I may try a vinyl bowtie to match my flames (yellow) or reflective tape cut to fit.
[IMG]
[/IMG]What happened is I rushed. I got excited seeing how good yours was, and I tried to remove it with a screwdriver and no heat gun. Then, I had to take my son to a doctors appointment, so when I got home at 4, I was anxious to finish getting the pieces off. I applied heat and it came off great, but I decided to remove the base. Again, I rushed (bust my chops now, CH) and I removed the inside panal looking for the mounting nut. Once off, I began thinking again and realized there was no access there. So, I tried removing the hatch switch. Again, no access, so I went back to my trusty heat gun and got the base off. Now, I am left with a larger, nearly perfectly flat spot to work with. The only imperfections are 2 small post holes and one casting depression. I just picked up some spot putty, and as soon as I can break away from my wife and kids, will smooth it out then decide what to put there. My local parts stores had nothing. I may try a vinyl bowtie to match my flames (yellow) or reflective tape cut to fit.

Thread Starter
Deceased
Joined: 10-03-2005
Posts: 2,351
From: Sachse, TX NE Dallas
Originally Posted by Lee3333
That would be an idea. CJ-speak to me.
he has some negative comments but i called him, they took my card and got both out that day. was a nice transaction. he was only slow on answering one email.