


Is this my oil pan?


Thread Starter
Joined: 11-28-2009
Posts: 1
From: Rector, AR
Is this my oil pan?
i know this is a stupid question but i laid under my car for 30 minutes and turned and turned on this and it never budged so im just wonder is it? lol thanks
http://i808.photobucket.com/albums/z...9/100_1597.jpg
http://i808.photobucket.com/albums/z...9/100_1598.jpg
http://i808.photobucket.com/albums/z...9/100_1597.jpg
http://i808.photobucket.com/albums/z...9/100_1598.jpg


Senior Member
Joined: 05-19-2009
Posts: 124
From: Florida
Yes that is the oil pan drain in the images you linked to.
Are you using a six point 15mm socket ?
Oil Filters -
- GM - P/N: - 12605566 or (PF457G)
- Fram - P/N: - CH9018
- Napa - P/N: - FIL7082
- WIX - P/N: - 57082
- K & N- P/N: - K33HP7000
- Beck Arnley - P/N - 041-0810
- CAUTION heard the Purolator P/N L15436 collapses
- 1 1/4" SAE (or 32mm socket) for oil filter cannister lid
- 15mm socket (prefer 6 point) for drain plug
~~~~~~~~~~~~~~~~~~~~~~~~~~~~~~~~~~~~~~~
Posted by Solman98 9/11/2007
https://www.chevyhhr.net/forums/maintenance-upkeep-50/how-change-your-own-oil-10546/
How to change your own oil.
A lot ask how to do it, here's my method. Time, 30 minutes.
HHR Oil Change
This is on the 2006 2.2 motor. But should be the same for the 2.4. This is literally the easiest oil change I have ever done.
This oil had 6374 miles on it. The OLM was at 15%. This is what I do for MY oil changes, not yours. YMMV
Parts needed
A method of lifting the vehicle (ramps or stands)
5 quarts 5w-30 oil (your choice)
1 Filter (your choice)
15mm socket for the drain plug
32mm socket for the filter cap (yes there is an SAE socket for the cap, but I preferred the metric), extension is very helpful.
Drain pan
Rags
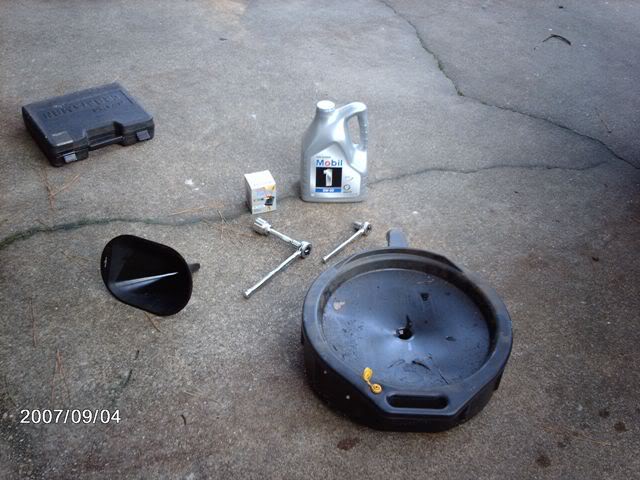
First of all, get the vehicle up in the air.
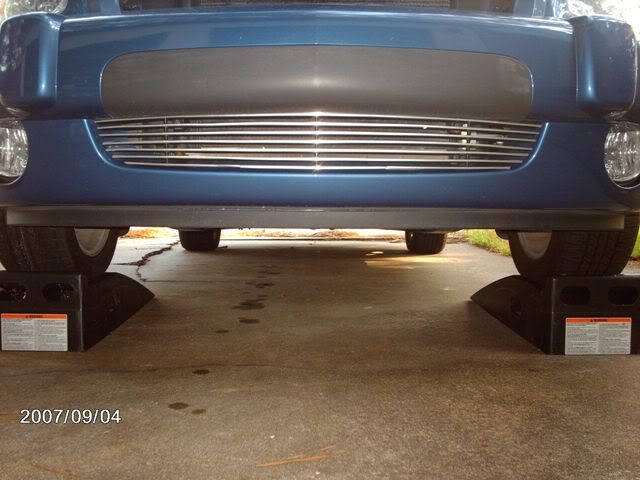
(The drips on the ground are from the A/C)
Locate drain plug under vehicle. It is on the passenger side. It take a 15mm socket. Place drain pan under before taking the bolt out.
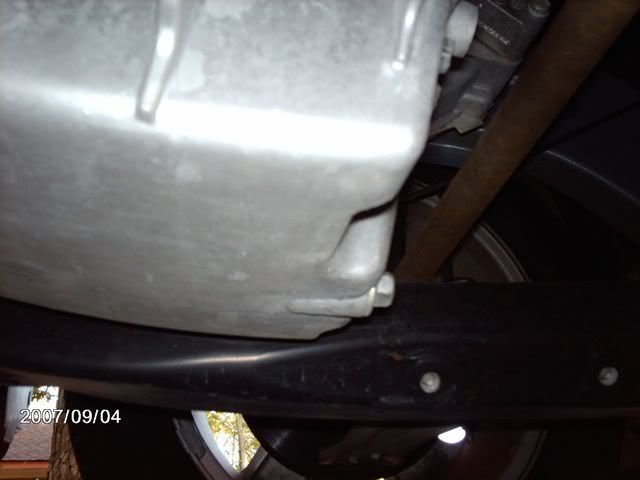
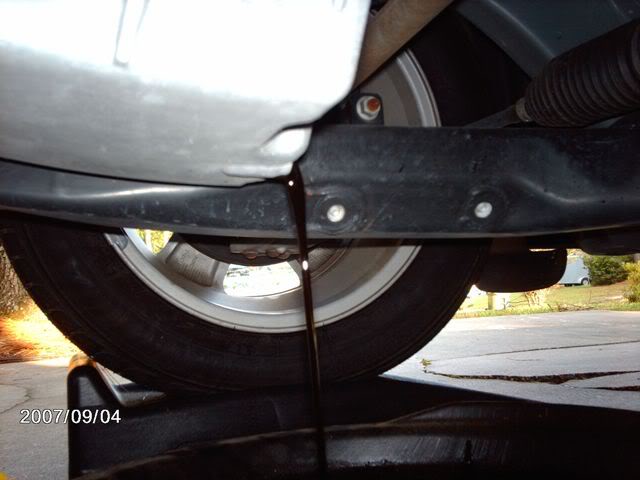
Once the oil is drained, put the plug back in. If you are using the old plug, I recommend wiping it down good. If you are using a new plug, be sure it has the correct gasket/washer. Then move the drain pan forward some. The position of the filter is great, you probably don’t need the drain pan there, but better safe than sorry.
Using the 32mm socket and extension, loosen the top of the oil filter cap. Once your “crack” the seal, you can unscrew the rest by hand. The filter comes out with the cap, they snap together.
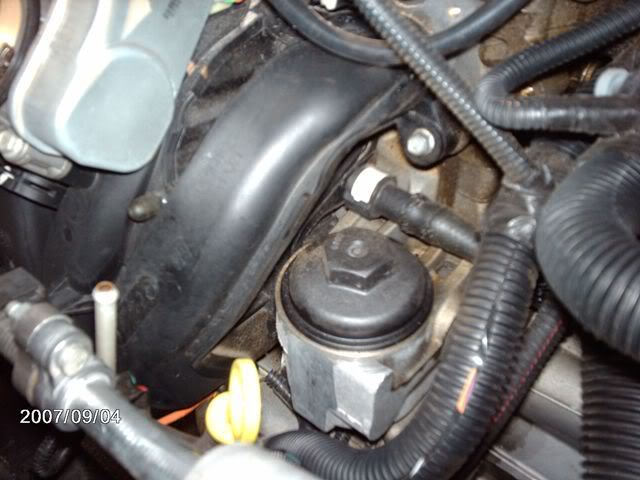
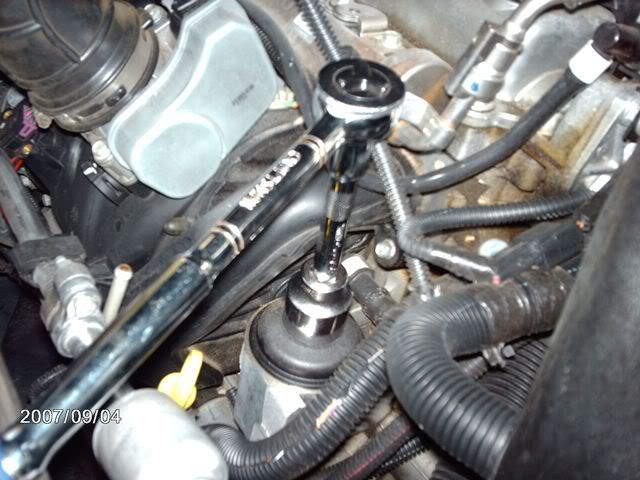
Here is look into the canister with the filter out.
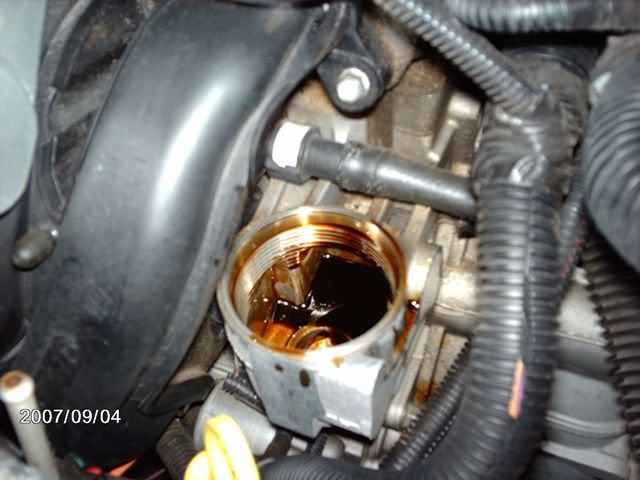
Place a rag under the filter and lift it out. I set mine on the drain pan so it can drain. Here is a shot of the two filters.

I know a lot of people get “alarmed” at the wrinkles in the old filter. Just remember that this filter has had oil flowing through it. You probably just never noticed it before since most filters you can’t see the elements inside.
Wipe the base of the cap off to make sure you didn’t get any dirt on it. Snap the new filter onto the cap and reinstall. You can tighten mostly by hand. I give it a good snug at the end to make sure it’s tight.
Wipe up any excess oil that may have dripped.
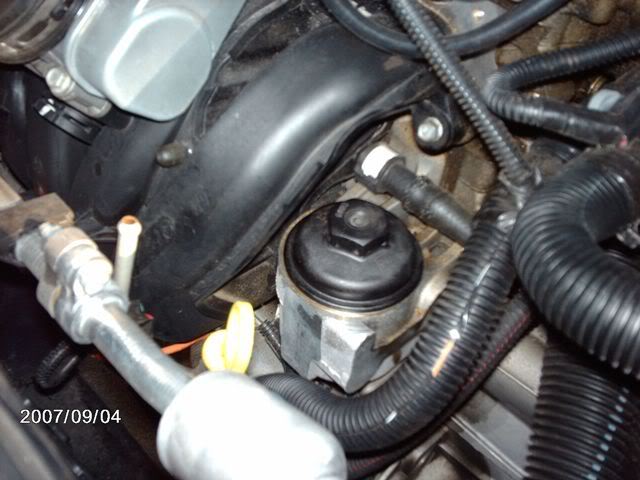
Take off the filler cap and put in 5 quarts of oil. You may want to only put in 4.5 quarts at first just in case you didn’t get a full drain. Then you can top off.
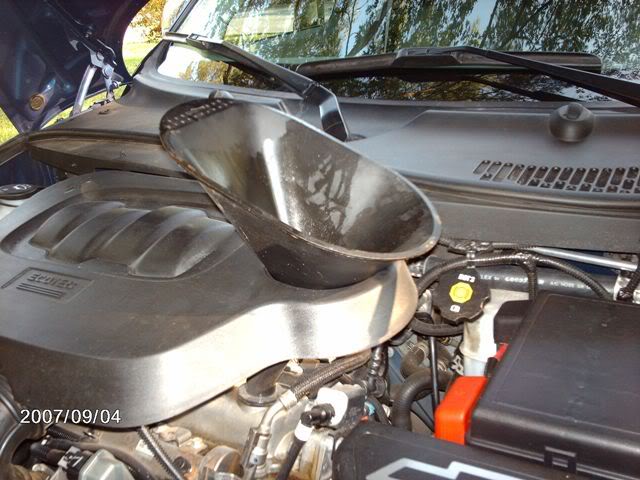
Start it up and let it run for a minute or two while you check for any leaks. If no leaks, pull down off the ramps/stands. Shut it down. After you clean up your tools and put things away. Check the oil level again. Top off as needed.
Are you using a six point 15mm socket ?
Oil Filters -
- GM - P/N: - 12605566 or (PF457G)
- Fram - P/N: - CH9018
- Napa - P/N: - FIL7082
- WIX - P/N: - 57082
- K & N- P/N: - K33HP7000
- Beck Arnley - P/N - 041-0810
- CAUTION heard the Purolator P/N L15436 collapses
- 1 1/4" SAE (or 32mm socket) for oil filter cannister lid
- 15mm socket (prefer 6 point) for drain plug
~~~~~~~~~~~~~~~~~~~~~~~~~~~~~~~~~~~~~~~
Posted by Solman98 9/11/2007
https://www.chevyhhr.net/forums/maintenance-upkeep-50/how-change-your-own-oil-10546/
How to change your own oil.
A lot ask how to do it, here's my method. Time, 30 minutes.
HHR Oil Change
This is on the 2006 2.2 motor. But should be the same for the 2.4. This is literally the easiest oil change I have ever done.
This oil had 6374 miles on it. The OLM was at 15%. This is what I do for MY oil changes, not yours. YMMV
Parts needed
A method of lifting the vehicle (ramps or stands)
5 quarts 5w-30 oil (your choice)
1 Filter (your choice)
15mm socket for the drain plug
32mm socket for the filter cap (yes there is an SAE socket for the cap, but I preferred the metric), extension is very helpful.
Drain pan
Rags
First of all, get the vehicle up in the air.
(The drips on the ground are from the A/C)
Locate drain plug under vehicle. It is on the passenger side. It take a 15mm socket. Place drain pan under before taking the bolt out.
Once the oil is drained, put the plug back in. If you are using the old plug, I recommend wiping it down good. If you are using a new plug, be sure it has the correct gasket/washer. Then move the drain pan forward some. The position of the filter is great, you probably don’t need the drain pan there, but better safe than sorry.
Using the 32mm socket and extension, loosen the top of the oil filter cap. Once your “crack” the seal, you can unscrew the rest by hand. The filter comes out with the cap, they snap together.
Here is look into the canister with the filter out.
Place a rag under the filter and lift it out. I set mine on the drain pan so it can drain. Here is a shot of the two filters.
I know a lot of people get “alarmed” at the wrinkles in the old filter. Just remember that this filter has had oil flowing through it. You probably just never noticed it before since most filters you can’t see the elements inside.
Wipe the base of the cap off to make sure you didn’t get any dirt on it. Snap the new filter onto the cap and reinstall. You can tighten mostly by hand. I give it a good snug at the end to make sure it’s tight.
Wipe up any excess oil that may have dripped.
Take off the filler cap and put in 5 quarts of oil. You may want to only put in 4.5 quarts at first just in case you didn’t get a full drain. Then you can top off.
Start it up and let it run for a minute or two while you check for any leaks. If no leaks, pull down off the ramps/stands. Shut it down. After you clean up your tools and put things away. Check the oil level again. Top off as needed.
i know this is a stupid question but i laid under my car for 30 minutes and turned and turned on this and it never budged so im just wonder is it? lol thanks http://i808.photobucket.com/albums/z...9/100_1597.jpg
http://i808.photobucket.com/albums/z...9/100_1598.jpg
http://i808.photobucket.com/albums/z...9/100_1598.jpg
Last edited by unique_w; Nov 30, 2009 at 07:54 AM. Reason: tag error

Senior Member
Joined: 07-05-2008
Posts: 5,464
From: Akron Ohio
i know this is a stupid question but i laid under my car for 30 minutes and turned and turned on this and it never budged so im just wonder is it? lol thanks
http://i808.photobucket.com/albums/z...9/100_1597.jpg
http://i808.photobucket.com/albums/z...9/100_1598.jpg
http://i808.photobucket.com/albums/z...9/100_1597.jpg
http://i808.photobucket.com/albums/z...9/100_1598.jpg


Senior Member
Joined: 12-24-2008
Posts: 717
From: N/A
Unique, Oh, sorry Solman98
Great "how to". The only thing I would add is to replace the filter while the oil is draining. Saves time. And I don't bother with the ramps; enough room, once you know where things are and it will drain a little more being level.
Great "how to". The only thing I would add is to replace the filter while the oil is draining. Saves time. And I don't bother with the ramps; enough room, once you know where things are and it will drain a little more being level.


Senior Member
Joined: 08-06-2008
Posts: 1,761
From: Grand Haven, MI
^^ X2, that was a great write up! Even a cave man could follow those instructions!

Joined: 02-17-2012
Posts: 2
From: Ohio
Oil Change
As always I was able to come in here and look up where to locate oil pan and steps to changing the oil. I was giving in one post the tools need and then pictures showing oil pan and how to replace the cartridge. I just love this site.
You are all so wonderful, with the time and effort, step by step.. I can't thank you all enough for this site. You have gave me everything on changing headlights and now the oil...
You are all so wonderful, with the time and effort, step by step.. I can't thank you all enough for this site. You have gave me everything on changing headlights and now the oil...

Platinum Member
Joined: 01-09-2007
Posts: 16,081
From: SE USA
Oil Change
PS: I always wipe some new oil over the Big 0-ring on the oil filter cap, this prevents it from possibly getting chaffed during install...
Plus I always wind the cap down by hand (can't cross thread it easily that way) then snug it down with rachet/extension & socket...
Plus I always wind the cap down by hand (can't cross thread it easily that way) then snug it down with rachet/extension & socket...