


Road Ripper Panelwagon








Senior Member
Joined: 12-28-2005
Posts: 2,531
From: Worcester County, MA
Awesome job! 
Now, the Road Rippers I have seen have buttons on the roof. Short of borrowing a straight razor from Captain Howdy, how did you shave them off??
PS - About the avatar..yep I used to play before my heart attacks. And for the big question: "What does a Scotsman wear under a kilt? Why shoes and socks of course!"
Now, the Road Rippers I have seen have buttons on the roof. Short of borrowing a straight razor from Captain Howdy, how did you shave them off??
PS - About the avatar..yep I used to play before my heart attacks. And for the big question: "What does a Scotsman wear under a kilt? Why shoes and socks of course!"

Senior Member
Joined: 10-24-2005
Posts: 426
From: Atlanta
Originally Posted by Firewatcher
Awesome job!
Now, the Road Rippers I have seen have buttons on the roof. Short of borrowing a straight razor from Captain Howdy, how did you shave them off??
PS - About the avatar..yep I used to play before my heart attacks. And for the big question: "What does a Scotsman wear under a kilt? Why shoes and socks of course!"
Now, the Road Rippers I have seen have buttons on the roof. Short of borrowing a straight razor from Captain Howdy, how did you shave them off??
PS - About the avatar..yep I used to play before my heart attacks. And for the big question: "What does a Scotsman wear under a kilt? Why shoes and socks of course!"
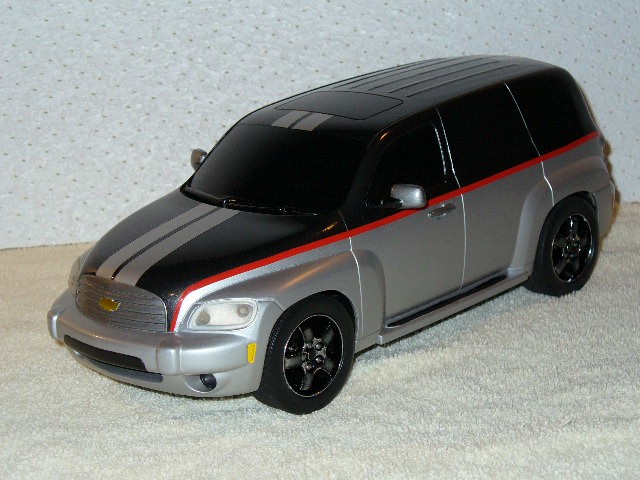
The hardest part and the most time consuming were the rear windows, it took about two (2) weeks of sanding and filling to get them up to the point I felt comfortable with.
The buttons are actually glued and sanded down in place and filled. Then the strips are applied and blended in, sorta where the original ones were.
I also removed the roof rails, and of course the rear door handles.
The body is lowered 0.040 in., and I experimented with a Black Chrome type thing. (Not sure if it came off quite right.)
It definitely takes time, but it helps keep me out of mischief... B/B
Senior Member
Joined: 10-24-2005
Posts: 426
From: Atlanta
Originally Posted by Firewatcher
Still haven't seen the original post, but thanks for the info. Man, what a lot of hard work and it came out FANTASTIC! 
Been watching too many fires there, page 1 of this thread, 5-6 comments down, not his orginal post, but a reply!!!
Glad to help!!!




Thread Starter
Senior Member
Joined: 05-13-2006
Posts: 2,334
From: Chicago,IL
Thanx everyone for the compliments and words of encouragement. I picked up a "Virgin" Ripper today, and I`m looking for/thinking of a new project...
I hope each time I get better, maybe one day we can have a Ripper Showdown..
Posted a couple more pics, The Cruck Bros. and Newbee..
A mini Run. Thanx again, B/B
I hope each time I get better, maybe one day we can have a Ripper Showdown..
Posted a couple more pics, The Cruck Bros. and Newbee..
A mini Run. Thanx again, B/B