


Dash hackery. What's going on here?


Senior Member
Joined: 01-02-2009
Posts: 154
From: missouri
may i add a suggestion to your cig plug ? i know on my cobalt down by the pass leg area is a plug there maybe look into that ? just throwing out that to you by the way damn good job sofar i cant wait to see finished product

Thread Starter
Senior Member
Joined: 05-06-2008
Posts: 1,076
From: Over here
This morning I pulled all the harnesses in the center section of the dash free so I could work on them in relative comfort. After some additional head-scratching, I've decided to get rid of the dimmer and the airbag/seatbelt indicator altogether, and put the flasher switch out of sight under the dash. That way, I can still have flashers in the event I really need them. I also relocated the 2 round switches (TC/ESC and fog lights) down to the bottom of the panel (where I WAS going to put the flasher). This really cleans up the look of the panel quite a bit, and leaves the lighter socket in the stock location... as I said before, I can't imagine needing it, but it does add balance to the bottom part of the panel, and people expect to see one, so it's good visually.). I stretched the 3 wires for the fog light plug and the 3 wires for the TC/ESC plug using same-color wires, soldered, and heat shrink, then wrapped it into a nice bundle with electrical tape and fed it down behind the radio and A/C pocket, and out where the switches will now be. All the other harness that I'm no longer going to use (mentioned above) were bundled up nice and neat with wire ties and left behind the dash intact. Nothing worth taking a pic of... I'm now waiting on the gauges to arrive so I can final fit them before doing the finish work on the bezel itself.

Thread Starter
Senior Member
Joined: 05-06-2008
Posts: 1,076
From: Over here
Finally got a chance to work on the dash bezel a little more. I've got the center section finished, AC vents back in, and am now waiting on the new gauges to arrive. I think I'll pop it back in the car so I can look at it while I'm driving to work tomorrow 


Thread Starter
Senior Member
Joined: 05-06-2008
Posts: 1,076
From: Over here
Dash hackery, part deux.
I've had some small pockets of time to start on dash bezel #2. I spent a lot of time working on an alternate configuration for the gauges, but ultimately realized I was second-guessing myself from my original idea. However, I didn't want to simply repeat what I had before, so this one has some slight changes. I didn't take any progress pics until the ones below... but the basic method was the same. Plug all holes with plastic, plastic welding, and then epoxy to get a "blank slate" to work with. From there, I added some ABS plumbing fittings that I first modified to hold the gauges at the proper location. Once those were welded/epoxied in, it was filler time... I've got one solid coat, and one touch-up coat on there now. It's time to lay down a guide coat of primer so I can make sure my curves and transitions are symmetrical. The curvature is very hard to see without a solid primer coat on there because the colors throw the eye off.
Oh, the chrome bezels were snatched from a couple of HHR IP clusters. It's the chrome trim around the tachometer, and it's a pretty nice fit as is. I will need to do some minor grinding on the backside to finalize the fitting.
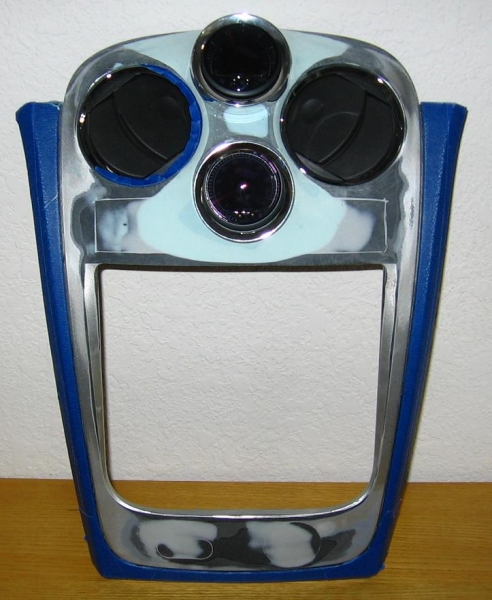
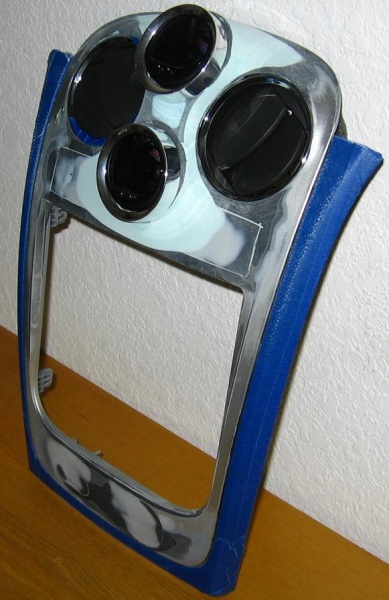
I don't like how far the gauges stick out into space, so I'll be reworking their depth, and thinning down the chrome trim rings so they don't stand up so far.
I've had some small pockets of time to start on dash bezel #2. I spent a lot of time working on an alternate configuration for the gauges, but ultimately realized I was second-guessing myself from my original idea. However, I didn't want to simply repeat what I had before, so this one has some slight changes. I didn't take any progress pics until the ones below... but the basic method was the same. Plug all holes with plastic, plastic welding, and then epoxy to get a "blank slate" to work with. From there, I added some ABS plumbing fittings that I first modified to hold the gauges at the proper location. Once those were welded/epoxied in, it was filler time... I've got one solid coat, and one touch-up coat on there now. It's time to lay down a guide coat of primer so I can make sure my curves and transitions are symmetrical. The curvature is very hard to see without a solid primer coat on there because the colors throw the eye off.
Oh, the chrome bezels were snatched from a couple of HHR IP clusters. It's the chrome trim around the tachometer, and it's a pretty nice fit as is. I will need to do some minor grinding on the backside to finalize the fitting.
I don't like how far the gauges stick out into space, so I'll be reworking their depth, and thinning down the chrome trim rings so they don't stand up so far.

Senior Member
Joined: 01-13-2008
Posts: 4,708
From: Washington State, where it rains
TAKE THE UPPER gage and level it with the pvc, instead of letting it angle up....match the lower one.. or maybe angle them left so the driver has a direct view, like the old 280z's ( I think)
Thread Starter
Senior Member
Joined: 05-06-2008
Posts: 1,076
From: Over here
Latest pics of "Part Deux"
I've tamed down the projection of the gauges quite a bit. However, I'm going to trim down the chrome rings still more (maybe as much as another 3/16"). I don't want these to get too thin, however, because they're supposed to tie back in visually to the tachometer trim ring (that is, of course, where they came from). But, at their current height, they still project off too high from the waterfall, especially when compared to the chrome trim rings on the AC vents, which are practically non-existent). Getting closer.
Also, I've got a paint shop trying to work out a paint solution for me. I'm in CA, where you simply can't buy "normal" paint any more. And the waterborne paints are too new for people to have gotten a good hang of mixing for low sheen. Back in the old days, you just glop in some flattening agent and stir it into the paint (or the clearcoat). The paint guys I've been taking to say there is no such method for the waterborne paint as of yet... and this is impacting their collission/theft work when someone comes in with a broken dash panel, and GM (or whoever) only stocks the generic "gray" panel that must be painted... painted with what???
BTW, I was scanning the thread and didn't immediately see a reference to the gauges... this will give me realtime, mechanical (as in measured, not read from CAN BUS) AFR and EGT.
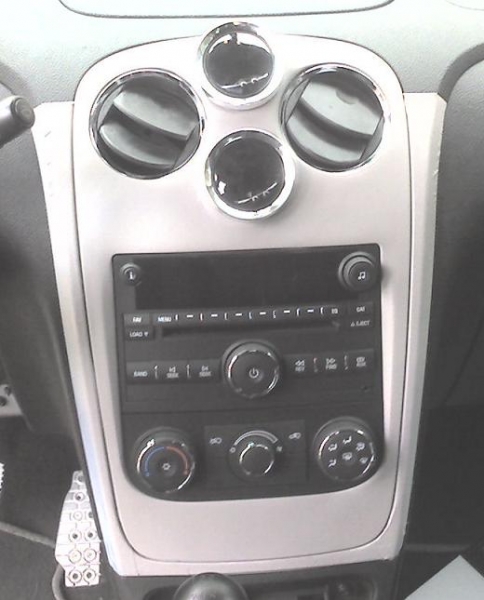
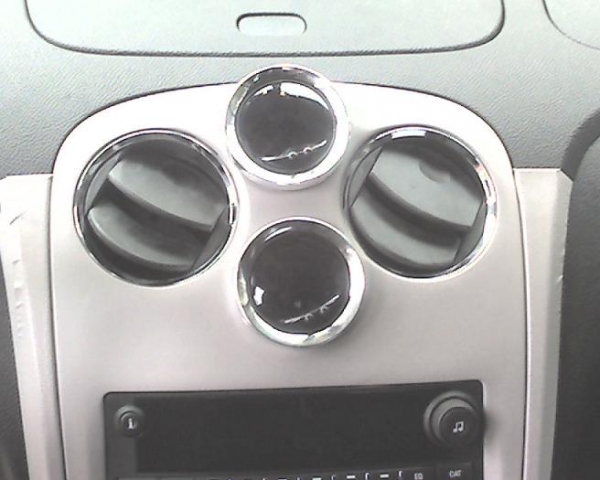
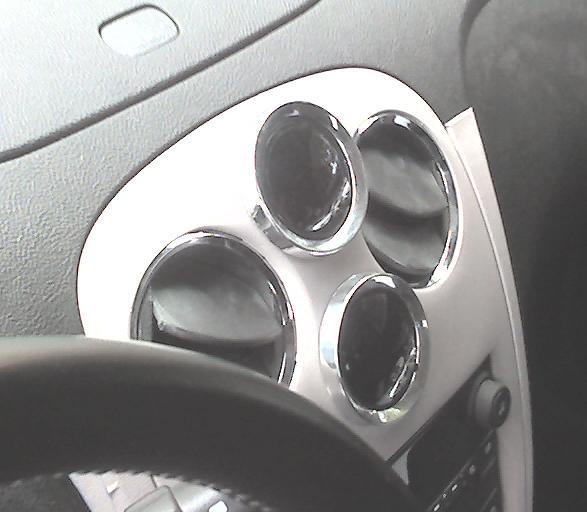
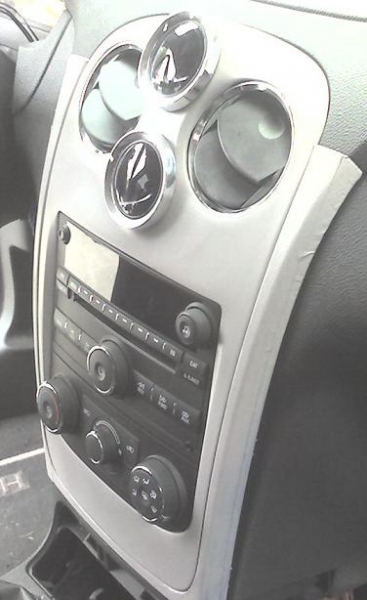
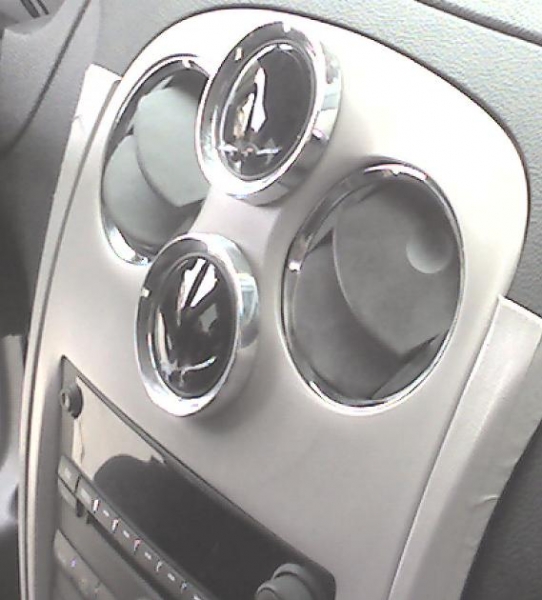
I've tamed down the projection of the gauges quite a bit. However, I'm going to trim down the chrome rings still more (maybe as much as another 3/16"). I don't want these to get too thin, however, because they're supposed to tie back in visually to the tachometer trim ring (that is, of course, where they came from). But, at their current height, they still project off too high from the waterfall, especially when compared to the chrome trim rings on the AC vents, which are practically non-existent). Getting closer.
Also, I've got a paint shop trying to work out a paint solution for me. I'm in CA, where you simply can't buy "normal" paint any more. And the waterborne paints are too new for people to have gotten a good hang of mixing for low sheen. Back in the old days, you just glop in some flattening agent and stir it into the paint (or the clearcoat). The paint guys I've been taking to say there is no such method for the waterborne paint as of yet... and this is impacting their collission/theft work when someone comes in with a broken dash panel, and GM (or whoever) only stocks the generic "gray" panel that must be painted... painted with what???
BTW, I was scanning the thread and didn't immediately see a reference to the gauges... this will give me realtime, mechanical (as in measured, not read from CAN BUS) AFR and EGT.

