
Remove Front Bumper and Swap Headlights


Thread Starter
Senior Member
Joined: 01-04-2010
Posts: 1,584
From: Imported from Detroit
Remove Front Bumper and Swap Headlights
I used 1Panel2NV's "How to paint your headlights" as a great guideline. I will expand on that.
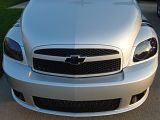
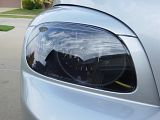
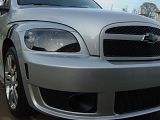
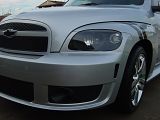
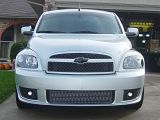
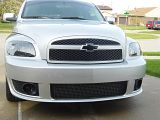
I didn't like the stock look
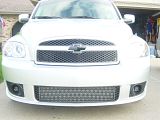

So I put the 3M tinted protective film on the headlights. However, that not only cuts down on my light output, it wasn't the final direction I wanted to go.

Pop your hood and remove the two 7mm bolts on each side of the radiator.
Remove the 7mm bolt from each wheel well
Now remove the 4 push pin clips on each side (2 under & 2 in each wheel well) as shown here by 1Panel2NV's pic
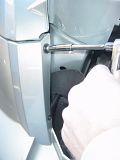
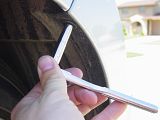
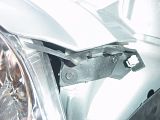
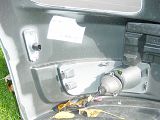
CAREFULLY pull the bumper from the wedge clips on both sides of the headlight. One above each wheel and one right next/above the 2 bolts you removed by the radiator. This requires small tools to help, maybe some tape to protect the paint.
Here's what you are looking at
Passenger Side
above wheel
next to radiator (in front)
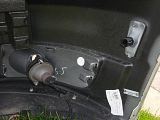
Drivers side
above wheel
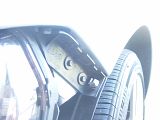
next to radiator (in front)

I didn't like the stock look


So I put the 3M tinted protective film on the headlights. However, that not only cuts down on my light output, it wasn't the final direction I wanted to go.


Pop your hood and remove the two 7mm bolts on each side of the radiator.

Remove the 7mm bolt from each wheel well

Now remove the 4 push pin clips on each side (2 under & 2 in each wheel well) as shown here by 1Panel2NV's pic

CAREFULLY pull the bumper from the wedge clips on both sides of the headlight. One above each wheel and one right next/above the 2 bolts you removed by the radiator. This requires small tools to help, maybe some tape to protect the paint.
Here's what you are looking at
Passenger Side
above wheel

next to radiator (in front)

Drivers side
above wheel

next to radiator (in front)

Thread Starter
Senior Member
Joined: 01-04-2010
Posts: 1,584
From: Imported from Detroit
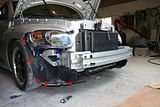
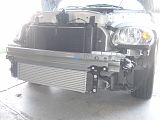
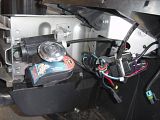
Then you have a bumperless HHR
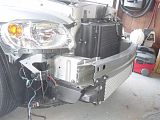
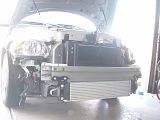
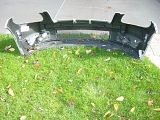
Said bumper off car

I can now see my HID ballasts and my Wolo Horn

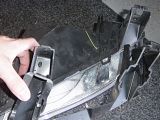
Remove the two 10mm bolts holding your headlights in
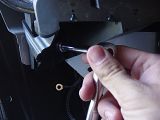
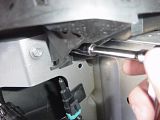
Firmly grasp the headlight and pull downwards to release the clips in these slats. Once released unplug your turn signal and headlight bulbs.
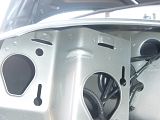
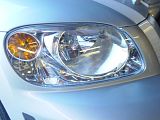
You have your two headlights for swapping
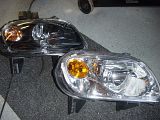
You must remove the bracket from your stock light and reuse on your new light. It simply unhooks.
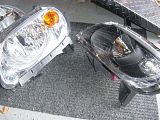
Hook up the headlight and turn signal bulbs, slide the new light into place and snap in. Then replace the two 10mm bolts holding the light in place.


Said bumper off car


I can now see my HID ballasts and my Wolo Horn


Remove the two 10mm bolts holding your headlights in


Firmly grasp the headlight and pull downwards to release the clips in these slats. Once released unplug your turn signal and headlight bulbs.

You have your two headlights for swapping

You must remove the bracket from your stock light and reuse on your new light. It simply unhooks.

Hook up the headlight and turn signal bulbs, slide the new light into place and snap in. Then replace the two 10mm bolts holding the light in place.

Thread Starter
Senior Member
Joined: 01-04-2010
Posts: 1,584
From: Imported from Detroit
Repeat swap on other side
Reinstall your your front bumper. That part is really easy. Then enjoy your headlight swap or upgrade or whatever else you did.
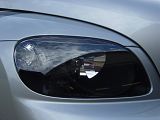


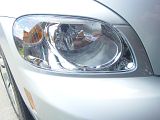
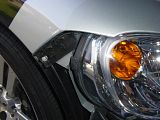
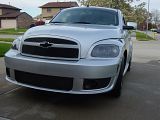
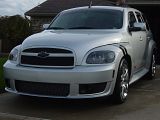
Nice shot of my non-amber covered LED towers
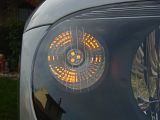
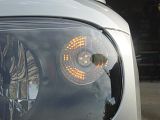
Like McD's I'm Luvin It!

Reinstall your your front bumper. That part is really easy. Then enjoy your headlight swap or upgrade or whatever else you did.


Nice shot of my non-amber covered LED towers


Like McD's I'm Luvin It!


 ! We actually think they look nicer than our fall editions
  !
! ,
,
Thread Starter
Senior Member
Joined: 01-04-2010
Posts: 1,584
From: Imported from Detroit
I don't think it is. Compare my thread to the paint headlight thread. The only difference I saw was the size of the bolts on the side of the radiator.
As far as the DEPO lights, I like em so far. They are exactly what I wanted. Further, with the sale of my stocks, I can help others get here as well.

