How to repair worn clutch pedal arm


Thread Starter
Moderator
Joined: 05-01-2014
Posts: 8,509
From: California
How to repair worn clutch pedal arm
This repair was done on my 2009 SS, not sure if non-SS is the same.
Many of us with manual transmissions have experienced the problem of a broken clutch pedal return spring. So we buy the spring kit and replace all the old worn and broken parts with the new. Pretty easy job, doesn't take very long, the hard part is working on your side or back under the driver's side dash.
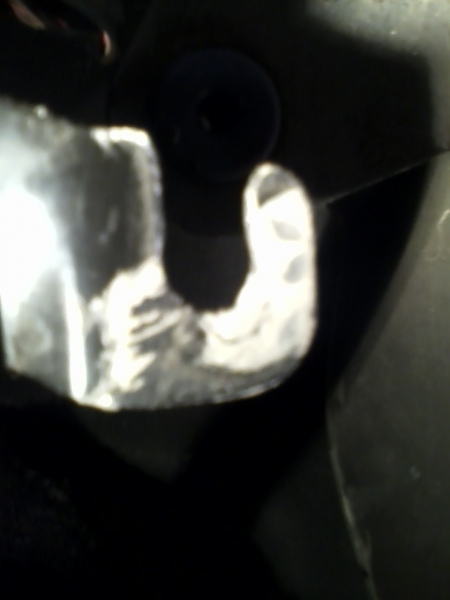
The spring sits horizontally in 2 end bushings and crosses the clutch pedal arm snapping into a center bushing. My center bushing was cracked, and when I went to replace all the parts I found that the spring had worn a groove in the arm:

I knew that if I just slapped all the new parts in, that the new spring would quickly crack the new bushing with no material backing it up.
Perhaps I should note that the original spring was NOT broken. Car had a little over 70,000 miles, and the clutch pedal was not fully returning to the high position.
I decided that since I had some JB Weld, I would give that a try. Mixed a small amount up and slathered it on the arm. I would suggest putting something to cover the carpet or mats from drips. Once it sets, repeat as necessary to fill the groove.
Now you must carefully file off the excess JB Weld until the center bushing clips in nicely. Here is the arm after filing:
I did this repair a year and a half and about 15,000 miles ago and the new bushing is not cracked.
Again, the spring on my car was NOT broken, so if your spring has not yet been replaced, you may want to take a look at it before it starts misbehaving. This is my first how-to, not much to it, hope it helps someone.
Many of us with manual transmissions have experienced the problem of a broken clutch pedal return spring. So we buy the spring kit and replace all the old worn and broken parts with the new. Pretty easy job, doesn't take very long, the hard part is working on your side or back under the driver's side dash.
The spring sits horizontally in 2 end bushings and crosses the clutch pedal arm snapping into a center bushing. My center bushing was cracked, and when I went to replace all the parts I found that the spring had worn a groove in the arm:
I knew that if I just slapped all the new parts in, that the new spring would quickly crack the new bushing with no material backing it up.
Perhaps I should note that the original spring was NOT broken. Car had a little over 70,000 miles, and the clutch pedal was not fully returning to the high position.
I decided that since I had some JB Weld, I would give that a try. Mixed a small amount up and slathered it on the arm. I would suggest putting something to cover the carpet or mats from drips. Once it sets, repeat as necessary to fill the groove.
Now you must carefully file off the excess JB Weld until the center bushing clips in nicely. Here is the arm after filing:
I did this repair a year and a half and about 15,000 miles ago and the new bushing is not cracked.
Again, the spring on my car was NOT broken, so if your spring has not yet been replaced, you may want to take a look at it before it starts misbehaving. This is my first how-to, not much to it, hope it helps someone.