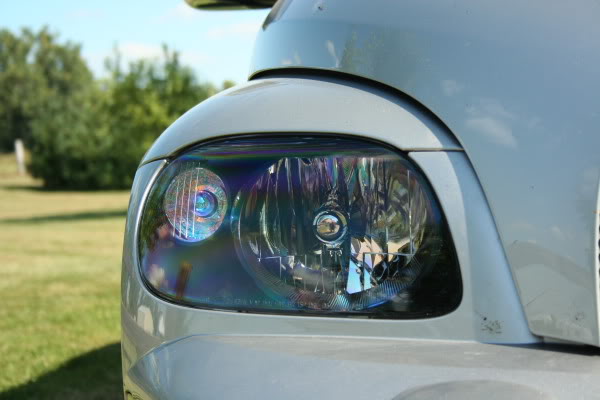
How to Paint Your Headlights
 08-21-2008, 08:43 PM
#1
Senior Member
Thread Starter

Join Date: 06-16-2007
Location: Illinois
Posts: 1,259
How to Paint Your Headlights
Difficulty: 7 out of 10
Time: At least a week
Cost: ~$250 or more
*Note: I used TYC headlights, not GM, so there may be small differences.
Materials (Most of these items can be found at any auto parts store)
Spare headlights (highly recommended)
10mm ratchet with extension
Flathead and phillips screwdrivers
Needle nose pliers
320 grit sandpaper
Steel wool
Paint (I used Duplicolor gloss black and clear coat)
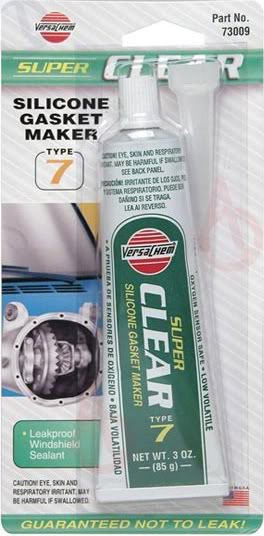
Sealant (I used 2 tubes of VersaChem clear silicone gasket maker)
Optional
Adhesion promotor/plastic primer (I used Duplicolor)
Painters tape
Turn signal bulbs (3157)
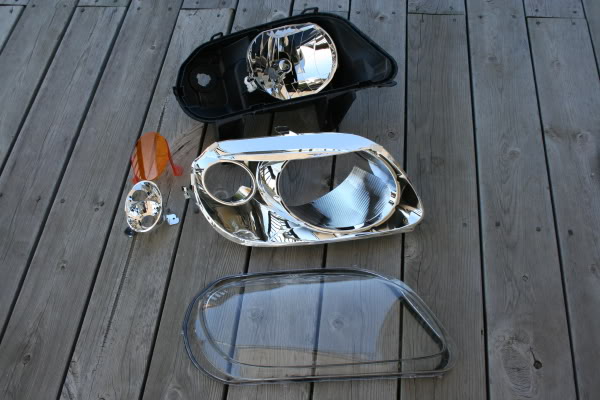
Step 1: Headlight disassembly
Start by removing the bulbs, the rubber around the headlight socket, and the vents. Put the headlight in the oven at about 200-250 degrees for 20-30 minutes. Then use a flathead screwdriver to carefully pry it apart. You'll likely need to reheat it several times. When taking the headlight apart, remember that you're only trying to get the clear cover off first. The chrome piece is held in with four phillips head screws which you can't get to until the cover is off. Also don't forget to unsnap the five tabs around the headlight once it starts coming apart.
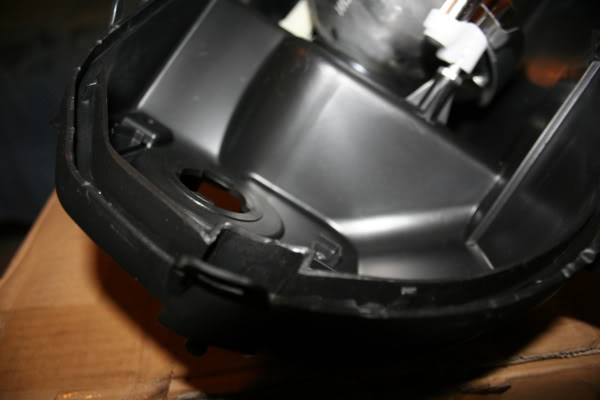
Depending on what what brand your headlights are, the sealant will be different. I found the best way to get the sealant off the TYC headlights was to use a heat gun and needle nose pliers. Heat up a section of the sealant then grab it with the pliers and rotate them so the sealant wraps around pliers. Try and get as much off as you can to help the headlight seal back together.
Step 2: Painting
If you want, you can tape off any areas you want to keep chrome. I ended up painting the whole thing because the masking tape pulled the chrome off. Whatever you decide to do, remove as much of the unmasked chrome as you can with the sandpaper and steel wool. At this point it's pretty much up to you as far as what you want to do (paint color, gloss or flat, etc.). Once the headlights are painted, let them sit for about a week to make sure they're cured as I believe this is the main cause of fogging.
Step 3: Reassembly
If you choose to not use the amber cover for the turn signal you will need amber or Silverstar turn signal bulbs and you'll need to use shorter screws or spacers. Otherwise, the turn signal housing will be loose. I broke the feet off the amber pace to use as spacers. Once you have the newly painted piece screwed in, run a bead of sealant around the housing and press the clear cover back in place. After the cover is back on, run another bead between it and the housing to be sure there is a good seal. Reinstall the rubber vents and the seal around the headlight socket. The rubber vents on mine were glued on, so glued them before putting them back. Let it set for 24 hours without bulbs installed so the vapors from the sealant aren't trapped in the headlight.
Step 4: Installing the Headlights
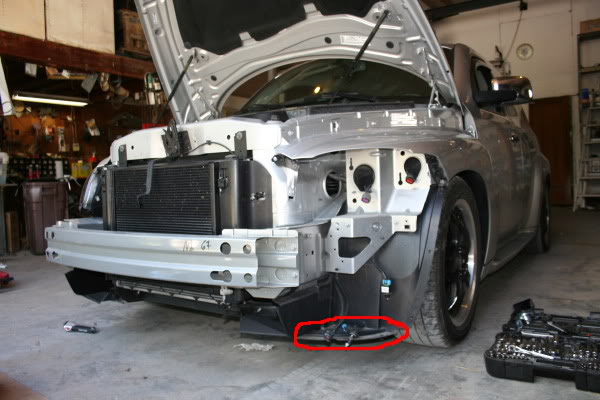
Start by removing the bolt and two plastic fasteners from each wheel well. Next, disconnect the fog lights and parking lights (should be able to reach though wheel well). There are also two plastic fasteners under each side of the bumper cover. (Red)
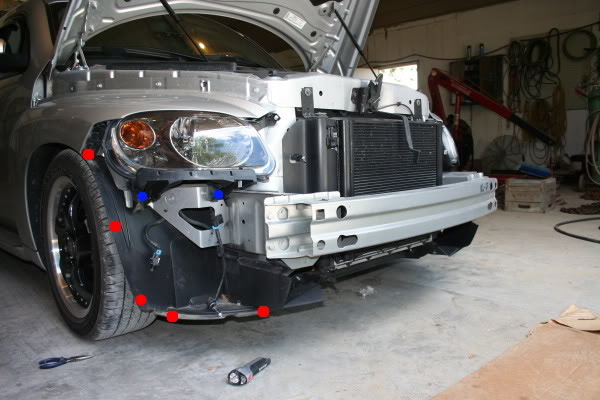
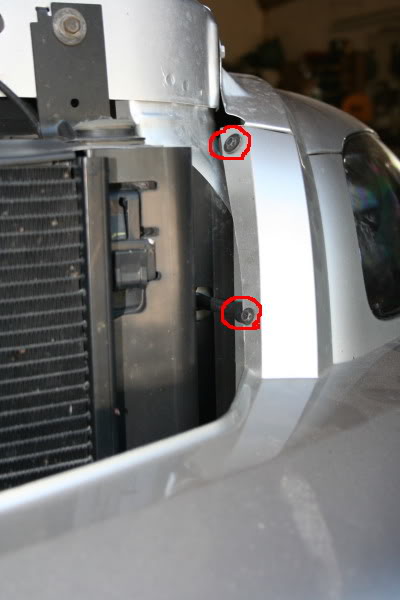
There are also two 10mm bolts on both sides of the radiator
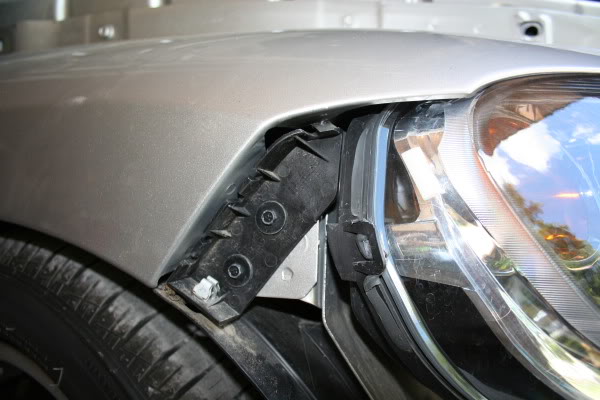
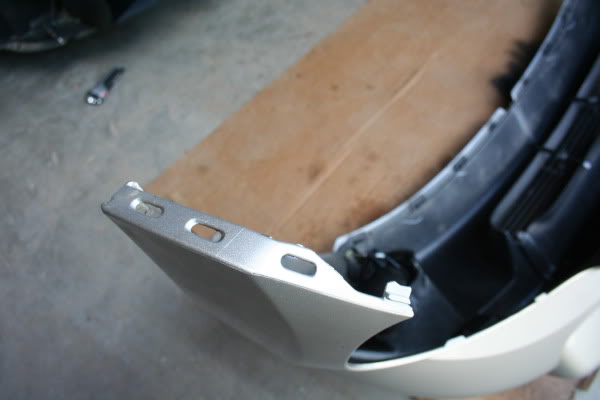
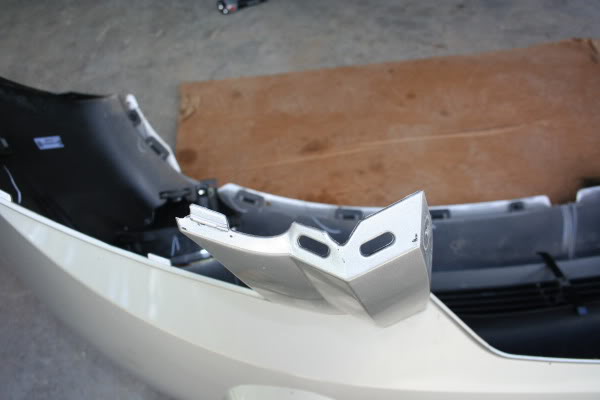
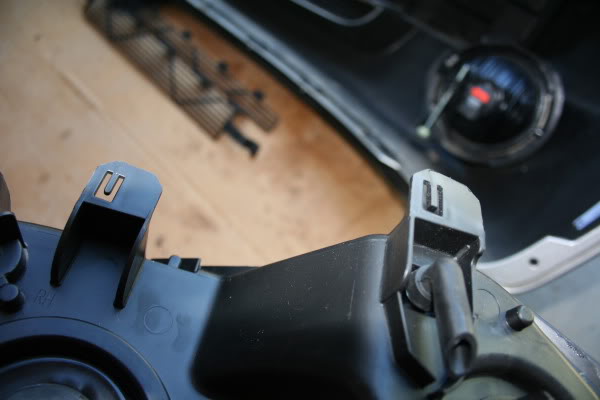
Now the trickiest part. The bumper cover clips on both sides of the headlights. You may be able to pull up and out or you may have to use a small screwdriver to press the tabs down. Pictures will probably help the most here.
Left side of passenger headlight
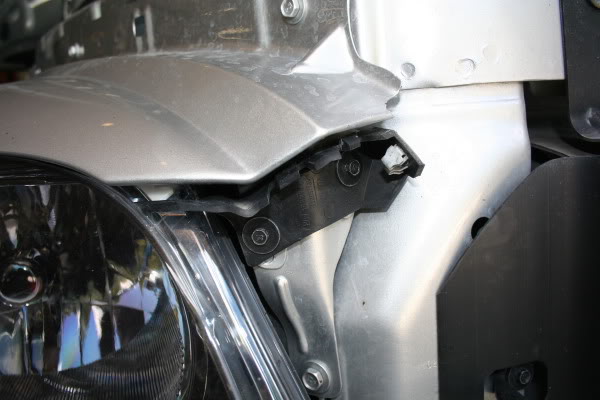
Right side of passenger headlight
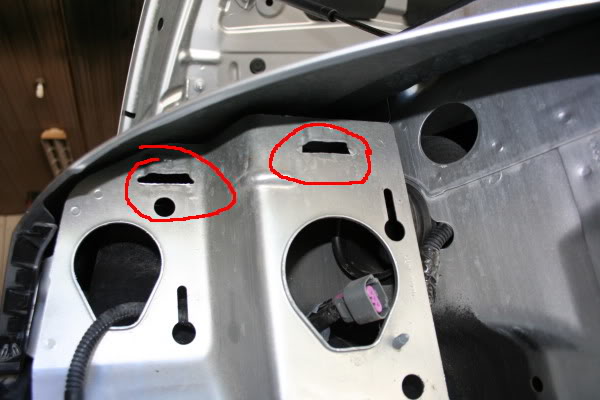
Once the cover is off take out the 10mm bolts on each headlight.(Blue) You should be able to pull the headlight out enough to disconnect the lights. You may need to unbolt the horn, also 10mm, to get to the drivers side headlight.
Transfer the headlight mount to the new headlights (Didn't get a picture, but it just clips on). When you put the new headlights back in, reattach the lights and make sure the tabs go into the slots then bolt them back on. Don't forget about the horn.
When you're lining the bumper cover up, make sure the bottom of the wheel well is below the cover or it won't line up right.
After you get the cover back on, put all the bolts and plastic fasteners back in place and enjoy your new headlights.
Time: At least a week
Cost: ~$250 or more
*Note: I used TYC headlights, not GM, so there may be small differences.
Materials (Most of these items can be found at any auto parts store)
Spare headlights (highly recommended)
10mm ratchet with extension
Flathead and phillips screwdrivers
Needle nose pliers
320 grit sandpaper
Steel wool
Paint (I used Duplicolor gloss black and clear coat)
Sealant (I used 2 tubes of VersaChem clear silicone gasket maker)
Optional
Adhesion promotor/plastic primer (I used Duplicolor)
Painters tape
Turn signal bulbs (3157)
Step 1: Headlight disassembly
Start by removing the bulbs, the rubber around the headlight socket, and the vents. Put the headlight in the oven at about 200-250 degrees for 20-30 minutes. Then use a flathead screwdriver to carefully pry it apart. You'll likely need to reheat it several times. When taking the headlight apart, remember that you're only trying to get the clear cover off first. The chrome piece is held in with four phillips head screws which you can't get to until the cover is off. Also don't forget to unsnap the five tabs around the headlight once it starts coming apart.
Depending on what what brand your headlights are, the sealant will be different. I found the best way to get the sealant off the TYC headlights was to use a heat gun and needle nose pliers. Heat up a section of the sealant then grab it with the pliers and rotate them so the sealant wraps around pliers. Try and get as much off as you can to help the headlight seal back together.
Step 2: Painting
If you want, you can tape off any areas you want to keep chrome. I ended up painting the whole thing because the masking tape pulled the chrome off. Whatever you decide to do, remove as much of the unmasked chrome as you can with the sandpaper and steel wool. At this point it's pretty much up to you as far as what you want to do (paint color, gloss or flat, etc.). Once the headlights are painted, let them sit for about a week to make sure they're cured as I believe this is the main cause of fogging.
Step 3: Reassembly
If you choose to not use the amber cover for the turn signal you will need amber or Silverstar turn signal bulbs and you'll need to use shorter screws or spacers. Otherwise, the turn signal housing will be loose. I broke the feet off the amber pace to use as spacers. Once you have the newly painted piece screwed in, run a bead of sealant around the housing and press the clear cover back in place. After the cover is back on, run another bead between it and the housing to be sure there is a good seal. Reinstall the rubber vents and the seal around the headlight socket. The rubber vents on mine were glued on, so glued them before putting them back. Let it set for 24 hours without bulbs installed so the vapors from the sealant aren't trapped in the headlight.
Step 4: Installing the Headlights
Start by removing the bolt and two plastic fasteners from each wheel well. Next, disconnect the fog lights and parking lights (should be able to reach though wheel well). There are also two plastic fasteners under each side of the bumper cover. (Red)
There are also two 10mm bolts on both sides of the radiator
Now the trickiest part. The bumper cover clips on both sides of the headlights. You may be able to pull up and out or you may have to use a small screwdriver to press the tabs down. Pictures will probably help the most here.
Left side of passenger headlight
Right side of passenger headlight
Once the cover is off take out the 10mm bolts on each headlight.(Blue) You should be able to pull the headlight out enough to disconnect the lights. You may need to unbolt the horn, also 10mm, to get to the drivers side headlight.
Transfer the headlight mount to the new headlights (Didn't get a picture, but it just clips on). When you put the new headlights back in, reattach the lights and make sure the tabs go into the slots then bolt them back on. Don't forget about the horn.
When you're lining the bumper cover up, make sure the bottom of the wheel well is below the cover or it won't line up right.
After you get the cover back on, put all the bolts and plastic fasteners back in place and enjoy your new headlights.


 08-21-2008, 11:48 PM
#7
Senior Member

Join Date: 02-07-2008
Location: Lakenheath, UK
Posts: 826
that looks awesome! where did you get the spare headlights? i have thought about doing this to tide me over until i have the money to do a projector retrofit. i figure if i paint a spare set and keep my factory ones, i can use the factory ones later for the projectors.


