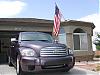
HHR Splash Guards that protect


Thread Starter
Senior Member
Joined: 04-25-2006
Posts: 428
From: Fort Worth, TX
HHR Splash Guards that protect
{edit, probably should have posted in How To}
After reading about the fact that the factory splash guards didn't protect the rear of the HHR from debris damage, I decided to to make some that would. I went to the local dealer and made a few measurements on HHRs that came with the flaps installed. I found that the factory guards left a space of 4" from the ground to the bottom of the guard. That is not nearly enough to protect the rear from debris thrown back by the front tire. The measurements I made on my HHR resulted in a requirement of 2" from the ground to totally block the view of any part of the front tire looking from the back.
(Note: That is not sandblasting you see, just dirt)

I made a calibration system using 2 straws, one 2" from the ground, and the other 3". This would tell me how low I could go with the flaps before I scraped the ground. I drove for one day over bumpy roads, speed bumps,
etc., and found that the 2" straw was barely scraped. So I decided to go with a design that would put the bottom of the guard at 2.25" from the ground.

I used the same source of plastic that I have used on another splash guard project, a tub I got for $6 at Lowes. I use the flat bottom of it for the guards.

I used some white cardboard to create my template. After about an hour of trimming, and plenty of help from the cats, I got what I wanted. The plastic guard will be mounted using the screw behind the tire which holds the plastic trim to the plastic wheel well piece (can you say plastic?)

Now, I trace the template onto the black plastic, and cut it out. Then drill a hole where the screw goes.

The resulting pieces, mirror images.

The view from the rear, you can see a little bit of tire tread, I think it is plenty low enough since the debris should be thrown upwards a tad bit.

This shows how it is mounted. I used the existing screw, plus some foam tape behind the plastic. Pretty study.

A rear view. WAY lower than the factory flaps. It looks good and no one will notice it's not a factory part.

After reading about the fact that the factory splash guards didn't protect the rear of the HHR from debris damage, I decided to to make some that would. I went to the local dealer and made a few measurements on HHRs that came with the flaps installed. I found that the factory guards left a space of 4" from the ground to the bottom of the guard. That is not nearly enough to protect the rear from debris thrown back by the front tire. The measurements I made on my HHR resulted in a requirement of 2" from the ground to totally block the view of any part of the front tire looking from the back.
(Note: That is not sandblasting you see, just dirt)
I made a calibration system using 2 straws, one 2" from the ground, and the other 3". This would tell me how low I could go with the flaps before I scraped the ground. I drove for one day over bumpy roads, speed bumps,
etc., and found that the 2" straw was barely scraped. So I decided to go with a design that would put the bottom of the guard at 2.25" from the ground.
I used the same source of plastic that I have used on another splash guard project, a tub I got for $6 at Lowes. I use the flat bottom of it for the guards.
I used some white cardboard to create my template. After about an hour of trimming, and plenty of help from the cats, I got what I wanted. The plastic guard will be mounted using the screw behind the tire which holds the plastic trim to the plastic wheel well piece (can you say plastic?)
Now, I trace the template onto the black plastic, and cut it out. Then drill a hole where the screw goes.
The resulting pieces, mirror images.
The view from the rear, you can see a little bit of tire tread, I think it is plenty low enough since the debris should be thrown upwards a tad bit.
This shows how it is mounted. I used the existing screw, plus some foam tape behind the plastic. Pretty study.
A rear view. WAY lower than the factory flaps. It looks good and no one will notice it's not a factory part.


Thread Starter
Senior Member
Joined: 04-25-2006
Posts: 428
From: Fort Worth, TX
I tested my work. I went on a run while there were still puddles in the streets. Before I went out, I cleaned off the bottom panels and the rear panel with the rubbber piece to see how much dirt would splash up onto it ( I haven't cleaned the whole HHR yet due to rain that keeps coming, so doors are not part of the test). I went through several puddles that would normally have caused a lot of water to spray up onto the areas I am trying to protect. I was pleasently surprised to see that the flaps worked very well. You can see from the pics that the areas are still 99% clean, and the flaps have caught most of the dirt. It looks like there might be dirt on the bottom of the panels in the pics, but that is a reflection of the concrete - they are clean! That indicates that they will protect the rear from dirt and rocks also.
I'm going to get the factory splash guards for the rear, as that is not as important as the front. But I trust my splash guard engineering more than Chevy's at this point. If anyone wants to make some, I will post the dimensions of the template. They are very easy to make and install.


I'm going to get the factory splash guards for the rear, as that is not as important as the front. But I trust my splash guard engineering more than Chevy's at this point. If anyone wants to make some, I will post the dimensions of the template. They are very easy to make and install.