


Removing a stock radio


Thread Starter
Joined: 02-04-2012
Posts: 2
From: Toms River, NJ
Removing a stock radio
Had my hhr at the local dealer with an electrical problem.
Turned out to be a bad power module. When all was done
I still have a blown out radio. Dealer wants something like
$500.00 to replace the stock radio. I'm looking at the dash
And don't see how to remove the radio. I will replace it
myself with a cheap replacement.
Turned out to be a bad power module. When all was done
I still have a blown out radio. Dealer wants something like
$500.00 to replace the stock radio. I'm looking at the dash
And don't see how to remove the radio. I will replace it
myself with a cheap replacement.
Moderator
Joined: 01-23-2009
Posts: 26,533
From: Fredericksburg,VA
You pop the bezel off by grabbing the air vent holes and yanking, then you will see the mounting. A new radio MAY need the dealer to program the BCM. Try junkyards for a radio,but still needs to be matched to the computer, theft deterrent issues, not to mention warning chimes and turn signal clicks.

Member
Joined: 06-10-2009
Posts: 57
From: Northern Utah
While looking for a way to upgrade my sound system with out having to spend a lot of money, I found a JVC KD-528 Am/FM/CD/MP3/USB Radio on clearance at one of the many Walmarts I was visiting while working for Swift doing Walmart Deliveries. So I pikced it up and brought it home.
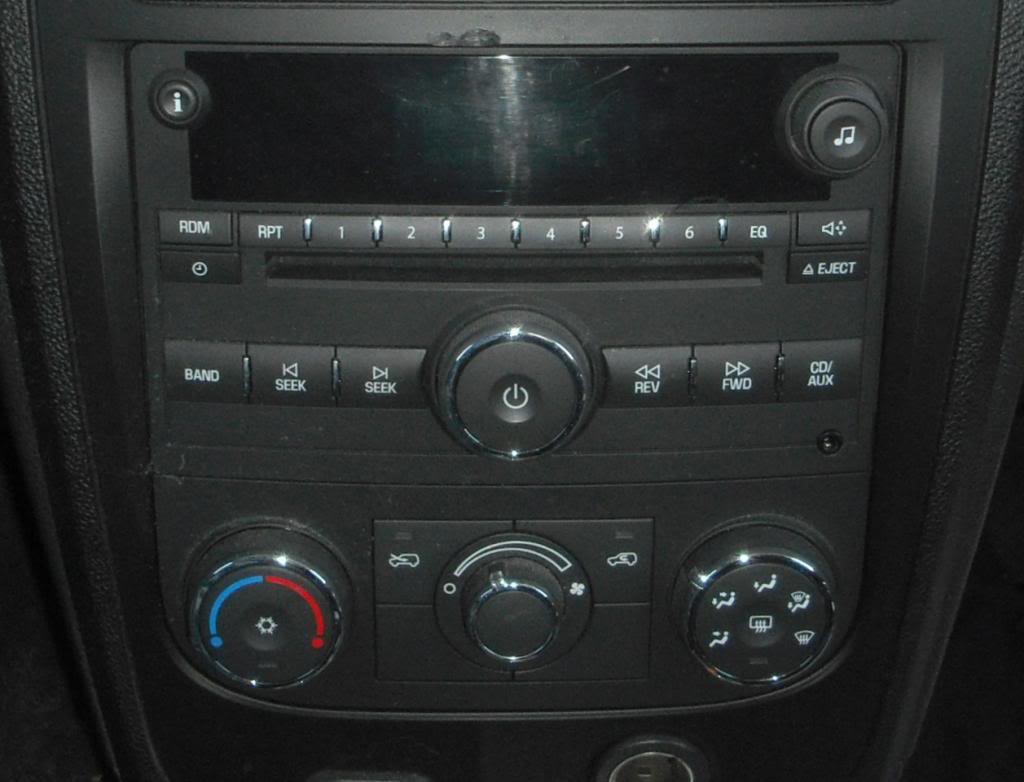
Stock HHR Radio
Next I needed an install kit, JVC KD-38/KD-28, which is a GM kit. I checked al the stores I was delivering to, hopeing to find one on sale, but no luck, I did find that my local in Perry Utah had it for the cheapest price, so I finaly bought it.
Then about a year ago I got some time to install it.
Step 1, besure you have EVERY THING you will need to do the install before stateding the project. The JVC KD-38/KD-28 install kit comes with almost every thing you need and some extra stuff you don't, it has the new wiring & plugs you will need, and includes a bracket with storage bin to fill the hole in the dash.
First remove the center front cover of the dash by pulling it out at the top, then unplug all the wires hooked to the switches and set it aside.
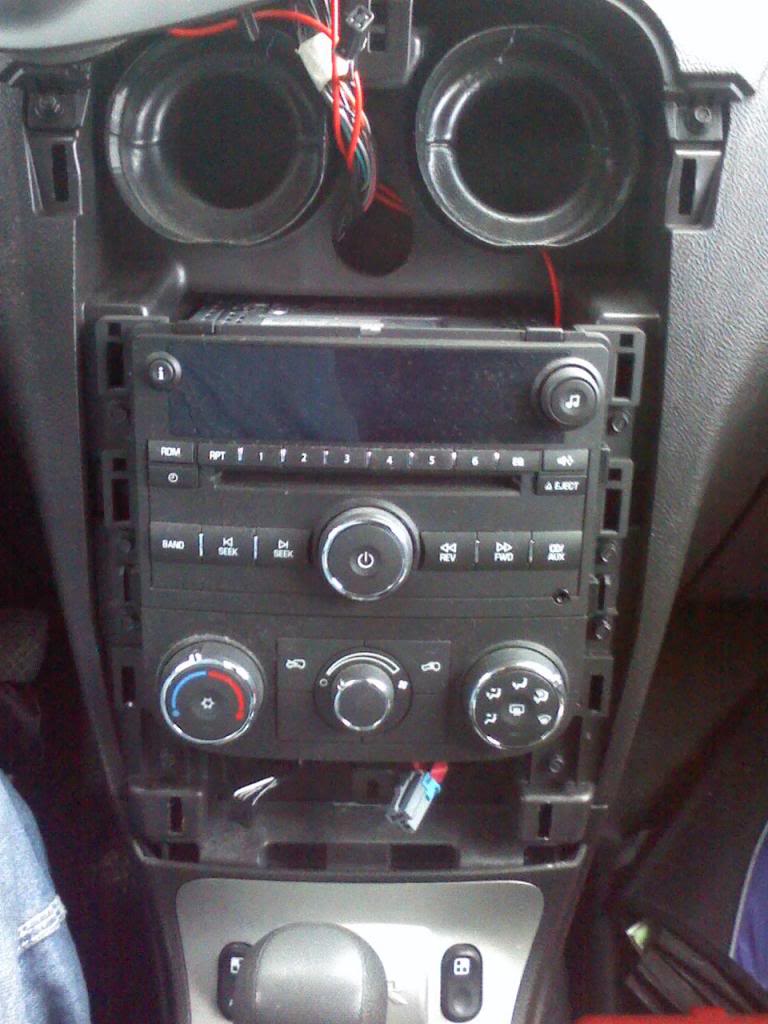
Remove the screws holding the radio & heater controls inplace.
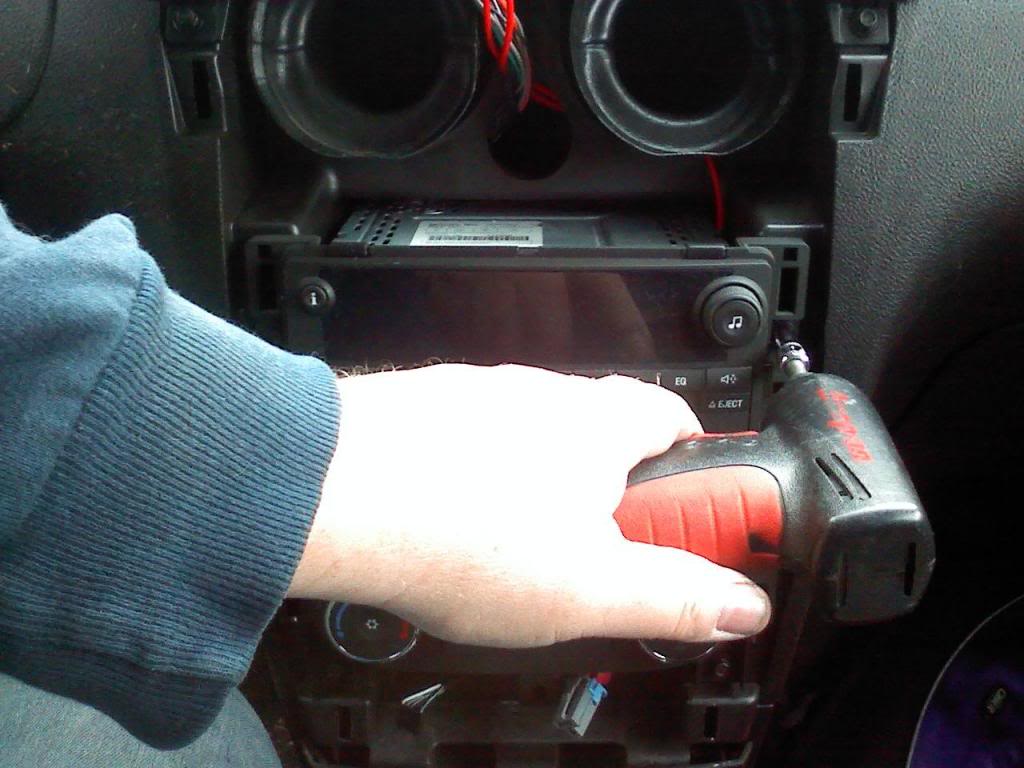
The radio will not come out with the heater controls still installed, so remove them first.
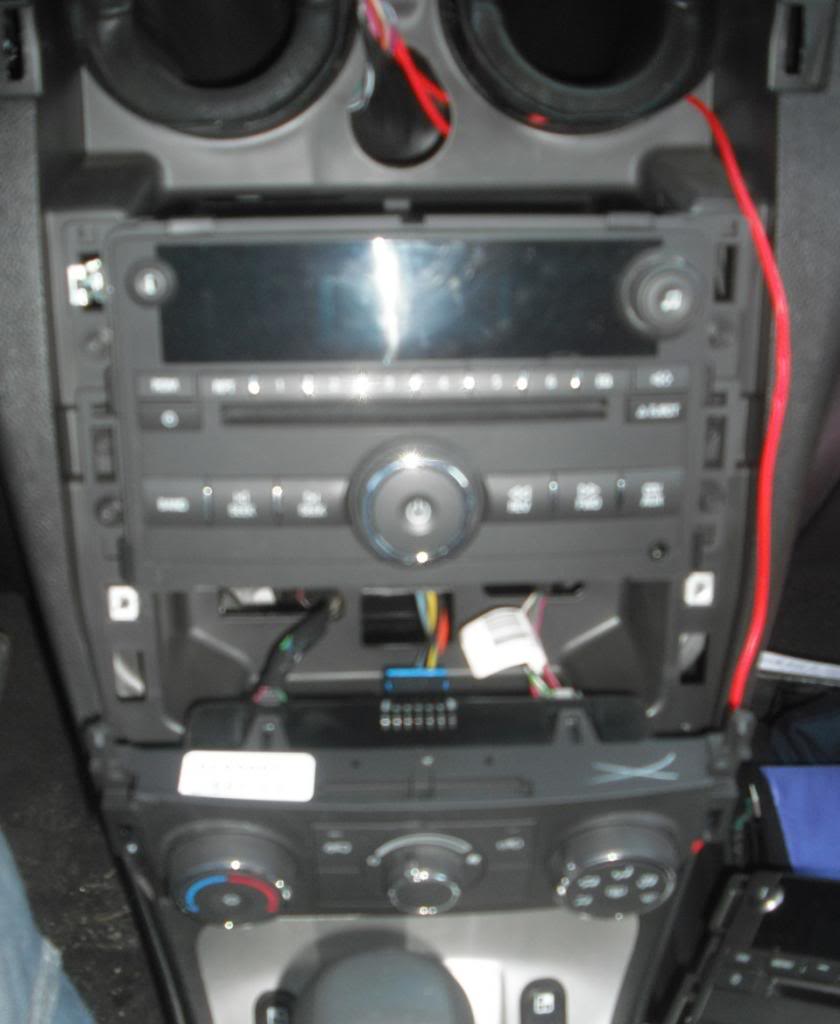
Now both the radio and heater controls are loose, unplug the radio wire & ant. then remove the radio and set it aside.
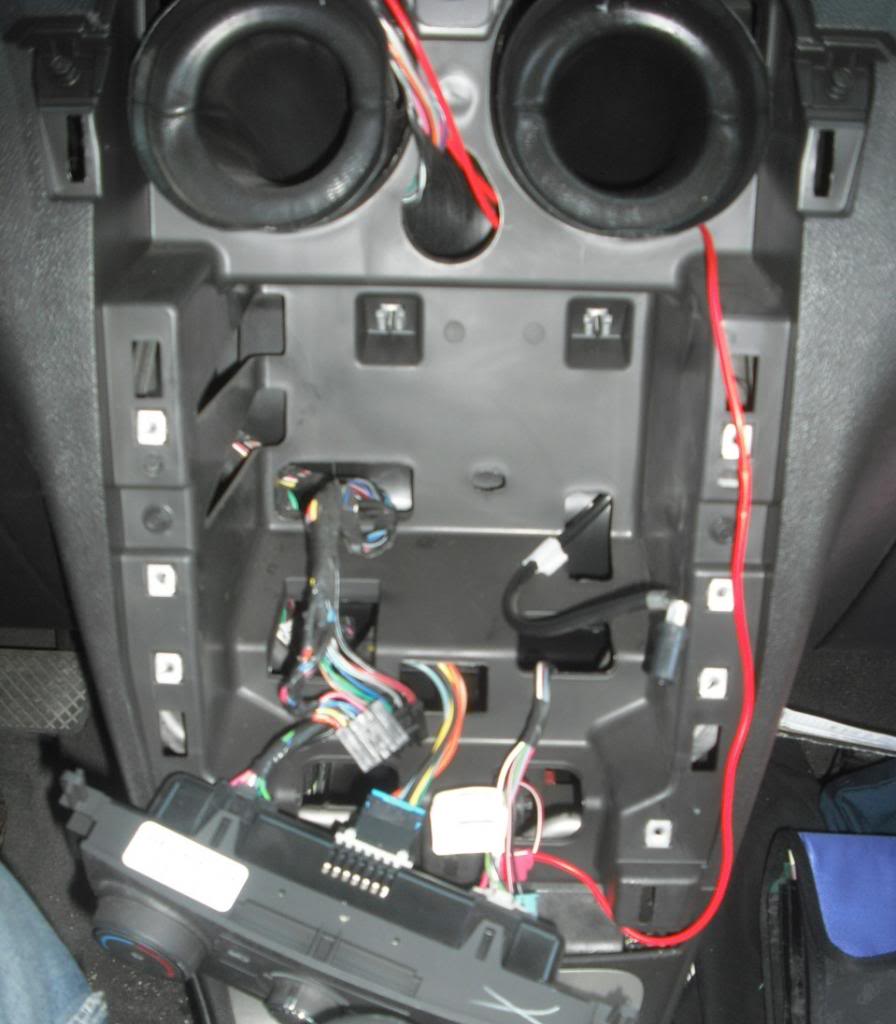
there should be a big emtpy hole in your dash now.
Stock HHR Radio
Next I needed an install kit, JVC KD-38/KD-28, which is a GM kit. I checked al the stores I was delivering to, hopeing to find one on sale, but no luck, I did find that my local in Perry Utah had it for the cheapest price, so I finaly bought it.
Then about a year ago I got some time to install it.
Step 1, besure you have EVERY THING you will need to do the install before stateding the project. The JVC KD-38/KD-28 install kit comes with almost every thing you need and some extra stuff you don't, it has the new wiring & plugs you will need, and includes a bracket with storage bin to fill the hole in the dash.
First remove the center front cover of the dash by pulling it out at the top, then unplug all the wires hooked to the switches and set it aside.
Remove the screws holding the radio & heater controls inplace.
The radio will not come out with the heater controls still installed, so remove them first.
Now both the radio and heater controls are loose, unplug the radio wire & ant. then remove the radio and set it aside.
there should be a big emtpy hole in your dash now.
Member
Joined: 06-10-2009
Posts: 57
From: Northern Utah
Now your ready to install the new wires, the installation manual that come with the install kit tell you evry thing you need to know so refur to it at this point.
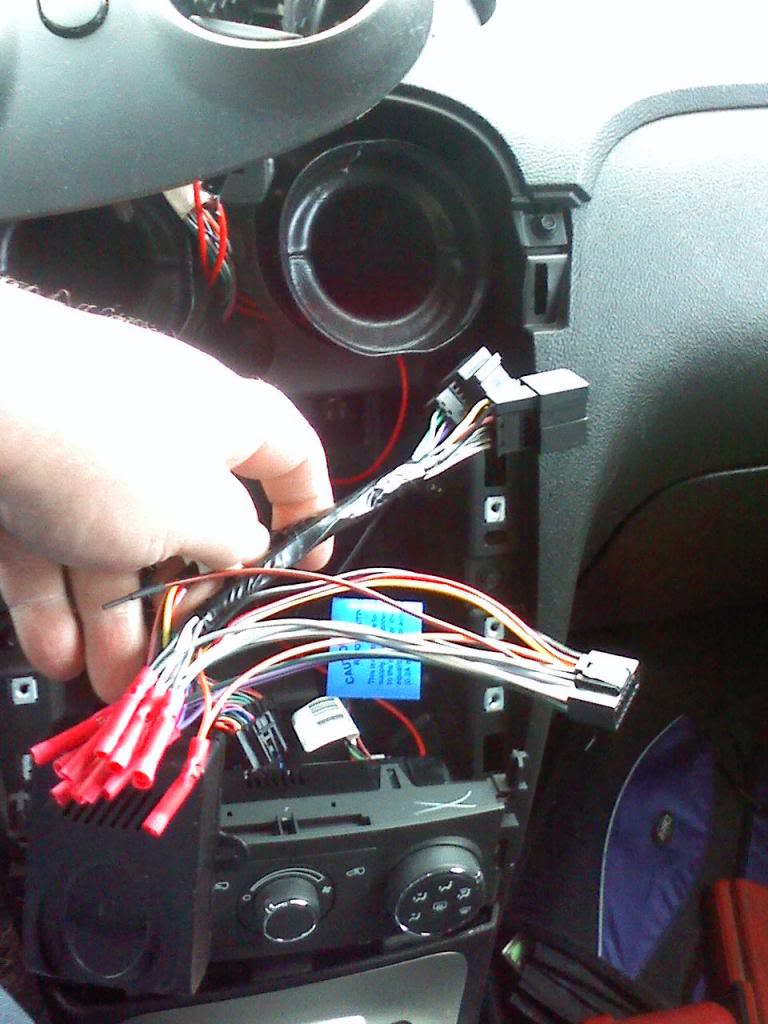
Once your new iwres are installed your ready to install the radio, but only if you stopped at Radio Shack and picked up an adaptor for the ant, I didn ot have one when I did my install and to this day I have not installed it, so far I just have not wanted to used the radio as I really don't like to hear ads and vary little music. The GM Install kit comes with a Chime Speaker that you just kinda let sit back behind the radio, and you can still hear it making noise {lower left corner in above photo}.
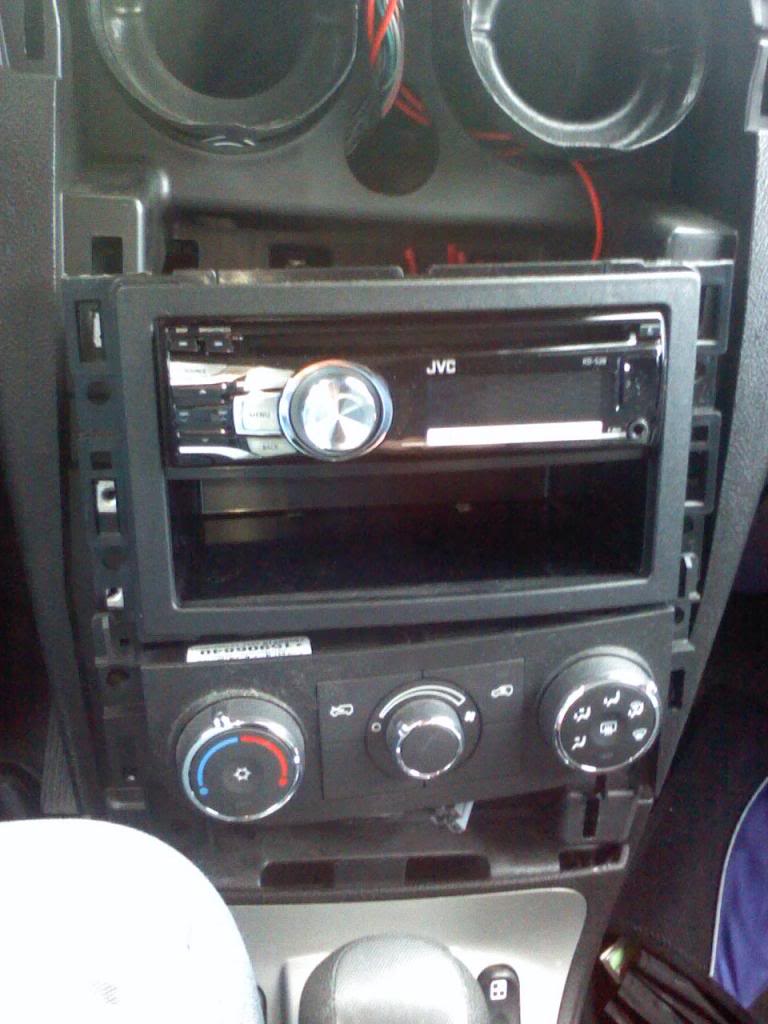
Next install the screws into the radio and heater controls, starting with the radio first.
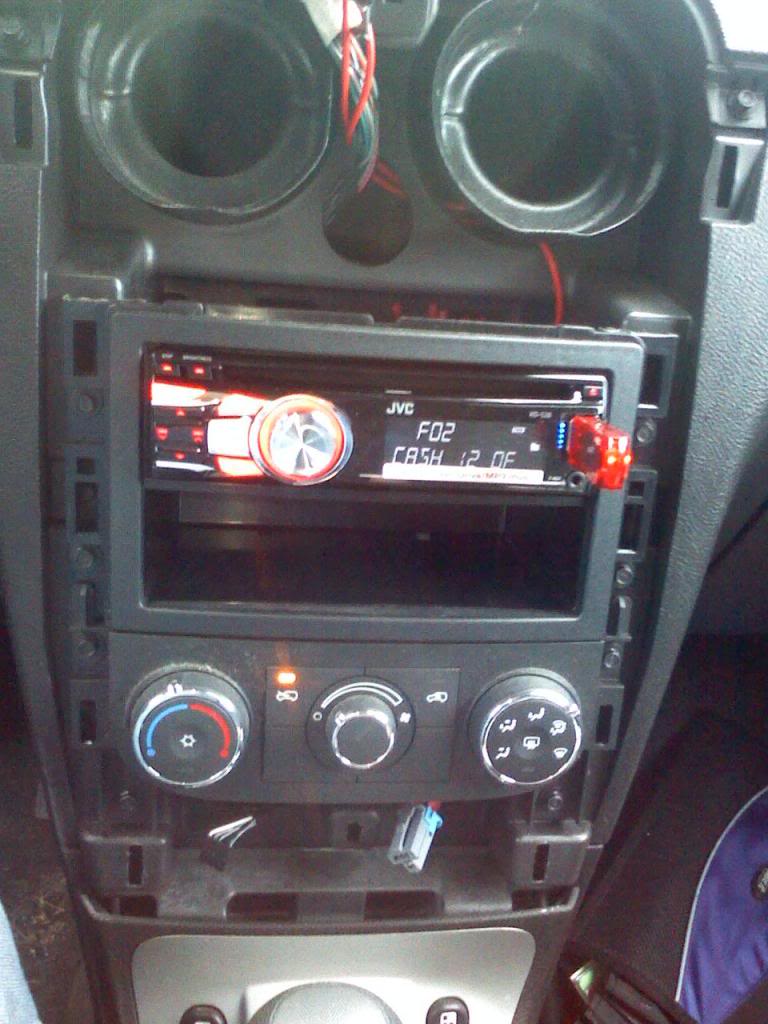
at this point its a good ideal to test the radio to be sure every thing is working the way you want it to. Next reinstall the dash faceplate.
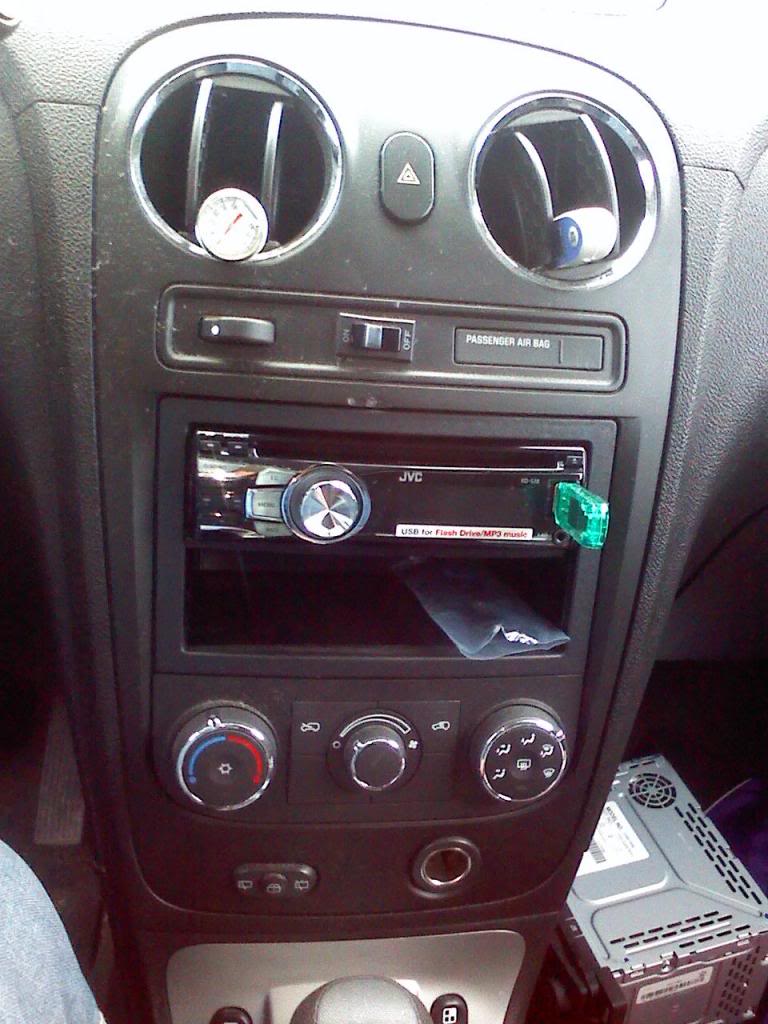
Once your new iwres are installed your ready to install the radio, but only if you stopped at Radio Shack and picked up an adaptor for the ant, I didn ot have one when I did my install and to this day I have not installed it, so far I just have not wanted to used the radio as I really don't like to hear ads and vary little music. The GM Install kit comes with a Chime Speaker that you just kinda let sit back behind the radio, and you can still hear it making noise {lower left corner in above photo}.
Next install the screws into the radio and heater controls, starting with the radio first.
at this point its a good ideal to test the radio to be sure every thing is working the way you want it to. Next reinstall the dash faceplate.


Senior Member
Joined: 03-17-2012
Posts: 1,042
From: Bay Area, CA
Here is how to get the waterfall off to gain access to everything.
I gutted the back of my head unit. SOOO much more room now. Sooo easy to stuff everything.


The area I cut out does not affect any braces or structural integrity of anything.
I gutted the back of my head unit. SOOO much more room now. Sooo easy to stuff everything.
The area I cut out does not affect any braces or structural integrity of anything.

Thread
Thread Starter
Forum
Replies
Last Post