


A Few Hub Replacement Pictures


Thread Starter
Senior Member
Joined: 02-01-2006
Posts: 1,471
From: lockport,ny
A Few Hub Replacement Pictures
Here are a few pictures I took of the hub I replaced a few weeks ago:
1. I removed the wheel/tire and put the car up on jack stands.
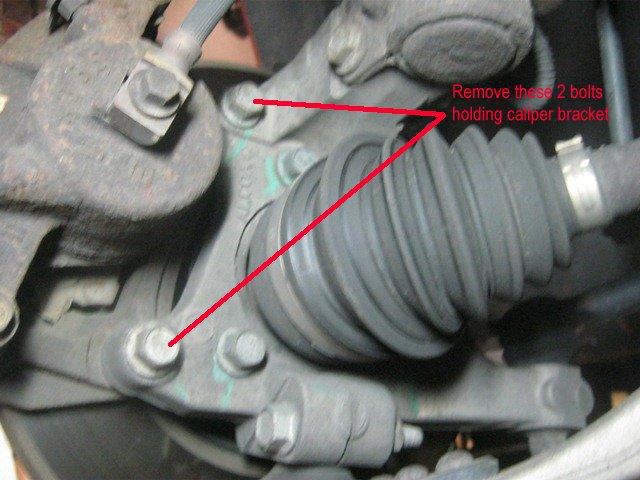
2. Removed the caliper bracket bolts:
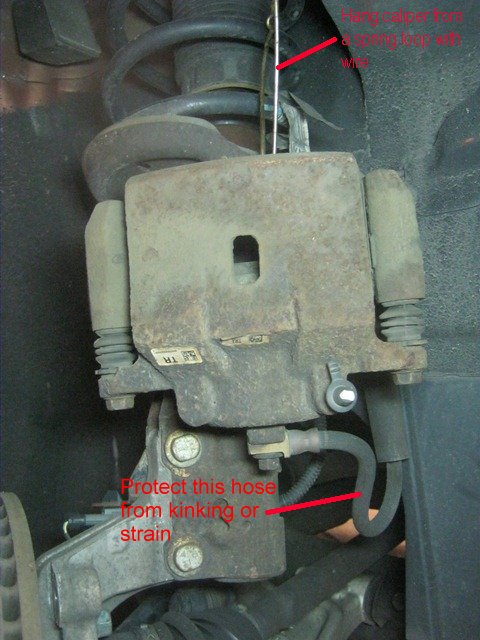
3. Hang the caliper safely out of the way:
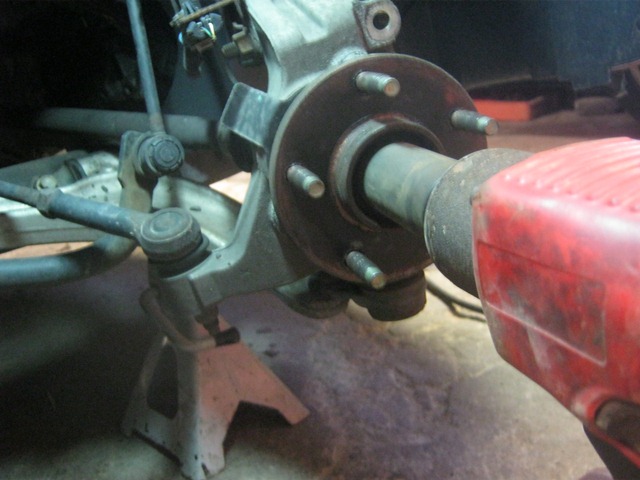
4. Remove the axle nut. I used an impact wrench. There is a large washer under the axle nut, don't lose it:
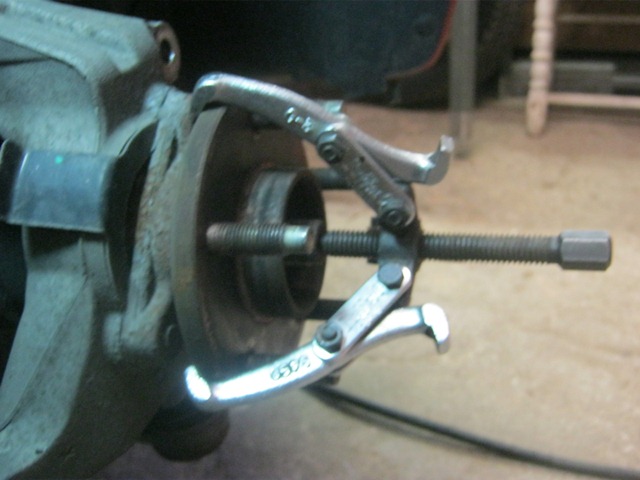
5. If necessary, use a puller on the axle shaft to push the shaft loose from the splines on the hub (In my case, even with 125K miles, the shaft pushed in by hand easily):
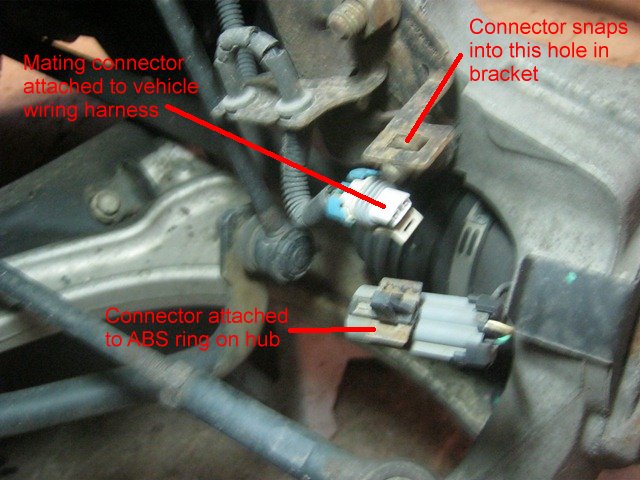
6. Disconnect the ABS connector. The connector is snapped into a bracket with a small plastic split nub directly on the connector:
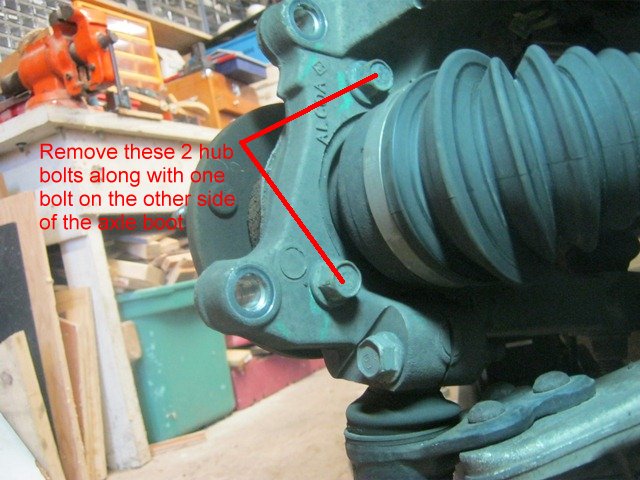
7. There are 3 nuts that hold the hub to the knuckle. I think I used 15mm sockets on these:
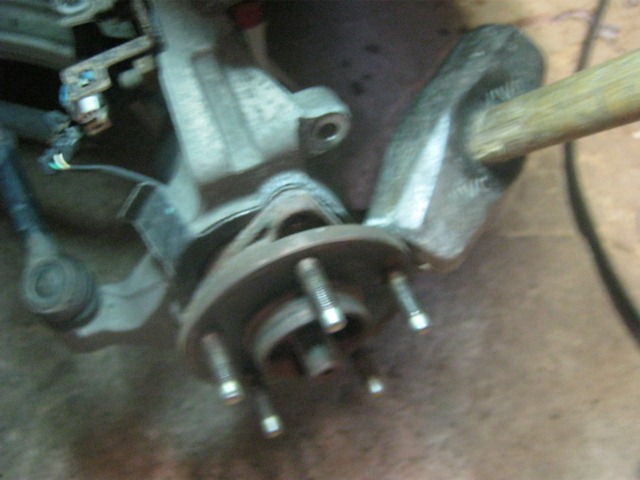
8. The hub will probably be stuck in the bore of the knuckle due to corrosion between the aluminum knuckle and the steel hub. Prying it out tends to deform the aluminum. I pounded on the plate that holds the studs with a sledge in several positions around the hub and worked it out by going around several times. There is limited space to swing the sledge, so be careful not to hit something else in the wheel well area:
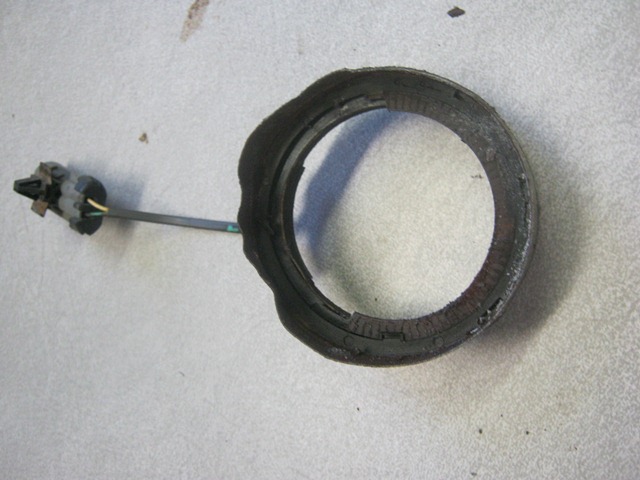
9. After you remove the hub, what is likely to happen is that the ABS ring will remain in the knuckle because it is corroded to the knuckle and it is attached to the hub very lightly. The new hub has its own ABS ring, so you don't have to save the old one. Remove it by punding it out and/or prying it out:
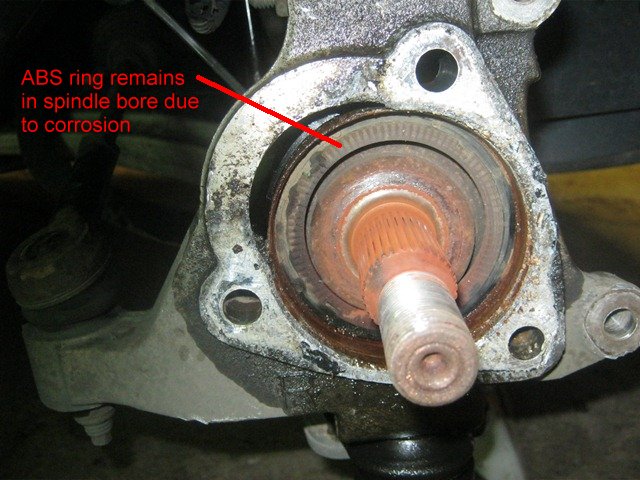
10. Here is a picture of the ABS ring after it was freed from the knuckle:
11. There will be corrosion in the bore of the knuckle. This may interfere with installing the new hub. You want to remove the corrosion to make it easier to put the new hub in. I used a drum sander on a cordless drill and worked it around the inside of the bore, pushing the axle shaft over to one side and then the other to keep it away from the sanding drum. It can also be sanded by hand but it will take a bit longer. Be careful, you don't want to remove aluminum, just the corrosion part:


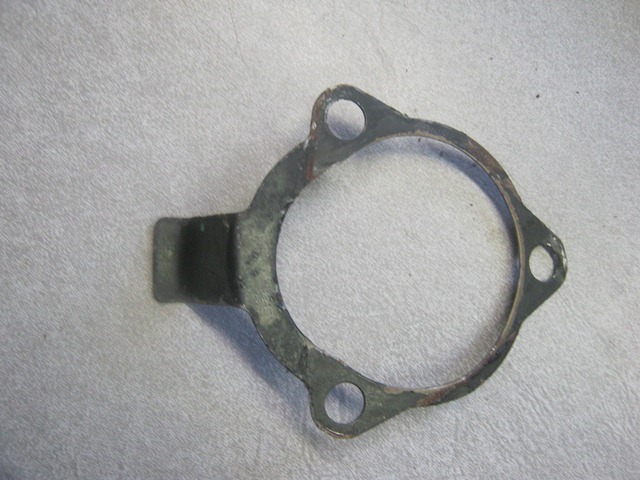
12. Clean off the hub mounting surface on the knuckle and also don't forget to clean the spacer that is installed between the knuckle and the hub. Here is a picture of the spacer that needs to be reinstalled:
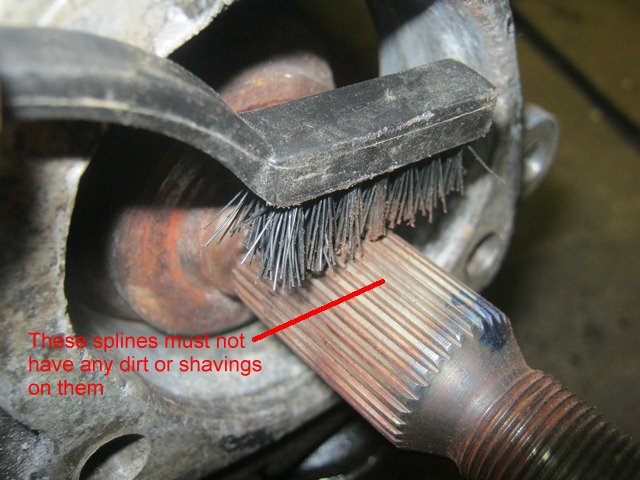
13. Clean the axle shaft splines carefully to remove any dirt or shavings that may be in the splines. I also applied a little anti-seize compound on the splines to keep them from sticking to the hub:
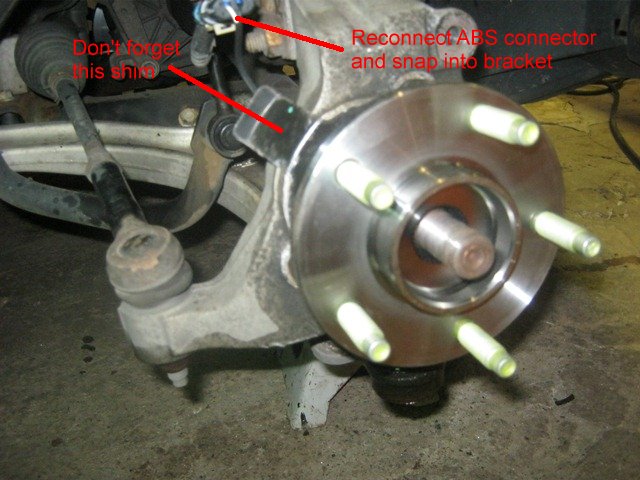
14. Now it's time to install the new hub. I put anti-seize compound on the knuckle bore to keep the new hub from corroding to the knuckle like the old one did. Don't forget to reinstall the shim between the knuckle and hub. Feed the ABS connector through the bore in the knuckle. Push the new hub into place as far as it will go and draw it into the knuckle the rest of the way by alternately tightening the three hub bolts until the hub is completely seated. Tighten the hub bolts to the appropriate torque (I forgot the number). During the installation, be careful not to knock the ABS ring off the new hub, it's not attached very sturdily. Connect the ABS connector and snap it into the mounting bracket. Reinstall the axle shaft washer and a new nut and torque to appropriate number (a recent thread said 155 lb-ft I think).
New hub installed:
After having done the other hub earlier this year, the entire replacement took about 1 hour and that includes getting the tools ready.
Steve
1. I removed the wheel/tire and put the car up on jack stands.
2. Removed the caliper bracket bolts:
3. Hang the caliper safely out of the way:
4. Remove the axle nut. I used an impact wrench. There is a large washer under the axle nut, don't lose it:
5. If necessary, use a puller on the axle shaft to push the shaft loose from the splines on the hub (In my case, even with 125K miles, the shaft pushed in by hand easily):
6. Disconnect the ABS connector. The connector is snapped into a bracket with a small plastic split nub directly on the connector:
7. There are 3 nuts that hold the hub to the knuckle. I think I used 15mm sockets on these:
8. The hub will probably be stuck in the bore of the knuckle due to corrosion between the aluminum knuckle and the steel hub. Prying it out tends to deform the aluminum. I pounded on the plate that holds the studs with a sledge in several positions around the hub and worked it out by going around several times. There is limited space to swing the sledge, so be careful not to hit something else in the wheel well area:
9. After you remove the hub, what is likely to happen is that the ABS ring will remain in the knuckle because it is corroded to the knuckle and it is attached to the hub very lightly. The new hub has its own ABS ring, so you don't have to save the old one. Remove it by punding it out and/or prying it out:
10. Here is a picture of the ABS ring after it was freed from the knuckle:
11. There will be corrosion in the bore of the knuckle. This may interfere with installing the new hub. You want to remove the corrosion to make it easier to put the new hub in. I used a drum sander on a cordless drill and worked it around the inside of the bore, pushing the axle shaft over to one side and then the other to keep it away from the sanding drum. It can also be sanded by hand but it will take a bit longer. Be careful, you don't want to remove aluminum, just the corrosion part:
12. Clean off the hub mounting surface on the knuckle and also don't forget to clean the spacer that is installed between the knuckle and the hub. Here is a picture of the spacer that needs to be reinstalled:
13. Clean the axle shaft splines carefully to remove any dirt or shavings that may be in the splines. I also applied a little anti-seize compound on the splines to keep them from sticking to the hub:
14. Now it's time to install the new hub. I put anti-seize compound on the knuckle bore to keep the new hub from corroding to the knuckle like the old one did. Don't forget to reinstall the shim between the knuckle and hub. Feed the ABS connector through the bore in the knuckle. Push the new hub into place as far as it will go and draw it into the knuckle the rest of the way by alternately tightening the three hub bolts until the hub is completely seated. Tighten the hub bolts to the appropriate torque (I forgot the number). During the installation, be careful not to knock the ABS ring off the new hub, it's not attached very sturdily. Connect the ABS connector and snap it into the mounting bracket. Reinstall the axle shaft washer and a new nut and torque to appropriate number (a recent thread said 155 lb-ft I think).
New hub installed:
After having done the other hub earlier this year, the entire replacement took about 1 hour and that includes getting the tools ready.
Steve





Moderator
Joined: 01-23-2009
Posts: 26,536
From: Fredericksburg,VA
Good job, now we can explain the "can't get the old one off" part, seems to only apply to ABS.
I have not seen that type of corrosion on mine (non-ABS), must be some kind of voltage bleed involved.
I have not seen that type of corrosion on mine (non-ABS), must be some kind of voltage bleed involved.

Thread
Thread Starter
Forum
Replies
Last Post