How To: Replace your dash gauges w/ Black Cat Custom


Thread Starter
Senior Member
Joined: 01-04-2010
Posts: 1,584
From: Imported from Detroit
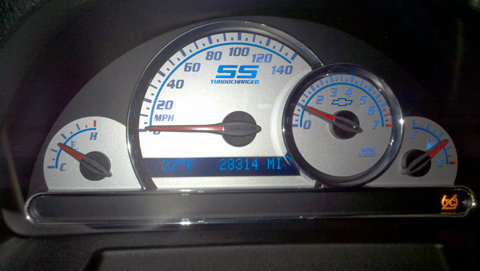
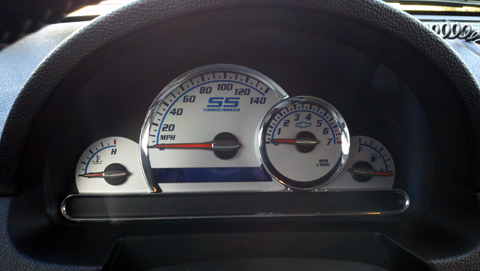
Yeah silver face, blue font and hash marks, but with the red accent line.
As you can see the stock face had the red accent line as well.
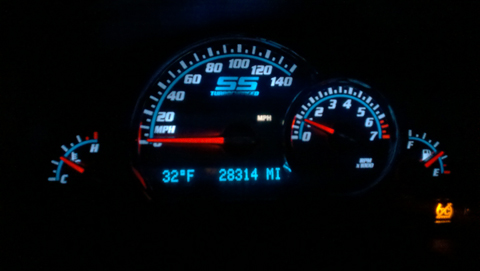
At night the red needle with the red accent line looks great at speed. Goes real nice.
The cresent shape in the word turbocharge is definately there but I'm sure that is due to limited light off I guess a singular LED lighting that gauge.
You can choose your colors. Now that is dependant on if your dash has colored LEDs or not. The SS we knew had white LEDs cause it had white numbers. I'm not sure about the LT and/or LS models. Call up Black Cat and I'm sure they can help you.
As you can see the stock face had the red accent line as well.
At night the red needle with the red accent line looks great at speed. Goes real nice.
The cresent shape in the word turbocharge is definately there but I'm sure that is due to limited light off I guess a singular LED lighting that gauge.
You can choose your colors. Now that is dependant on if your dash has colored LEDs or not. The SS we knew had white LEDs cause it had white numbers. I'm not sure about the LT and/or LS models. Call up Black Cat and I'm sure they can help you.

Senior Member
Joined: 05-26-2009
Posts: 726
From: NorCal BayArea
First of all what a great "How To"  !
!
We used a fork underneath the needle towards the center post area and they should pop off! Also make sure to place a thin cloth such as a t-shirt behind the fork as to protect the faceplate  !
!
Best-O-Luck,
!Best-O-Luck

Senior Member
Joined: 07-23-2008
Posts: 321
From: ny
got it together, no worries. definitely took a lot of the guesswork out with the how to, and help here-cheers. A little side note on the crescent through the turbocharged logo. There is a curved bit of plastic obstructing it a bit. I think a little dremel work might clean it up, but it was a little cold today to mess with it.
Thread Starter
Senior Member
Joined: 01-04-2010
Posts: 1,584
From: Imported from Detroit
got it together, no worries. definitely took a lot of the guesswork out with the how to, and help here-cheers. A little side note on the crescent through the turbocharged logo. There is a curved bit of plastic obstructing it a bit. I think a little dremel work might clean it up, but it was a little cold today to mess with it.
Glad the how to helped!!