
Window Switch Shroud Tutorial...


Thread Starter
Senior Member
Joined: 08-04-2006
Posts: 244
From: .
Originally Posted by HHR PNOY
if you guys use krylon just remember that the paint WILL chip and you will need to redo the job over again. I'm looking at moving up to a dashboard kit instead of attempting to paint the rest of the interior (doors, dash, etc).


Founding Member
Joined: 03-12-2006
Posts: 6,543
From: Lake Isabella CA
waterfall paint
This may help the next guy paint their "waterfall".
My way might not be the right way but here's my input:
Tools used:
Scotch bright scratch pad, Phillips screwdriver, flat screwdriver, #20 (I think) star screwdriver, adhesion promoter, paint, clear gloss, masking take, towel and patients.
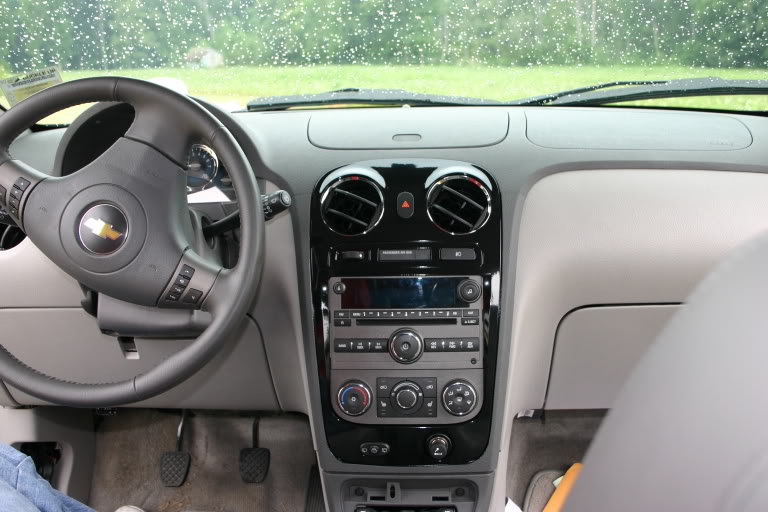
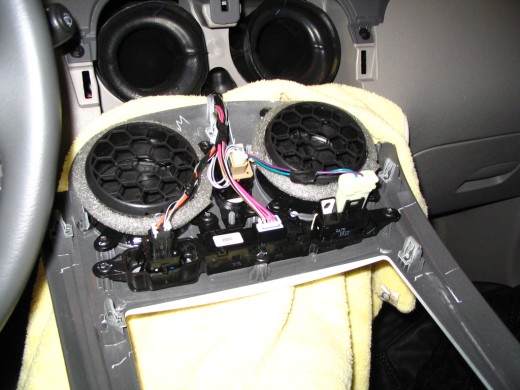
As said by others on here, it is a firm grasp and yank to pull the cover off. I put my fingers into the A/C vents to begin poping the cover off.
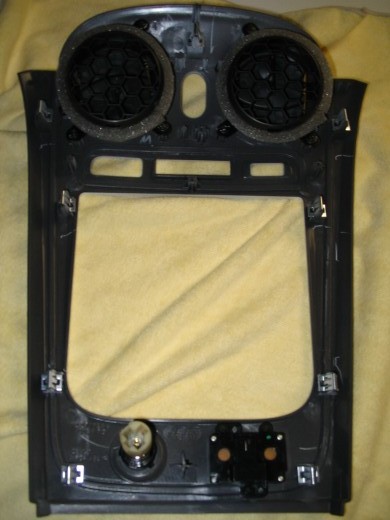
Do not grab by the honeycomb as that is weak and will break.
Grasp the cover without having contact with those dang honeycombs. (I broke one piece of the honeycomb)
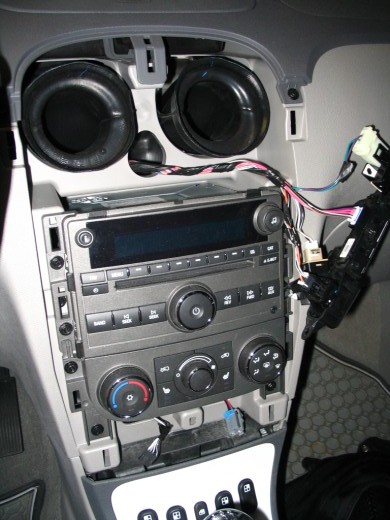
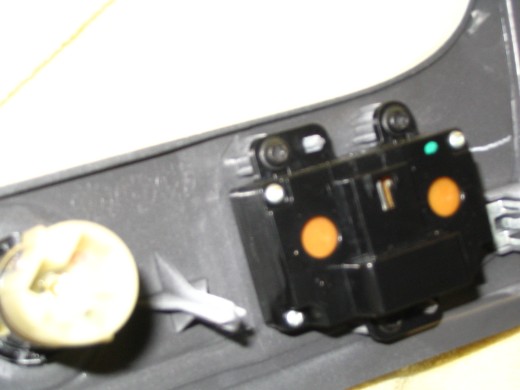
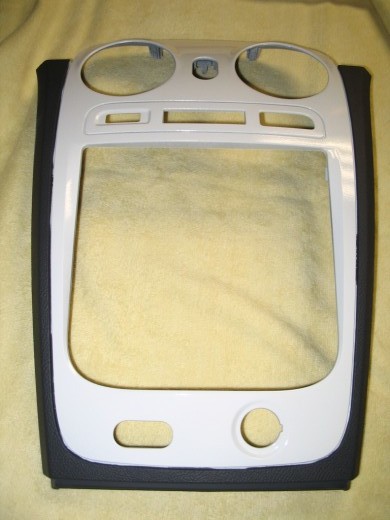
The cover is attached by the clips as shown in a close up in a photo above.
Removing the switches is easy also. A star tool is required for the rear window wiper switch. The cig lighter was a challenge for me but I got it out.
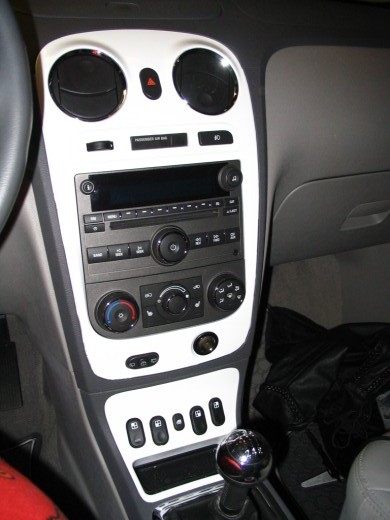
After using a scotch pad to rought up the finish, washed, dry, adhesion promoter, paint, clear then reasembled.
Masked

unmasked
Reasembly without scratching the new paint jobbie was tricky. Used a towel to protect the new paint.
NOTE: when reinstalling the dimmer/airbag warning indicator/fog light switch pannel, A/C vents mount, switch pannel then screws! I did it bassackwards first. Errrk, wrong!
When ready to put the cover back on, again, I tried to do it wrong again....
Insert the bottom of the cover in first then the tabs push/snap easily into place working your way upwards.
My way might not be the right way but here's my input:
Tools used:
Scotch bright scratch pad, Phillips screwdriver, flat screwdriver, #20 (I think) star screwdriver, adhesion promoter, paint, clear gloss, masking take, towel and patients.
As said by others on here, it is a firm grasp and yank to pull the cover off. I put my fingers into the A/C vents to begin poping the cover off.
Do not grab by the honeycomb as that is weak and will break.
Grasp the cover without having contact with those dang honeycombs. (I broke one piece of the honeycomb)
The cover is attached by the clips as shown in a close up in a photo above.
Removing the switches is easy also. A star tool is required for the rear window wiper switch. The cig lighter was a challenge for me but I got it out.
After using a scotch pad to rought up the finish, washed, dry, adhesion promoter, paint, clear then reasembled.
Masked
unmasked
Reasembly without scratching the new paint jobbie was tricky. Used a towel to protect the new paint.
NOTE: when reinstalling the dimmer/airbag warning indicator/fog light switch pannel, A/C vents mount, switch pannel then screws! I did it bassackwards first. Errrk, wrong!
When ready to put the cover back on, again, I tried to do it wrong again....
Insert the bottom of the cover in first then the tabs push/snap easily into place working your way upwards.
Thread Starter
Senior Member
Joined: 08-04-2006
Posts: 244
From: .
Originally Posted by BlackHHR
Looken very cool Sindy.
Hows about pianting the middle trim on the doors.
Hows about pianting the middle trim on the doors.
Great addition to this thread Sindy...!! looking very nice...!!

