


Checking and replacing the air filter


Senior Member
Joined: 02-22-2012
Posts: 376
From: Baton Rouge
You are absolutely right about the noise. I am not a great fan of that either. I guess 40 or 50 years ago I would have thought it was cool. Got my first car in 1961; first thing I did was put a cutout on it. Now that was noise.
Platinum Member
Joined: 01-09-2007
Posts: 16,081
From: SE USA

My first ride was a 1953 chevy two-ten deluxe, in early 60's.

Senior Member
Joined: 04-17-2009
Posts: 251
From: PA
My current air filter had about 40,000 through it, so I decided to change it. When I got it open, I found a mouse's nest--about a third of the chamber was full of insulation, bird seed, and droppings. I don't know how long it had been in there, but I'm going to check it every year from now on.
I have found eaten bird seed on the engine before--they get up there for the heat in the winter. A couple of years ago, I had to change the spark plug wires on our old van, because the mice chewed up the rubber wire casings.
Guess I also need to buy more mouse traps.
I have found eaten bird seed on the engine before--they get up there for the heat in the winter. A couple of years ago, I had to change the spark plug wires on our old van, because the mice chewed up the rubber wire casings.
Guess I also need to buy more mouse traps.


Senior Member
Joined: 07-17-2011
Posts: 130
From: va
My current air filter had about 40,000 through it, so I decided to change it. When I got it open, I found a mouse's nest--about a third of the chamber was full of insulation, bird seed, and droppings. I don't know how long it had been in there, but I'm going to check it every year from now on.
I have found eaten bird seed on the engine before--they get up there for the heat in the winter. A couple of years ago, I had to change the spark plug wires on our old van, because the mice chewed up the rubber wire casings.
Guess I also need to buy more mouse traps.
I have found eaten bird seed on the engine before--they get up there for the heat in the winter. A couple of years ago, I had to change the spark plug wires on our old van, because the mice chewed up the rubber wire casings.
Guess I also need to buy more mouse traps.

Joined: 06-29-2012
Posts: 8
From: Houston Tx area
Man Great pic's too bad i didn't see these b4 i tangled it going blind so to speck i have no repair manual just a owners manual & we just got our HHR Fri 6/29/12 after a search i found a very short video on youtube that was missing 1/2 what i needed to know.thanks
Joined: 06-29-2012
Posts: 8
From: Houston Tx area
 Air Filter
Here's what you need to check and/or replace the world's most secure air filter:
My socket set has a screwdriver handle that allows you to put sockets and a screwdriver bit adapter on it, so that is what I used.
Pop the hood:
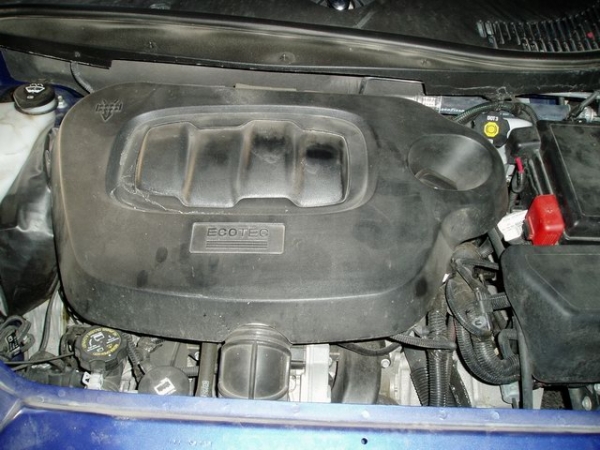
Disconnect the air intake tube from the passenger side fender well.
The air intake tube is connected to the fender by a large rubber grommet. Gently pull it out of the fender.
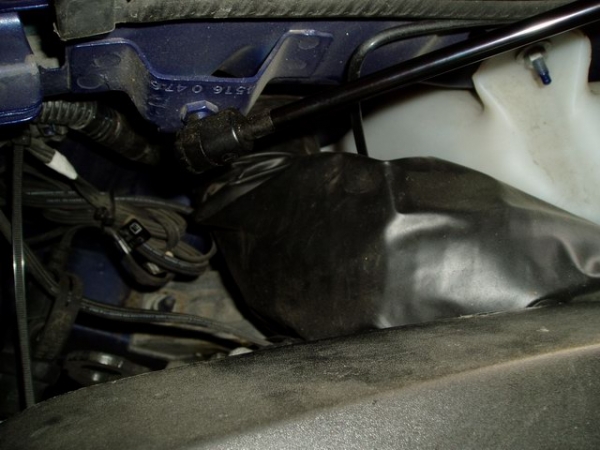
Cold air intake opening in the fender:
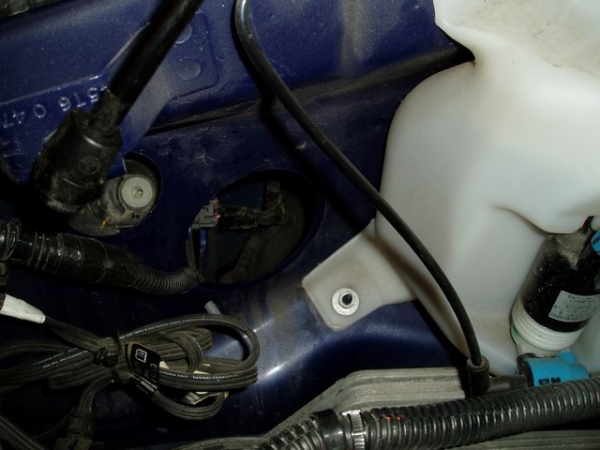
Disconnect the MAF sensor plug by pressing down on the top of the clip and pull it apart (upper right in the picture).
Loosen the 8mm nut on the band (top centre) so that the air tube can be separated from the air box.
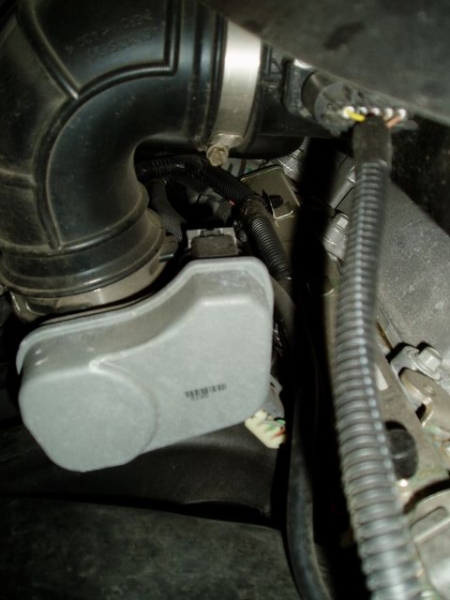
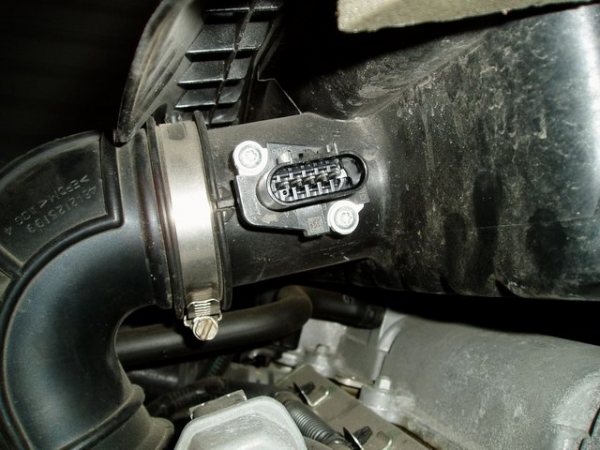
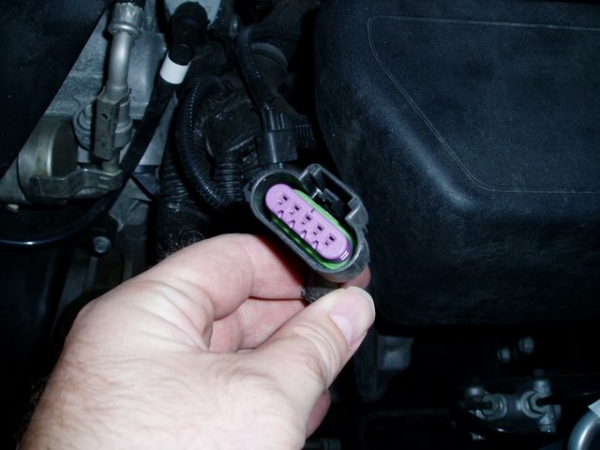
Now that everything has basically been disconnected from the air box, grab the upper left and right of the airbox. Pull up and slightly forward.
You should feel the air box release from the two rear grommets. Grab the front left of the air box and pull up.
Again, you should feel the air box release from the front grommet.
Slip the air box over the oil fill neck and wiggle the air box out of the air intake tube at the front of the engine.
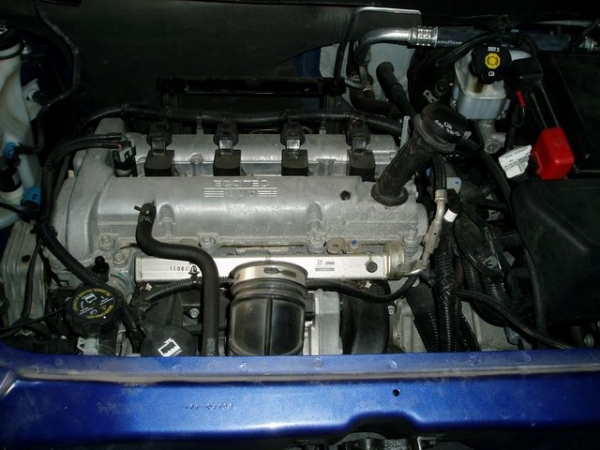
Now take the air box to a clean area and place it upside down.
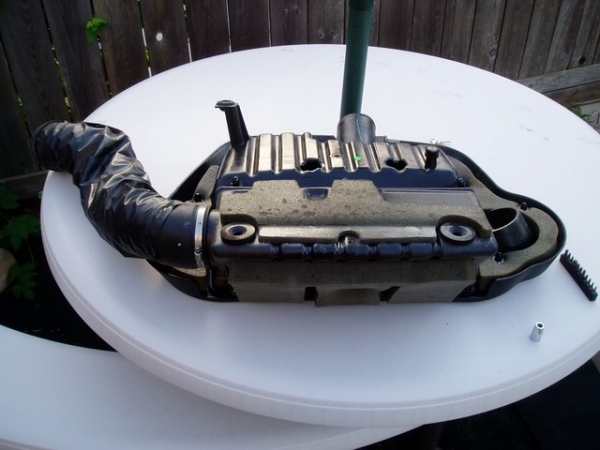
Using a T-25 Torx bit, remove the 7 (seven) T-25 Torx screws that connect the air filter cover to the air box.
Remove the air filter cover and voila, one highly secure air filter has been freed
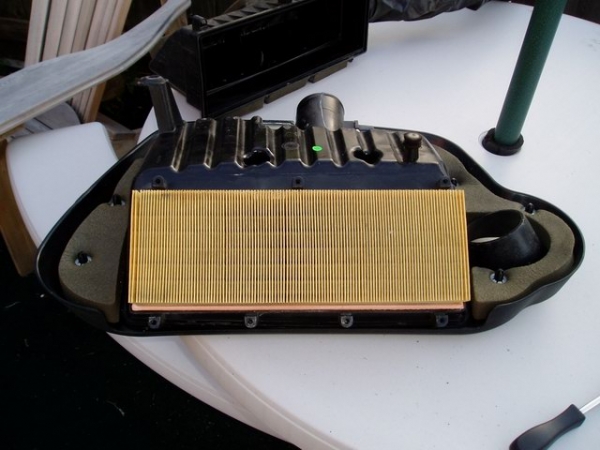
Take the air filter out to check it and also inspect the inside of the air box for any excess dirt, etc.
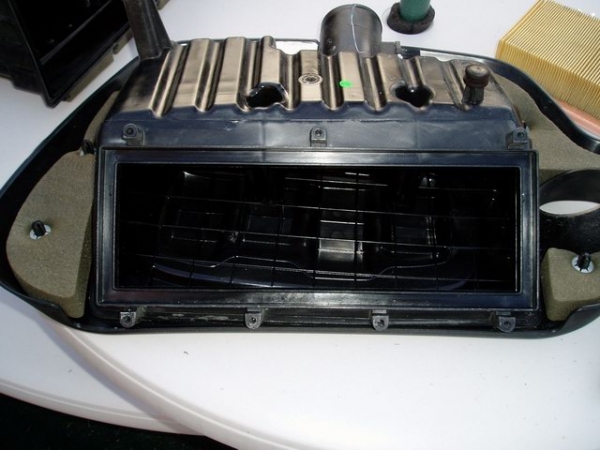
MAF Sensor
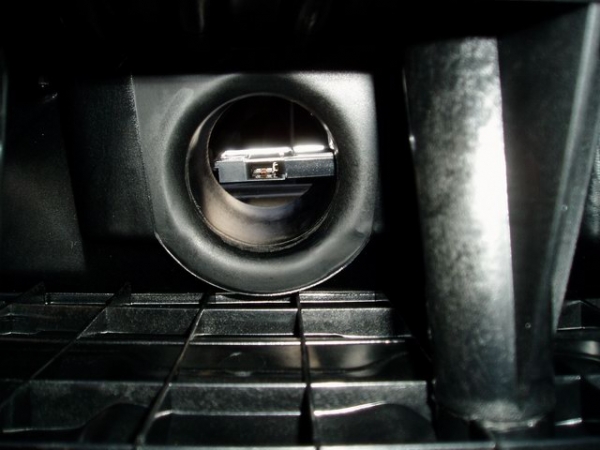
Clean any excess dirt from the air box, put the (new or old) air filter back in place. Tighten the 7 (seven) T-25 Torx screws.
Take the air box assembly back to your HHR and put it all back together.
Slip the air box back over the oil fill tube, reconnect the air box and the air tube at the front of the engine.
Line up the air box with the 3 (three) grommets and press down. You should feel the air box slide back into place on the grommets.
Reconnect the cold air hose to the fender well. The large rubber grommet should slip back into place.
Reattach the MAF sensor plug to the MAF sensor.
Tighten the 8mm nut on the band of the air tube at the front of the engine and you're good to go.
- 1 HHR

- 8mm socket
- T-25 Torx bit and adapter
- Replacement air filter (if replacing)
My socket set has a screwdriver handle that allows you to put sockets and a screwdriver bit adapter on it, so that is what I used.Pop the hood:
Disconnect the air intake tube from the passenger side fender well.
The air intake tube is connected to the fender by a large rubber grommet. Gently pull it out of the fender.
Cold air intake opening in the fender:
Disconnect the MAF sensor plug by pressing down on the top of the clip and pull it apart (upper right in the picture).
Loosen the 8mm nut on the band (top centre) so that the air tube can be separated from the air box.
Now that everything has basically been disconnected from the air box, grab the upper left and right of the airbox. Pull up and slightly forward.
You should feel the air box release from the two rear grommets. Grab the front left of the air box and pull up.
Again, you should feel the air box release from the front grommet.
Slip the air box over the oil fill neck and wiggle the air box out of the air intake tube at the front of the engine.
Now take the air box to a clean area and place it upside down.
Using a T-25 Torx bit, remove the 7 (seven) T-25 Torx screws that connect the air filter cover to the air box.
Remove the air filter cover and voila, one highly secure air filter has been freed
Take the air filter out to check it and also inspect the inside of the air box for any excess dirt, etc.
MAF Sensor
Clean any excess dirt from the air box, put the (new or old) air filter back in place. Tighten the 7 (seven) T-25 Torx screws.
Take the air box assembly back to your HHR and put it all back together.
Slip the air box back over the oil fill tube, reconnect the air box and the air tube at the front of the engine.
Line up the air box with the 3 (three) grommets and press down. You should feel the air box slide back into place on the grommets.
Reconnect the cold air hose to the fender well. The large rubber grommet should slip back into place.
Reattach the MAF sensor plug to the MAF sensor.
Tighten the 8mm nut on the band of the air tube at the front of the engine and you're good to go.
__________________


Member
Joined: 11-03-2012
Posts: 68
From: Aiken Co, SC
New to the forum.
New to HHR, just purchased a 2006, with 58k one owner, bronze, like it so far, 25mpg gettin groceries.
super writeup on filter change.
Question, what/why is the foam on the backside of the airbox?
Comment, I remember seeing some aluminum flex duct at a home store in several sizes, thinking this could replace the "wooly worm". Plan on changing the belt, and the air filter soon, I'll measure and see if there is a size that will fit.
If anyone has a box out, measure the intake id and please post it.
Thanks..great forum. Bill
New to HHR, just purchased a 2006, with 58k one owner, bronze, like it so far, 25mpg gettin groceries.
super writeup on filter change.
Question, what/why is the foam on the backside of the airbox?
Comment, I remember seeing some aluminum flex duct at a home store in several sizes, thinking this could replace the "wooly worm". Plan on changing the belt, and the air filter soon, I'll measure and see if there is a size that will fit.
If anyone has a box out, measure the intake id and please post it.
Thanks..great forum. Bill