
No bowtie 3 bar grille, "The Wildwood"


Thread Starter
Member
Joined: 02-10-2013
Posts: 57
From: Wildwood Pa
No bowtie 3 bar grille, "The Wildwood"
I picked up a grille at a local swap meet a few weeks ago. Grill, front bumper, R headlight, & hood latch, all for $20.00. The HHR the parts came off was a very light deer hit, just enough to scrape the paint, & break the top mount on the grille. So, I figured it was time to do a 3 bar!
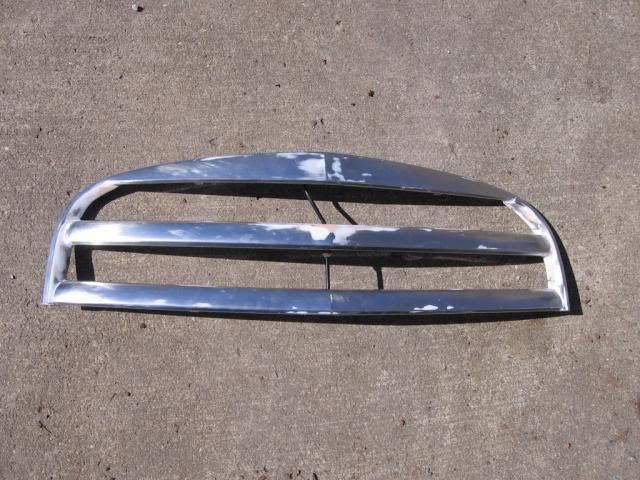
But, I wanted my 3 bar to be different from the rest, no bowtie. Here's how I did it.
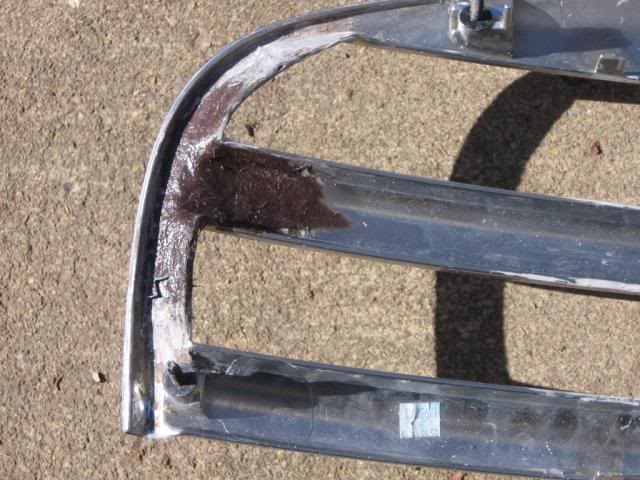
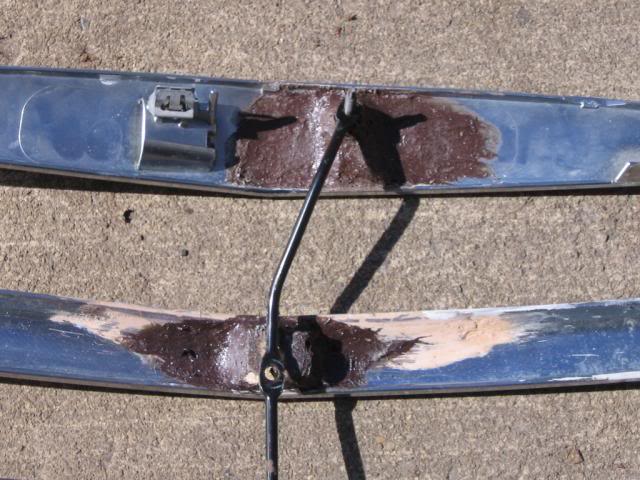
I used a coping saw to cut all the bars out of the grille. Then I cut them apart at the bowtie. I took the lower bar & test fit it to the middle bar position. It is slightly longer than the middle bar so it needs to be trimmed a little. But, it has to fit into the opening with a little tension, to make it bulge out, so it has the right contour. One thing I didn't expect was how much all the parts changed shape once cut out. There is a lot of tension on the parts in the grille, cut them out & the shape of everything changes. Once I had the new center bar fit & centered, I used ABS glue to hold it in place. Lots of glue on all the joints, then holding it in place for 10 minutes until it set. Next, I reinforced the back with Tiger Hair body filler. This was after I used my die grinder to strip off the chrome. On the front I filled any gaps with a mixture of ABS glue & ABS plastic shavings.
I will say that if I tried this again, I might cut just the bowtie out of the center & fit a piece cut from the center of another bar. It may be easier than gluing the ends in place.
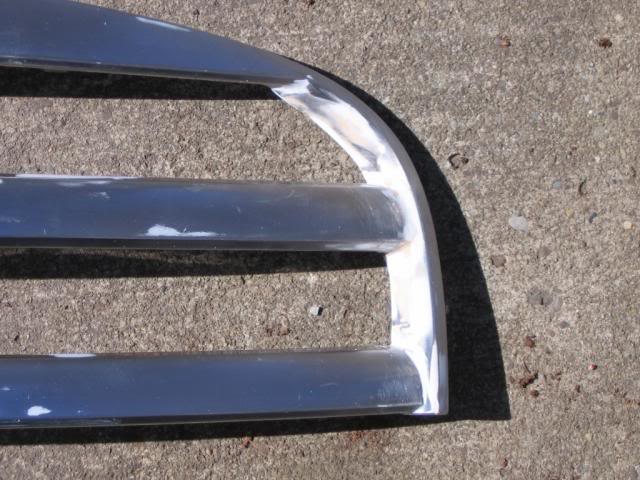
Next up I used more Tiger Hair to fill the half moons left by the bars that were removed.
Then everything was smoothed with Bondo & finished with glazing putty.
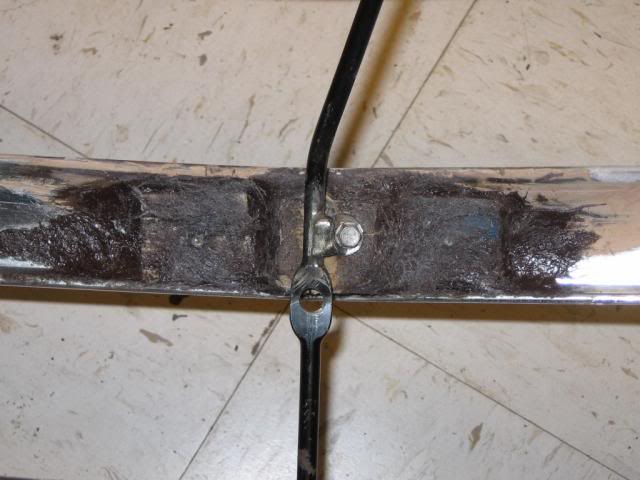
Up next I remounted the top mount that the deer hit broke off. More grinding, ABS glue, followed by a lot of Tiger Hair. Here's where I realized that the grill bowed in top & bottom by more than 1/2" with the brace & all the bars & ties removed. At this point it took lots of playing around to get even spacing between the top & bottom of the center bar. The metal brace being reinstalled helped a lot, but things were still off. I had to weld a new tab to the bar & glue a block in the center bar to fasten to that tab. That allowed me to adjust the center bar so it was....centered. You'll see the tab & block in the pics. The factory tab was too low to use, it mounts below center line of the center bar, at the bottom of the bowtie
I also had to fill the hole left from the bowtie attachment to the new center bar, more Tiger Hair & Bondo.
Next I Tiger Haired wooden blocks to the back to provide a spot for screws to anchor the screen I will be installing. I plan on using plastic gutter guard rather than aluminum, if I can get paint to stick to it. I like the pattern better, & it is much easier to work with.
That's where I am currently. I should have time in a couple of weeks to get it painted. I will be using R-M Diamont products. Epoxy primer used wet on wet as an adhesion promoter, Victory red basecoat, then clear. Note I did not strip the chrome. I feel the epoxy will stick very well to it as I sanded it all.
Here's some pics of the progress to this point.
But, I wanted my 3 bar to be different from the rest, no bowtie. Here's how I did it.
I used a coping saw to cut all the bars out of the grille. Then I cut them apart at the bowtie. I took the lower bar & test fit it to the middle bar position. It is slightly longer than the middle bar so it needs to be trimmed a little. But, it has to fit into the opening with a little tension, to make it bulge out, so it has the right contour. One thing I didn't expect was how much all the parts changed shape once cut out. There is a lot of tension on the parts in the grille, cut them out & the shape of everything changes. Once I had the new center bar fit & centered, I used ABS glue to hold it in place. Lots of glue on all the joints, then holding it in place for 10 minutes until it set. Next, I reinforced the back with Tiger Hair body filler. This was after I used my die grinder to strip off the chrome. On the front I filled any gaps with a mixture of ABS glue & ABS plastic shavings.
I will say that if I tried this again, I might cut just the bowtie out of the center & fit a piece cut from the center of another bar. It may be easier than gluing the ends in place.
Next up I used more Tiger Hair to fill the half moons left by the bars that were removed.
Then everything was smoothed with Bondo & finished with glazing putty.
Up next I remounted the top mount that the deer hit broke off. More grinding, ABS glue, followed by a lot of Tiger Hair. Here's where I realized that the grill bowed in top & bottom by more than 1/2" with the brace & all the bars & ties removed. At this point it took lots of playing around to get even spacing between the top & bottom of the center bar. The metal brace being reinstalled helped a lot, but things were still off. I had to weld a new tab to the bar & glue a block in the center bar to fasten to that tab. That allowed me to adjust the center bar so it was....centered. You'll see the tab & block in the pics. The factory tab was too low to use, it mounts below center line of the center bar, at the bottom of the bowtie
I also had to fill the hole left from the bowtie attachment to the new center bar, more Tiger Hair & Bondo.
Next I Tiger Haired wooden blocks to the back to provide a spot for screws to anchor the screen I will be installing. I plan on using plastic gutter guard rather than aluminum, if I can get paint to stick to it. I like the pattern better, & it is much easier to work with.
That's where I am currently. I should have time in a couple of weeks to get it painted. I will be using R-M Diamont products. Epoxy primer used wet on wet as an adhesion promoter, Victory red basecoat, then clear. Note I did not strip the chrome. I feel the epoxy will stick very well to it as I sanded it all.
Here's some pics of the progress to this point.


Thread Starter
Member
Joined: 02-10-2013
Posts: 57
From: Wildwood Pa
I'm going to be using plastic gutter guard. Less than $2 for a roll, & I'll have enough to do the grille 3 times over. I'm making three sets, one black, one Victory red, one silver. I'm thinking the red will look best, but I'll have to see.
The plastic gutter guard is easier to work with then the aluminum guard, in my opinion.
Hopefully everything will get painted next weekend.
The plastic gutter guard is easier to work with then the aluminum guard, in my opinion.
Hopefully everything will get painted next weekend.
Thread Starter
Member
Joined: 02-10-2013
Posts: 57
From: Wildwood Pa
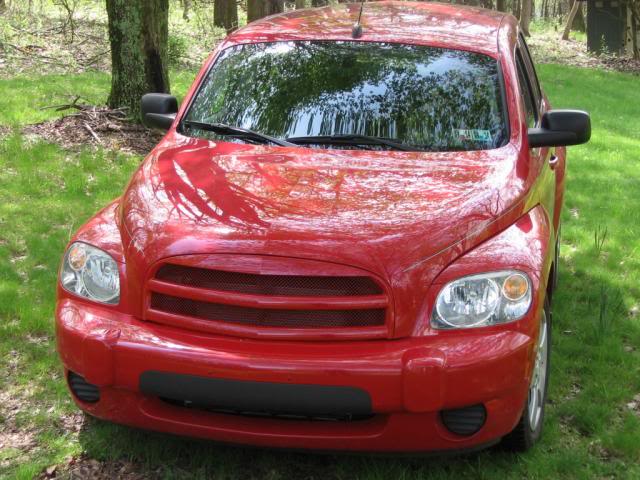
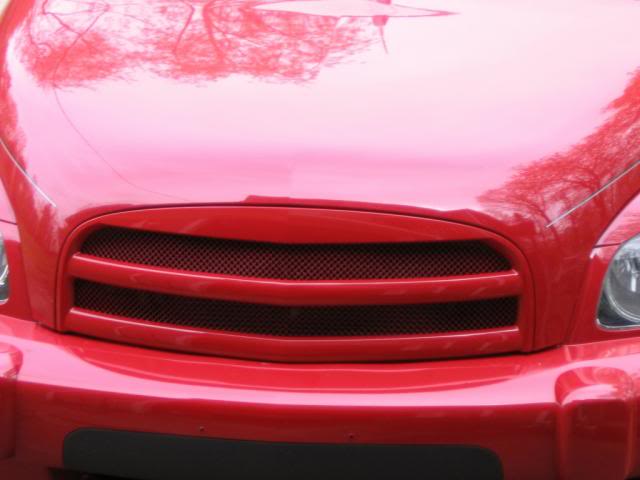
Here's the final result, painted & installed.
The epoxy primer really seems to have stuck the the chrome, no need to strip it off in my opinion. I sanded the chrome with 320 grit sandpaper, then primed it with RM Diamont EP589. Next was Victory red basecoat, followed by DC88 clear. These are all body shop products, not spray cans. The paint seems to have stuck well to the plastic gutter guard mesh too.
I painted the ends of my AC condenser black, the silver really showed thru the grille mesh & stood out. It disappeared once it was painted black. I didn't paint the core, it doesn't show like the ends did, & I'm not sure if painting it would affect its efficiency.
If you are removing your grille, I recommend putting some grease on the studs that hold the grille to the hood, as well as on the hood where the studs go thru. When you remove & install the grille, the threads on the studs scrape off some paint in the holes. In the north, that is an invitation to rust. Coating those areas will keep rust away.


