Got Some Mod Pics To Post...but


Thread Starter
Senior Member
Joined: 03-21-2011
Posts: 101
From: Hammond, Indiana
Got Some Mod Pics To Post...but
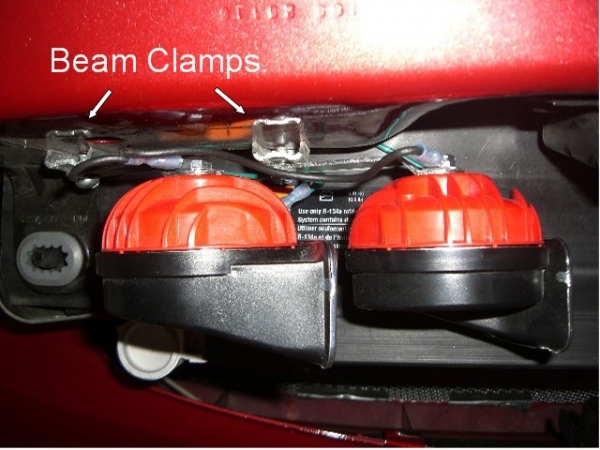
 I want to post pictures of my horn mod in the thread like so many of you have done. Do I have to resize each picture to 480 by 640 to post them here like I had to do for my gallery posts? Also, I don't know how to post pictures in the thread or add text to them to explain the steps of the mod. Can someone help? I'd really appreciate it. I mounted two Fiaam Grande's under the hood, atop the A/C condenser. Can't wait to show you guys.
J.J.


Senior Member
Joined: 03-06-2010
Posts: 6,869
From: Ohio
This one.... How to post photos
And if you upload them here in the gallery they will resize automatically. That should do it for you.
And if you upload them here in the gallery they will resize automatically. That should do it for you.
Thread Starter
Senior Member
Joined: 03-21-2011
Posts: 101
From: Hammond, Indiana
Thanks much folks. All is appreciated. I think I have to rersize before I can upload them. I'll get that done and then we'll see what happens next. Thanks again to all of you good people of Earth.
J.J.
J.J.
Thread Starter
Senior Member
Joined: 03-21-2011
Posts: 101
From: Hammond, Indiana
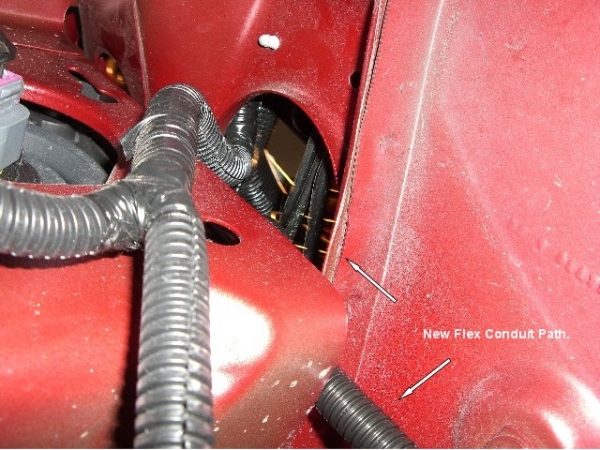
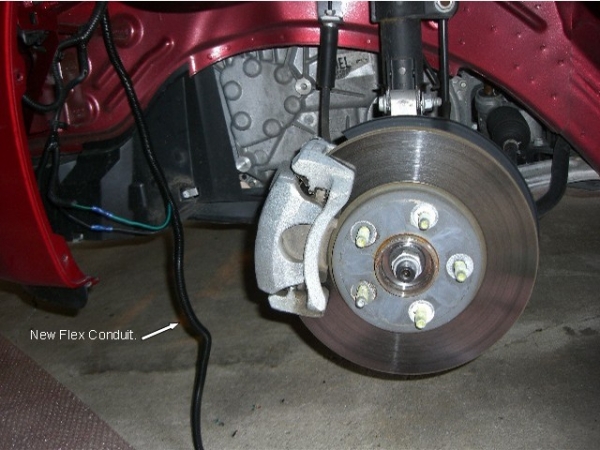
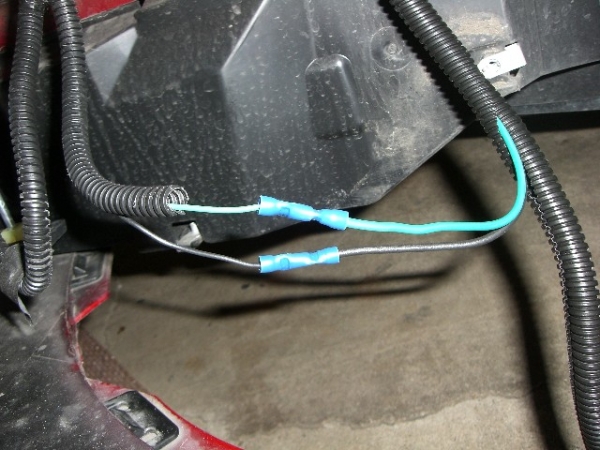
New wires butt spliced to factory wires. I went overboard on the conductor size. #18 wire would be plenty adequate. I used #14. The new conduit is large enough to over wrap the factory conduit for a seamless jacket.
J.J.
J.J.