
Timing Chain gears


Thread Starter
Senior Member
Joined: 02-01-2006
Posts: 1,471
From: lockport,ny
Timing Chain gears
Now that I plan on reusing my existing engine, I plan on the following:
1) Replace timing chain and guides (and the oil "squirter"). I already have these parts from Rock Auto from before.
2) Replace water pump and thermostat (because it's easy and will eventually fail).
3) Drop the oil pan and clean out any pieces from the broken timing chain guides and guide bolt.
4) Replace the clutch disc, pressure plate, and bearing/slave cylinder assembly.
5) Replace oxygen sensor and both cam actuator solenoids.
Anything else I should do or replace while the engine is out on a hoist?
Also, how can I tell if the cam timing gears need replacement? They are very expensive to buy and I don't want to replace them if they are OK.
Steve

Thread Starter
Senior Member
Joined: 02-01-2006
Posts: 1,471
From: lockport,ny
I have the engine on a stand and removed the oil pan today.
I wasn't sure if I wanted to go to the effort to remove it, but I'm glad I did. There was a pretty big piece of the broken timing chain guide in the bottom of the oil pan (about 3/4" long). I don't know if it would have caused problems for sure, but it can't be good to have it sitting there.
Oil pans have sure come a long way since they were just a stamped steel cover. The Ecotec oil pan is quite a work of engineering. It bolts to the engine and the transmission, and has an integral oil pickup and tube which mates with a passage cast into the block. There is no gasket, just silicone sealer.
What is your preference for using silicone gaskets, putting the parts together immediately after applying the silicone or waiting 15 minutes or so before assembling? I have seen it done both ways.
Also, closer inspection of the timing chain area shows that the loose timing chain wore a spot on the front of a balance shaft chain guide. I have ordered a new guide from Rock Auto and will replace the worn one.
I also removed the cut-off studs at the exhaust header output flange. Since the flange has threaded holes all the way through, I am going to thread in M12 hex bolts from the backside rather than trying to find the right studs that fit.
Steve
Thread Starter
Senior Member
Joined: 02-01-2006
Posts: 1,471
From: lockport,ny
Here are some pictures:
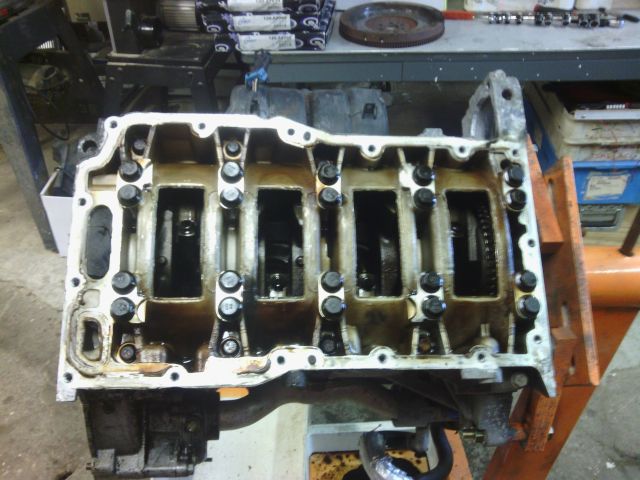
Bottom of block with oil pan off:
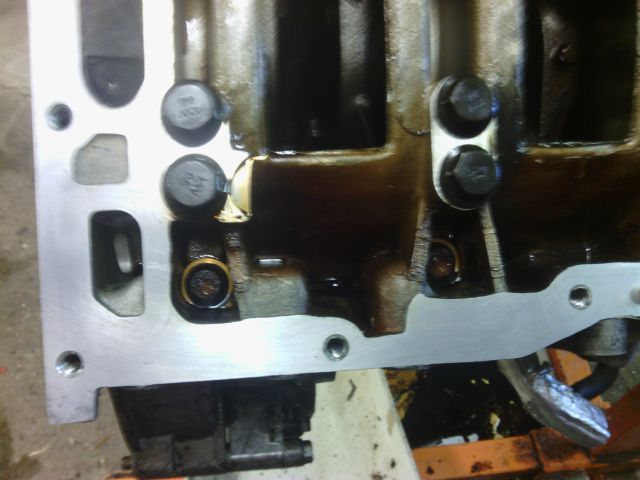
Block surface after cleaning lightly with scotchbrite pad:
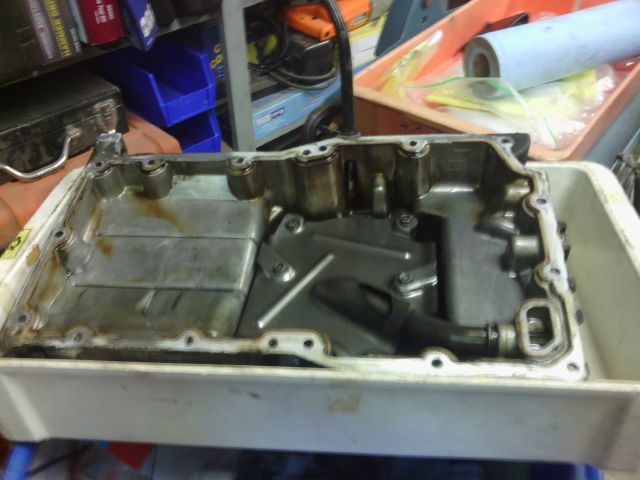
Oil pan with windage tray:
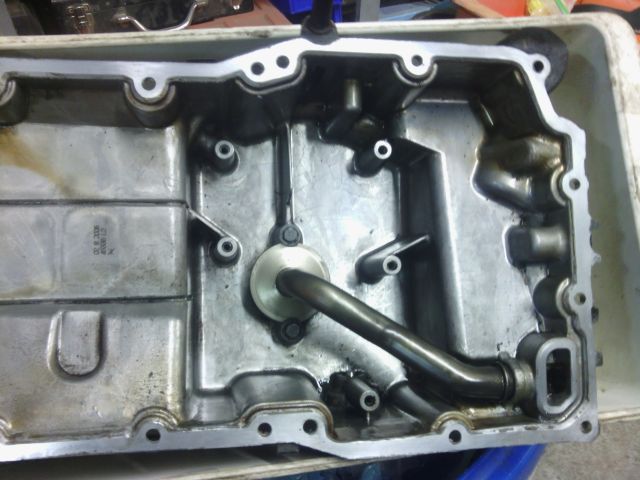
Oil pan with windage tray removed, showing oil pickup tube:
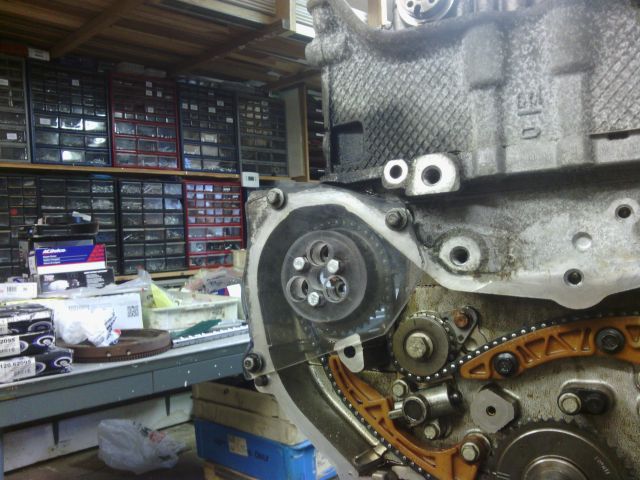
My homemade water pump sprocket holder that attaches to the engine without the timing cover on (the regular tool for this attaches to the timing cover and costs $50 or so):
Steve
Bottom of block with oil pan off:
Block surface after cleaning lightly with scotchbrite pad:
Oil pan with windage tray:
Oil pan with windage tray removed, showing oil pickup tube:
My homemade water pump sprocket holder that attaches to the engine without the timing cover on (the regular tool for this attaches to the timing cover and costs $50 or so):
Steve

Moderator
Joined: 01-23-2009
Posts: 26,532
From: Fredericksburg,VA
Follow the directions on he tube?
The exhaust studs are fairly expensive and tough to install (available from GM). Good luck finding bolts with long enough threads and the correct hardness. I used M12 X1 1/2. I'm not sure they make 2 inch fully threaded bolts. It is very difficult to get the exhaust hooked up without at least 1 stud.
Why do you need the sprocket holder with the engine out? The water pump doesn't have a timing mark.

Senior Member
Joined: 09-07-2008
Posts: 1,016
From: Mebane, NC
Also for future reference, manaul says not to clean those surfaces with a scotch brite abrasive pad. Little pieces of the pad break off and get inside the motor. I do use them as well but only if the motor is completely apart and I'm going to be doing a thorough wash down before I start assembly.
Thread Starter
Senior Member
Joined: 02-01-2006
Posts: 1,471
From: lockport,ny
My GM service manual specifies a 2mm (max) bead of RTV, I notice your posted instructions say a 3.5mm bead. Maybe mine shows different because its an early HHR (2006).
I'll probably use a good RTV made for oil pans from the local NAPA store.
Dr.Loch:
I didn't see the warning in my GM manual. Is it listed under the general engine rebuild procedures somewhere?
When I was scraping the old RTV off (with a plastic putty knife) and then using the scotchbrite pad, I had the engine tilted so the pan surface was vertical. This allowed most of the stuff to fall onto the floor instead of into the engine.
Do you think I should flush out the bottom end somehow (without disassembling it)?
Steve
Senior Member
Joined: 09-07-2008
Posts: 1,016
From: Mebane, NC
Let it go and make a mental note.
The sealant like the GM 12378521 Is a permatex, 85144 7.5oz Pressurized can, 34311 5oz cartridge or 34310 10.2 oz cartridge.
I have also used the Permatex� Ultra Grey� RTV Silicone Gasket Maker with good results, your choice.
The sealant like the GM 12378521 Is a permatex, 85144 7.5oz Pressurized can, 34311 5oz cartridge or 34310 10.2 oz cartridge.
I have also used the Permatex� Ultra Grey� RTV Silicone Gasket Maker with good results, your choice.
Moderator
Joined: 01-23-2009
Posts: 26,532
From: Fredericksburg,VA
But, if the chain is installed and the waterpump sprocket is bolted on, the only way to screw the timing up is to spin the crankshaft.
OK, could happen if you have children or other inquisitive folks in your shop. Suspenders AND a belt!
Mitchell says 2mm for 2.2L and 3.5mm for 2.4L.
OK, could happen if you have children or other inquisitive folks in your shop. Suspenders AND a belt!
Mitchell says 2mm for 2.2L and 3.5mm for 2.4L.