
Installing Interior Dome/Mirror Light Switch


Thread Starter
Senior Member
Joined: 05-19-2009
Posts: 124
From: Florida
Installing Interior Dome/Mirror Light Switch
This mod will allow you to turn off power for the dome and mirror lights
Here are the tools and steps required to perform the interior light switch mod.
If you are not technically inclined please purchase the fabricated bypass circuit from http://www.rv-partsplus.com/home/accessories/ per 87silver ref: Dome Override thread https://www.chevyhhr.net/forums/problems-service-repairs-42/dome-override-26350/
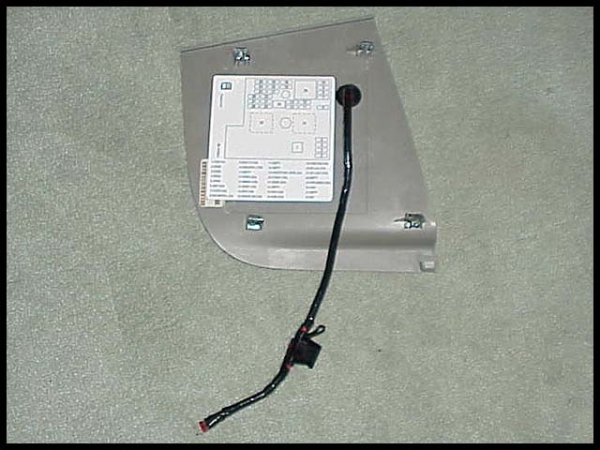
Decided to use the fuse panel / bcm cover as opposed to locating it elsewhere, moved the fuse information about 1" to accommodate the new switch. Your choice of location within the limits of the length of the new circuit.
Tools
25 watt Soldering Iron
Wire Cutters
3/8" drill (battery powered preferred)
3/4" hole cutter bit or Forstner bit
1/8" drill bit (to center drill 3/4" hole)
Dremel power tool (diamond cutter and mini drum sander)
Exacto cutter or sharp knife
Crimping tool
Parts and supplies
Solder
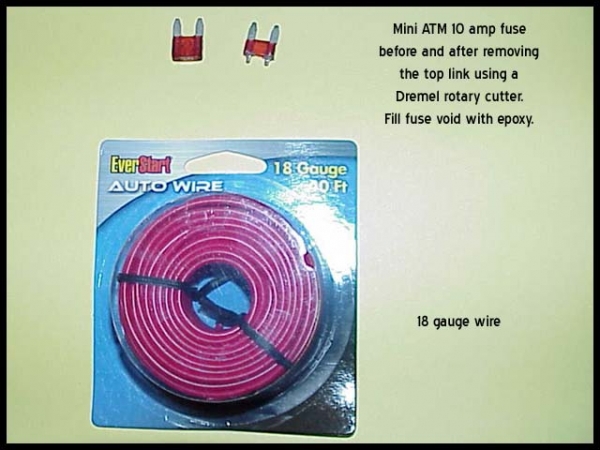
18 gauge wire (Walmart auto dept)
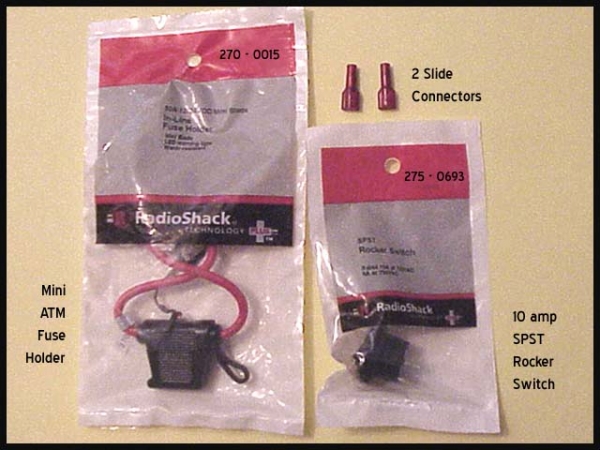
Fuse holder (Radio Shack # 270-0015)
10 amp Switch (Radio Shack # 275-0693)
10 amp ATM mini fuse (use Dremel to remove top)
1/4" flex or spiral loom
Electrical Tape
2 small insulated push on slide connectors (to fit switch connections)
Heat shrink tubing
Directions:
Assembly -
1. Fill void in modified fuse with epoxy (assure that the fuse link in the center is removed)
2. Cut fuse holder wire so that 1/2" of wire is left on it and strip 1/8" of insulator off on both sides
3. Solder a 3 inch 18 gauge wire to one side of exposed fuse connection
4. Solder the other end of the above wire to one side of the fuse holder
5. Use heat shrink in both soldered ends of the wire above
6. Solder a 8" piece of 18 gauge wire to the opposite side of the fuse holder
7. Crimp the other end of the 8" wire to a slide connector with end stripped about 3/8"
8. Cut a 15" piece of 18 gauge wire
9, Solder one end to the other fuse terminal (see images) strip end about 1/8"
10. Shorten the 15" wire so that it is the same length as the total length of fused side
11. Use heat shrink at fuse connection of the 15" wire
12. Solder other end of this wire to another slip connector
13. Circuit is complete
Installing -
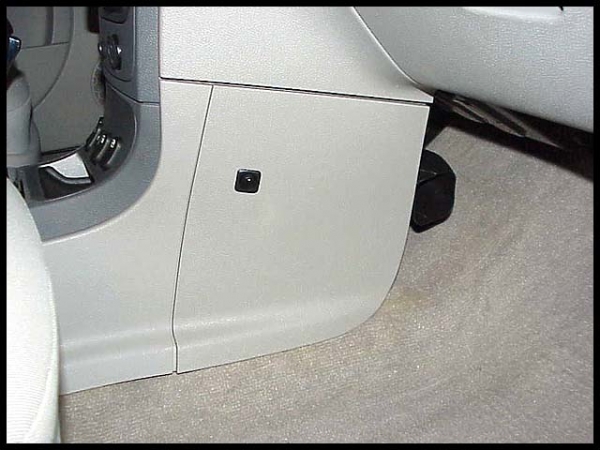
a. Remove fuse info on rear of cover - relocate info label 1" to left from original position
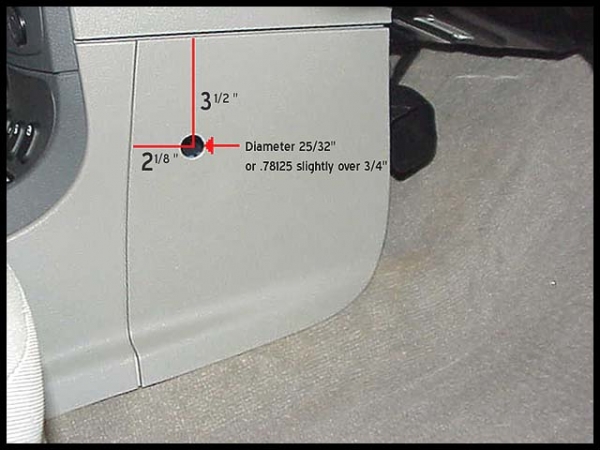
b. Drill 1/8" pilot in fuse cover panel where shown in image or in your desired location
c. Drill 3/4" hole using pilot hole as a guide with a 3/4' circle cutter or Forstner bit
d. Enlarge this hole about 1/32" in diameter using a small Dremel drum sand or similar tool or file
e. Mount switch in cover panel
f. Push slide connectors onto switch
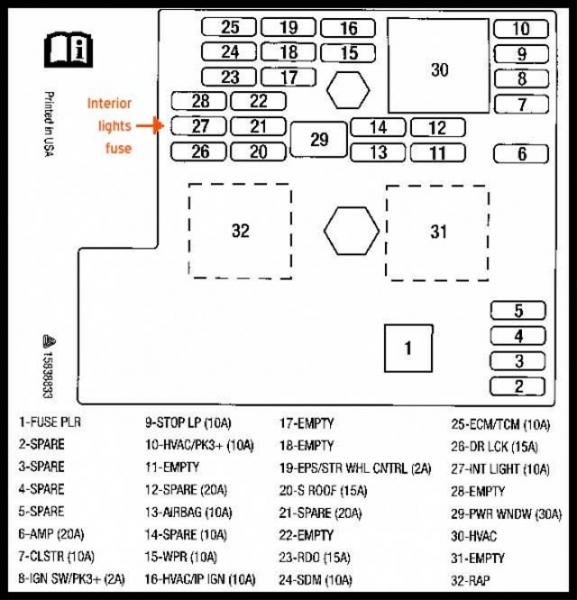
g. Remove the 10 amp fuse from position # 27 and insert the modified fuse end of the circuit into fuse position #27
h. Position or push excess circuit loom/wire into open area between the bcm connectors
i. Re-install fuse cover
Images:


Last edited by unique_w; Nov 5, 2009 at 06:58 AM. Reason: Correct Title

Thread Starter
Senior Member
Joined: 05-19-2009
Posts: 124
From: Florida
Use
Mike - It will allow the interior lights to be turned off for those that do not wish them to be on with the doors open for an interval of 20 minutes. For example; If you are working on the vehicle, cleaning it, or any other reason one may have the doors or liftgate open for an extended interval. etc... The bcm timer that dims the interior lights is set for 20 minutes as opposed to other GM vehicles that are set for 5 minutes.
Please excuse no explanation.
Visit the thread Deflace posted https://www.chevyhhr.net/forums/showthread.php?t=26350
Please excuse no explanation.
Visit the thread Deflace posted https://www.chevyhhr.net/forums/showthread.php?t=26350


Thread Starter
Senior Member
Joined: 05-19-2009
Posts: 124
From: Florida

Thread Starter
Senior Member
Joined: 05-19-2009
Posts: 124
From: Florida
Auxilary Harness Kit
Guess one could modify this auxiliary harness kit, its cost is about three dollars less than the parts listed, it uses a glass buss type fuse as opposed to a mini ATM.
Last edited by unique_w; Nov 7, 2009 at 07:03 AM. Reason: Remove Image


Senior Member
Joined: 10-20-2009
Posts: 106
From: Fort Worth Texas
I had the idea of just installing a 2008 HHR Light with the dome override switch and every service manager that I talked to from about five dealerships said that would be possible if the body control model of the vehicle was recalibrated to accept the light. The wiring for both the 2008 and 2009 are the same. However, I was told by a rep from GM that the 2009's did not have the calibration feature which I find that hard to believe. If anybody can let me know more about this, cool. In any case, we'll see what happens.
Thanks
Blue