Sub install
 02-02-2006, 08:33 AM
#41
Senior Member

Join Date: 01-29-2006
Location: Port Saint Lucie,Florida
Posts: 1,148
I was thinking remove the spare and the plastic cover over the spare but leave the shelf. Maybe build the bottom section fiberglass and the top mdf. Hopefully it can be built with enough airspace but sit down low enough so the shelf can still sit in the floor position. I'm going to take tome measurements and see what I can do. The only set back is that I have never done fiberglass and I dont wanna muff anything up on my interior. I'm thinking I need to figure out what I wanna do before I lower it. Anybody know if the fiberglass is something a rookie can do or am I better off trying to think of a total mdf enclosure?
 02-02-2006, 01:53 PM
#42
Senior Member

Join Date: 12-18-2005
Location: Middle Village, NY
Posts: 1,791
What about using a tube, like Bazooka. It could fit right behind the back seat, over the 2 little compartments and still allow access to the big one. They come either powered or not. If you get the unpowered one, you could stick the amp where the old sub went (and it would be vented from the factory holes in the panal).
In my many years of car audio, I have always been disappointed with free air subs. Likewise, although I have worked as a carpenter and built beautiful boxes according to all the proper specs and sealing methods, they never sounded as tight as the prebuilt ones. So in my last car, a bought a box then built it in to my car.
In my many years of car audio, I have always been disappointed with free air subs. Likewise, although I have worked as a carpenter and built beautiful boxes according to all the proper specs and sealing methods, they never sounded as tight as the prebuilt ones. So in my last car, a bought a box then built it in to my car.
02-02-2006, 02:48 PM
#43
Senior Member

Join Date: 01-06-2006
Location: Long Island, NY
Posts: 224
Originally Posted by Lee3333
What about using a tube, like Bazooka. It could fit right behind the back seat, over the 2 little compartments and still allow access to the big one. They come either powered or not. If you get the unpowered one, you could stick the amp where the old sub went (and it would be vented from the factory holes in the panal).
In my many years of car audio, I have always been disappointed with free air subs. Likewise, although I have worked as a carpenter and built beautiful boxes according to all the proper specs and sealing methods, they never sounded as tight as the prebuilt ones. So in my last car, a bought a box then built it in to my car.
In my many years of car audio, I have always been disappointed with free air subs. Likewise, although I have worked as a carpenter and built beautiful boxes according to all the proper specs and sealing methods, they never sounded as tight as the prebuilt ones. So in my last car, a bought a box then built it in to my car.
When the right woofers are used, free-air systems can work great.
A lot of SQ Competitors use IB systems.
Just hard to find a good woofer for em...
 02-05-2006, 08:05 PM
#44
Banned

Join Date: 10-14-2005
Location: Rochester,N.Y.
Posts: 9,121
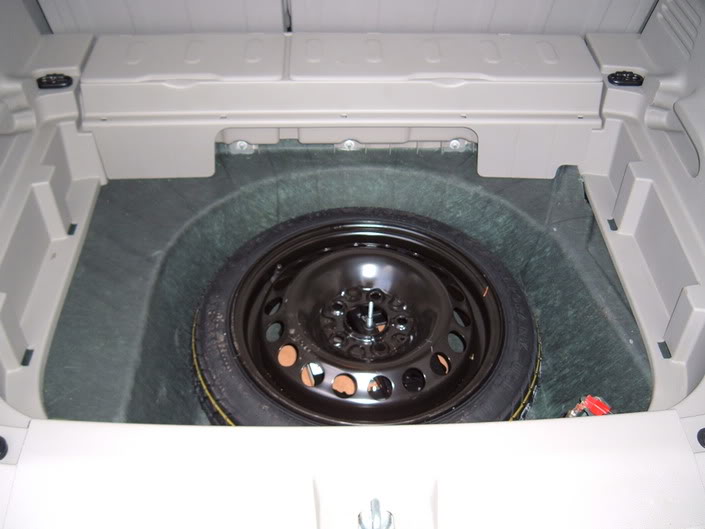
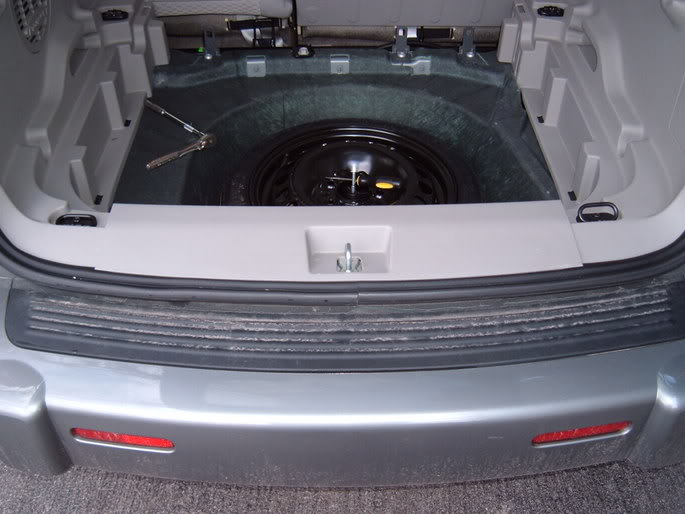
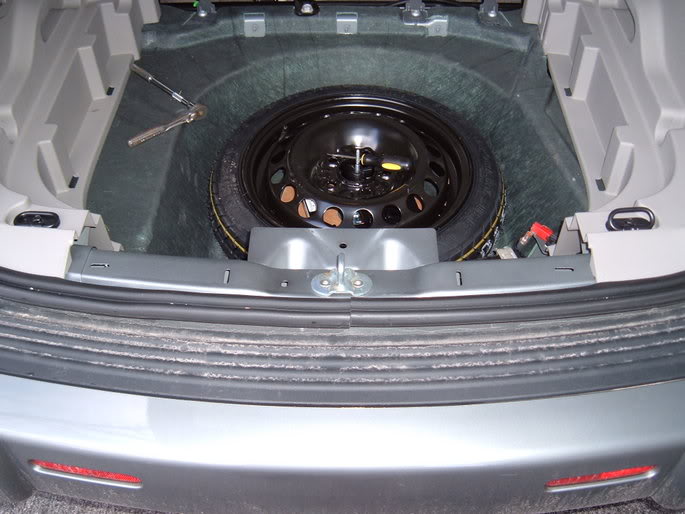
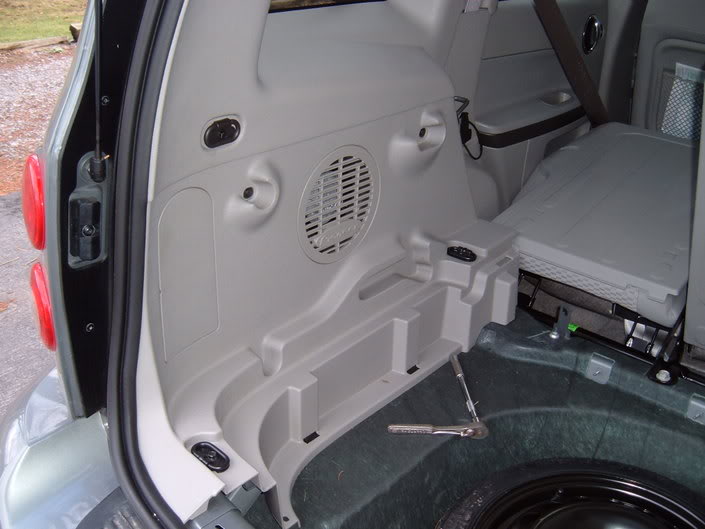
I suck at how-tos so here is a very basic description of how to get the factory box out. First you will need a couple of tools. A small flathead screw driver, a 10mm deep socket, socket wrench, socket extender. I use my hands but you can use a trim removal tool if you want. The first thing you need to do is take off the spare tray and spare cover:
Next you will see three 10mm bolts holding in the two little bins:
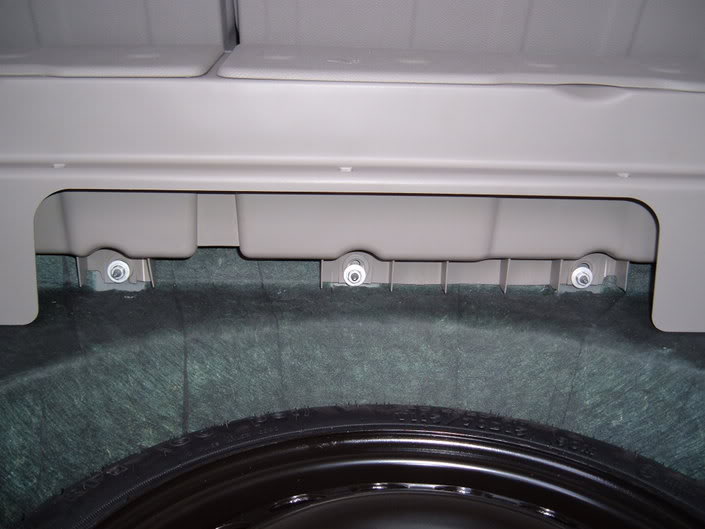
Remove them and pull up on the bin it will pop out:
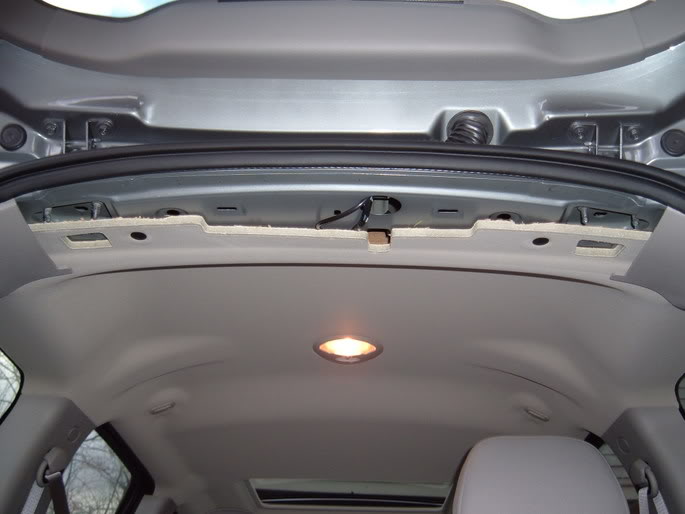
Next pop off the top panel:
Next you will see three 10mm bolts holding in the two little bins:
Remove them and pull up on the bin it will pop out:
Next pop off the top panel:
 02-05-2006, 08:10 PM
#46
Banned
Join Date: 10-14-2005
Location: Rochester,N.Y.
Posts: 9,121
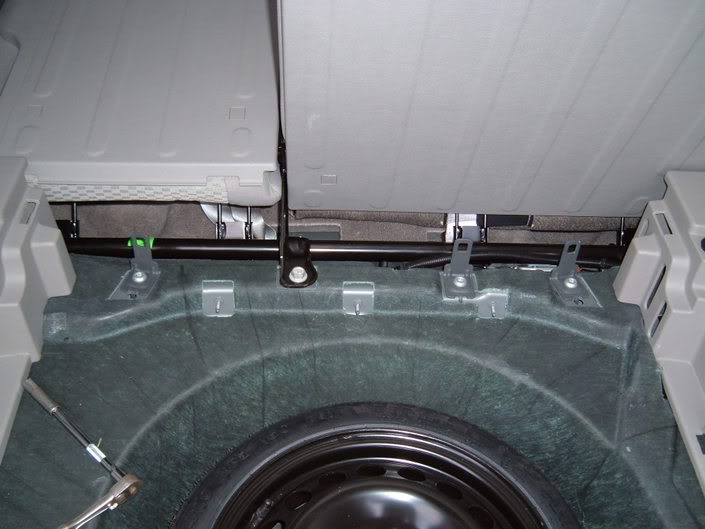
And the bottom panel:
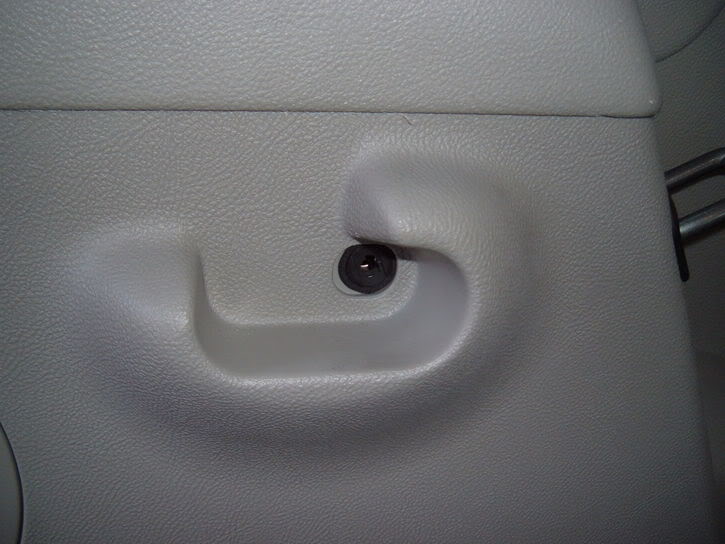
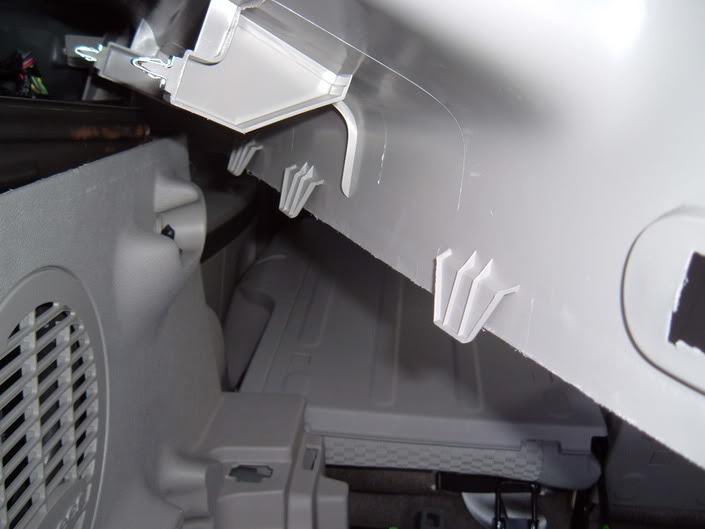
from there you will need to un secure the side panels. Pull the two little pins out of the side panels:

They are two part push pins. Take a small flathead and pull out the center pin:
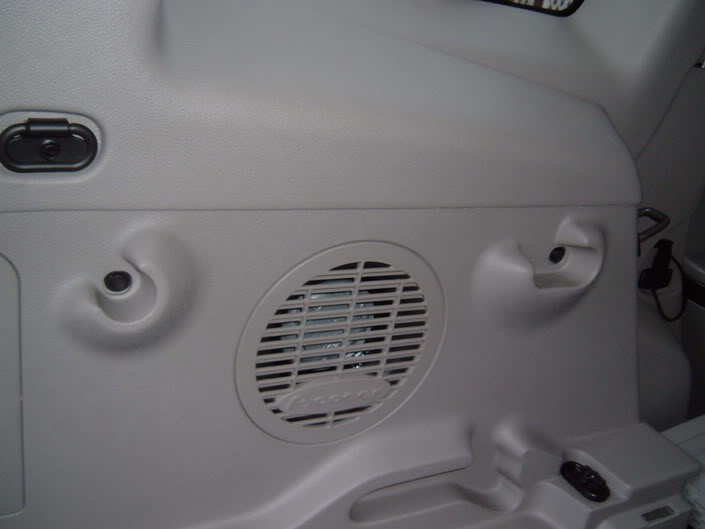
Next take out the rubber gromet out the seat latch:
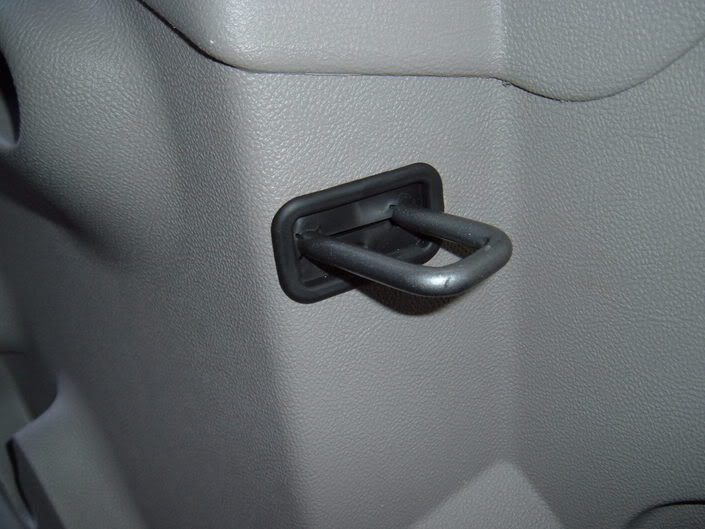
Now take off the three cargo tie downs. They are held on by one 10mm bolt each:
from there you will need to un secure the side panels. Pull the two little pins out of the side panels:
They are two part push pins. Take a small flathead and pull out the center pin:
Next take out the rubber gromet out the seat latch:
Now take off the three cargo tie downs. They are held on by one 10mm bolt each:
Last edited by captain howdy; 02-05-2006 at 10:16 PM.
02-05-2006, 08:42 PM
#47
Banned
Join Date: 10-14-2005
Location: Rochester,N.Y.
Posts: 9,121
After that you are free to pull out the side panels. I didn't completely remove them because it's not necessary to get to the box. Anyways start at the top and be careful when you get to where they meet. They are held together by plastic tabs:
Be carefull when you remove the bottom panel because the other part of these pins will pop out:
Grab them before the get lost. Once you have the panels out you will see a metal brace over the box held on by 4 10mm bolts. Remove it:
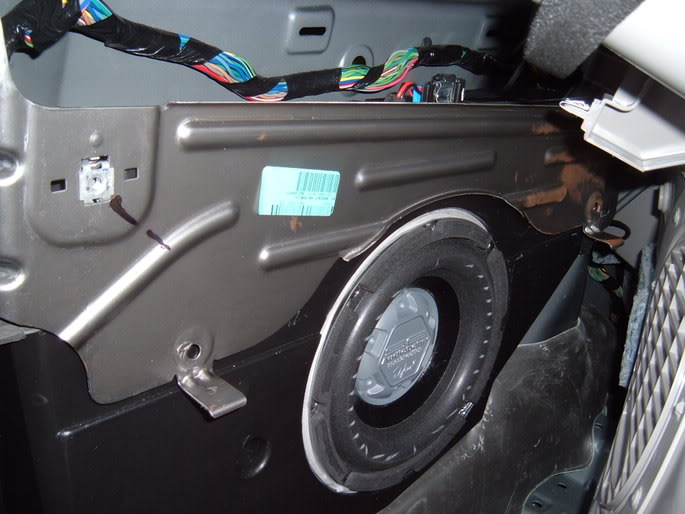
After that you are free to get to the box. It is held in by four 10mm bolts. This in where the socket extender will come into play. Three of the bolts are in the deep holes that go through the box and there is one below the amp:
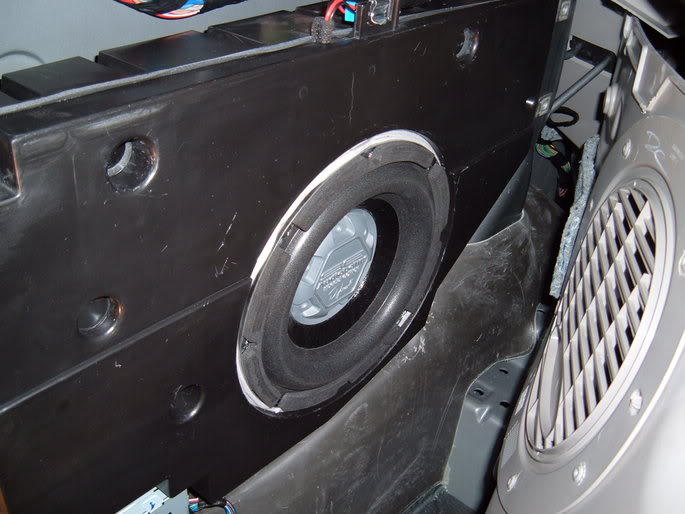
Once those are out undo the wire harness. There are three plugs on the amp and one at the top of the box going to the sub. If you are thinking of cheating at this point and thinking about removing the eight screws holding in the sub and swaping it without pulling the box, don't even try. The factory subwoofer is actualy bolted into the backside of the box:
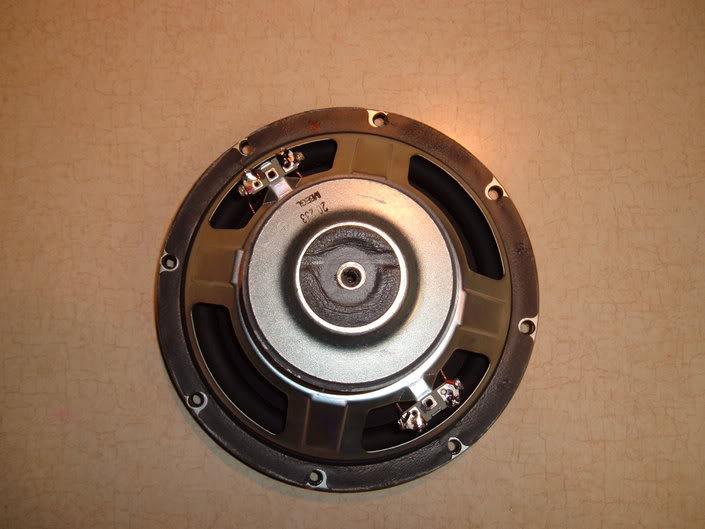
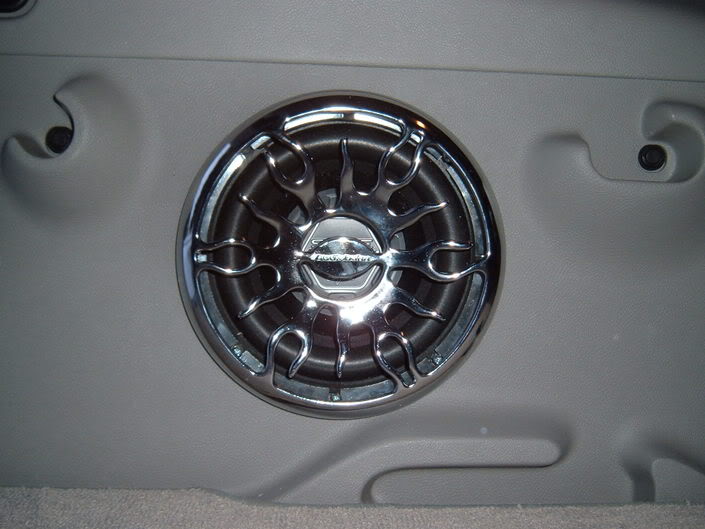
You will have to unbolt it from the back in order to remove it. It also leaves a nice little hole to fill in. Also another word of advice is that you are probably going to have to put in a space ring and aftermarket grille like me if you put in an aftermarket sub:
You will also find the only place in the whole system where it tells you how many ohms it is:

Be carefull when you remove the bottom panel because the other part of these pins will pop out:
Grab them before the get lost. Once you have the panels out you will see a metal brace over the box held on by 4 10mm bolts. Remove it:
After that you are free to get to the box. It is held in by four 10mm bolts. This in where the socket extender will come into play. Three of the bolts are in the deep holes that go through the box and there is one below the amp:
Once those are out undo the wire harness. There are three plugs on the amp and one at the top of the box going to the sub. If you are thinking of cheating at this point and thinking about removing the eight screws holding in the sub and swaping it without pulling the box, don't even try. The factory subwoofer is actualy bolted into the backside of the box:
You will have to unbolt it from the back in order to remove it. It also leaves a nice little hole to fill in. Also another word of advice is that you are probably going to have to put in a space ring and aftermarket grille like me if you put in an aftermarket sub:
You will also find the only place in the whole system where it tells you how many ohms it is:
Last edited by captain howdy; 02-05-2006 at 10:17 PM.
 02-05-2006, 11:04 PM
#49
Senior Member
Join Date: 12-18-2005
Location: Middle Village, NY
Posts: 1,791
All of the stock 'premium' speakers must be 2 ohm, since the 4 in the passanger compartment are too. I lost some volume when I replaced them, but gained bass and overall sound quality.
What a pain to get to the sub and amp. I am not looking forward to it. Much different than the other speakers, ease wise.
What a pain to get to the sub and amp. I am not looking forward to it. Much different than the other speakers, ease wise.
02-05-2006, 11:18 PM
#50
Banned
Join Date: 10-14-2005
Location: Rochester,N.Y.
Posts: 9,121
When I tested the lines they all came out 2 ohms but as you know there is no marking on any of the other speakers. You are not going to make it any louder unless you add more power but as you noticed swapping the speakers makes the stereo sound a lot better. When I swapped out the fronts and tweeters it did make the system seem louder but I'm sure thats mostly because because of it sounding clearer and producing better tones.