


Where to put headunit wires without cutting?


Thread Starter
Member
Joined: 04-26-2011
Posts: 38
From: Idaho
Where to put headunit wires without cutting?
I started an aftermarket headunit installation this evening. Ordered the recommended adapters from Crutchfield, including the GMOS-LAN-4 and steering wheel button adapter. Full parts list in this other thread.
Anyway, it's mostly working properly (have to diagnose the steering wheel controls only partially working tomorrow, planning to call Crutchfield), but I'm not looking forward to trying to get all the wires in place for the final install. I'd really rather not cut the plastic out. The headunit itself was recommended by Crutchfield, and technically fits, but only barely. There's zero space behind it for any of the extra wiring or adapter boxes.
Is there space behind the plastic behind the headunit, such that just the connectors could peek through? What's the best way to access that area?
Anyway, it's mostly working properly (have to diagnose the steering wheel controls only partially working tomorrow, planning to call Crutchfield), but I'm not looking forward to trying to get all the wires in place for the final install. I'd really rather not cut the plastic out. The headunit itself was recommended by Crutchfield, and technically fits, but only barely. There's zero space behind it for any of the extra wiring or adapter boxes.
Is there space behind the plastic behind the headunit, such that just the connectors could peek through? What's the best way to access that area?
Administrator
Joined: 10-13-2011
Posts: 40,097
From: Welland,Ont Canada
Thread Starter
Member
Joined: 04-26-2011
Posts: 38
From: Idaho
Anyway, I'll be searching/reading some more, but if someone has some information they can chime in with, hopefully it'll help me, and the descriptive thread title will hopefully help others find the info in the future.

Administrator
Joined: 10-13-2011
Posts: 40,097
From: Welland,Ont Canada
I've never replaced my HU so, I thought maybe some of our threads might help.
That being said way back during my radio installer days I'd just cut a hole large enough to stuff the wires thru, mind you , there were just the wires no fancy factory like connectors!

Like this vintage Alpine unit!
That being said way back during my radio installer days I'd just cut a hole large enough to stuff the wires thru, mind you , there were just the wires no fancy factory like connectors!
Like this vintage Alpine unit!

Senior Member
Joined: 10-06-2011
Posts: 1,150
From: Mesa, AZ
Here is a post from my thread asking pretty much the same thing showing where I ended up running my wires instead of cutting. I also have 3 sets of RCAs that I ran thru one of the other existing holes but that is not shown for some reason.
Well the stereo isinstalled  . I did not need to cut afterall. This is thanks to the included spacer and the use of short barrel RCA's. My 90* ones are still in the mail and since these fit I went with them. The spacer is actually needed with this HU as the volumn knob prevents the face from coming all the way down without the spacer. Without the space the HU sits half an inch into the dash kit which is why the volumn knob hits.
For the depth the spacer is needed or atleast helps since I did not have to cut. The heat sink on this unit hits the back wall before it can clip into the sleeve without the spacer so I would have had to cut the entire back out to fit the HU. Spacer gave the HU about 1/4 to spare which inturn gave me enough extra room for the rca's.
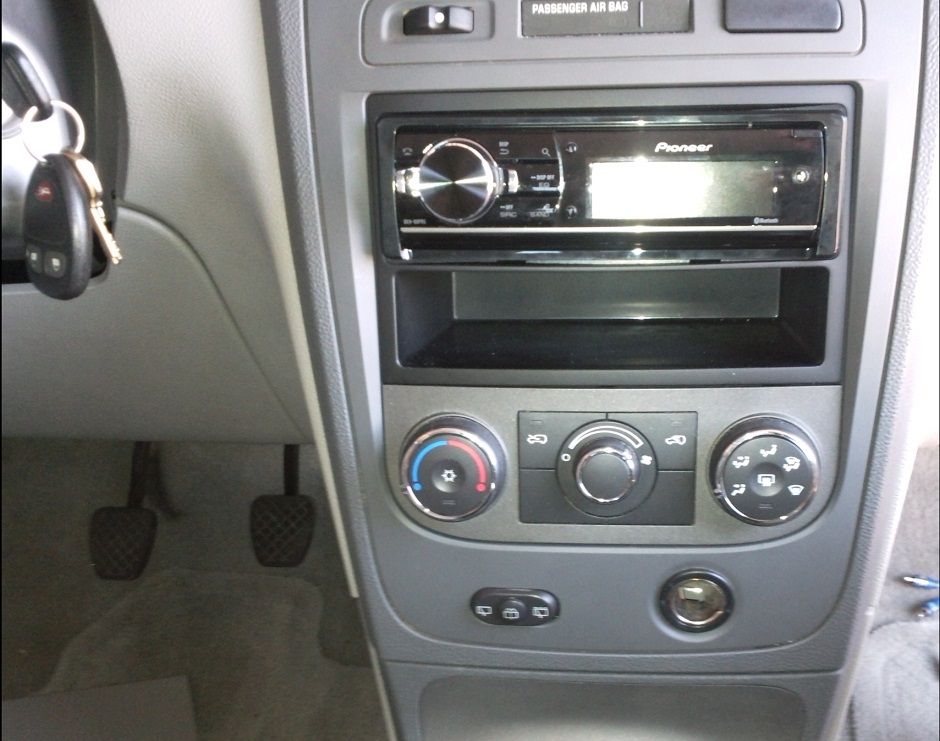
You can't tell from this pic but this is with the sacer and is not touching. Notice the heatsink on the back of the radio. That was touching without the spacer.
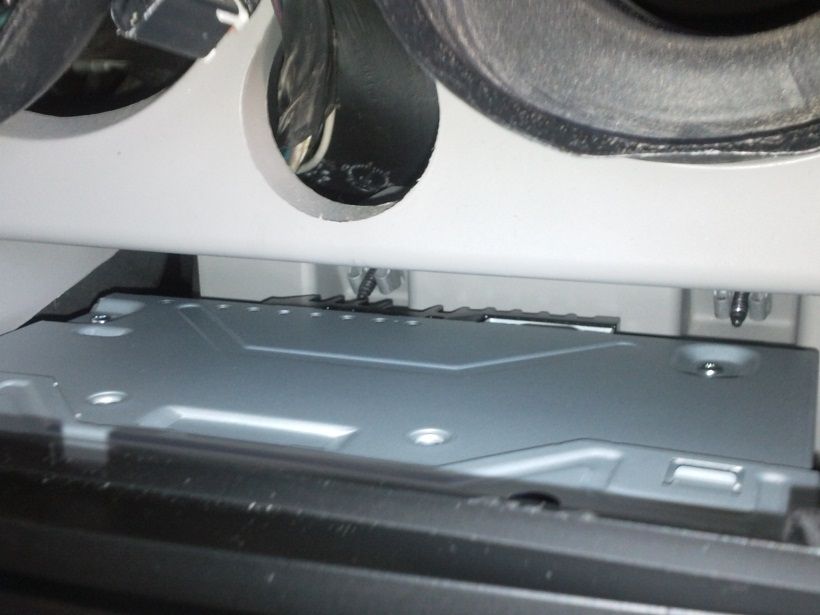
Here is where I mounted the chime box from the axxess/metra wire kit. The rca's had not been ran but had been test fitted at this point. The box has about 3/8" clearance above it from the radio kit's pocket.
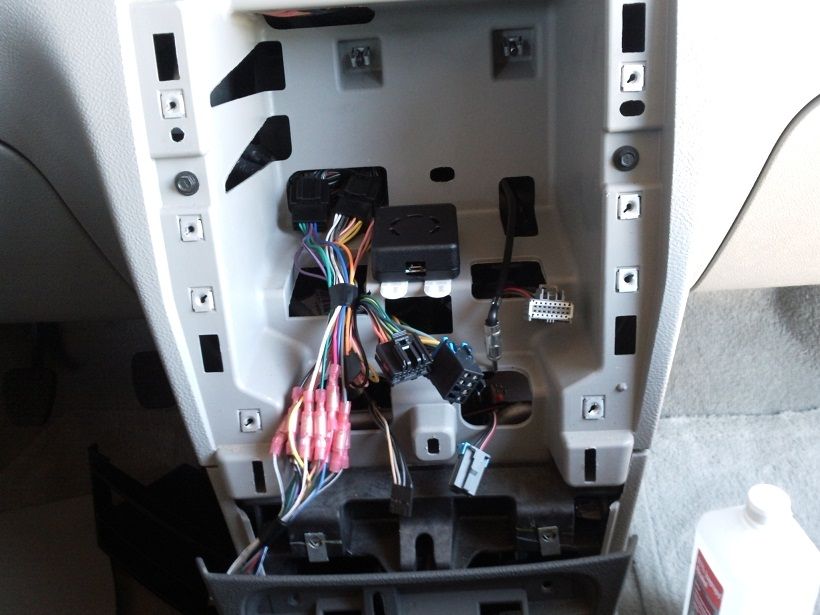
. I did not need to cut afterall. This is thanks to the included spacer and the use of short barrel RCA's. My 90* ones are still in the mail and since these fit I went with them. The spacer is actually needed with this HU as the volumn knob prevents the face from coming all the way down without the spacer. Without the space the HU sits half an inch into the dash kit which is why the volumn knob hits. For the depth the spacer is needed or atleast helps since I did not have to cut. The heat sink on this unit hits the back wall before it can clip into the sleeve without the spacer so I would have had to cut the entire back out to fit the HU. Spacer gave the HU about 1/4 to spare which inturn gave me enough extra room for the rca's.
You can't tell from this pic but this is with the sacer and is not touching. Notice the heatsink on the back of the radio. That was touching without the spacer.
Here is where I mounted the chime box from the axxess/metra wire kit. The rca's had not been ran but had been test fitted at this point. The box has about 3/8" clearance above it from the radio kit's pocket.
Thread Starter
Member
Joined: 04-26-2011
Posts: 38
From: Idaho
Thanks, that helps a bit to see the space, and also to see some of what can be cut without causing issues. :)
Thread Starter
Member
Joined: 04-26-2011
Posts: 38
From: Idaho
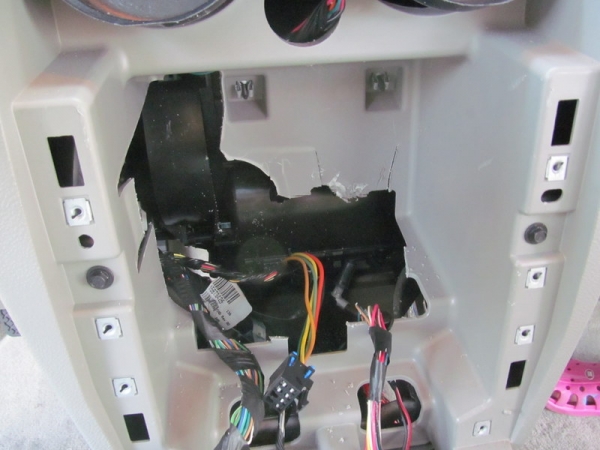
I gave in & cut.
Function test & adapter programming:

Cutting done mostly with a right-angle adapter on a Dremel, with my wife holding the shop vac nearby to catch scraps

Final hole

Final cleaned up adapter harness

Function test & adapter programming:
Cutting done mostly with a right-angle adapter on a Dremel, with my wife holding the shop vac nearby to catch scraps
Final hole
Final cleaned up adapter harness

