DIY Roof Rack Install

 03-18-2009, 06:21 AM
#22
Senior Member

Join Date: 07-17-2006
Location: Dallas, GA
Posts: 6,050
I saw a set of these on EBay recently, but no hardware. Anyone know what the hardware kits cost seperately?
 03-19-2009, 06:13 AM
#23

Join Date: 03-15-2009
Location: Temperance
Posts: 7
I bought my on Ebay. Side rails and cross rail kits , both included the hardware ,tamplats and instructions.
I think I paid $150 for chrome side rails kit and $200 for cross rails with chrome end caps from Rubyautogoup ( They are around Columbus OH area ), If you google RubyAutoGroup on line, you will find them . Talk to there parts guy. His name is Dennis .
I think I paid $150 for chrome side rails kit and $200 for cross rails with chrome end caps from Rubyautogoup ( They are around Columbus OH area ), If you google RubyAutoGroup on line, you will find them . Talk to there parts guy. His name is Dennis .
04-28-2009, 09:05 PM
#24
Senior Member

Join Date: 04-26-2009
Location: NE Texas
Posts: 1,222
You were right...This makes me want to put some on mine now
07-22-2009, 04:59 PM
#25
Senior Member

Join Date: 07-13-2009
Location: NC
Posts: 414
R60us, you are THE MAN! I just bought my HHR, but it lacks a roof rack. It looks totally naked, and I was pondering how hard the installation would be. With your tutorial, I am totally confident. I ordered the rails today, and they'll be here tomorrow. A fun weekend project for sure. :-) My sincere thanks, and I owe you one. God Bless, Marc
07-24-2009, 11:09 PM
#26
New Member
Thread Starter

Join Date: 12-31-2008
Location: MN
Posts: 28
R60us, you are THE MAN! I just bought my HHR, but it lacks a roof rack. It looks totally naked, and I was pondering how hard the installation would be. With your tutorial, I am totally confident. I ordered the rails today, and they'll be here tomorrow. A fun weekend project for sure. :-) My sincere thanks, and I owe you one. God Bless, Marc
Thanks,
Rob
07-25-2009, 05:31 PM
#27
Senior Member
Join Date: 07-13-2009
Location: NC
Posts: 414
Whew. What a harrowing day. My HHR �Elvis� (my son named him) now has chrome rails. I can add a bit to the installation tale now.
Part 1 - The work went just as indicated in the main posting here, all the way through the drilling of the holes in the roof. I test fit the soft-metal rivet-nuts. Bad news, 5 rivet-nuts fit, but 3 rivet-nuts encountered metal underneath. That�s right, in the rear, it is a double walled roof, separated by about a quarter inch. In that lower layer, there are holes drilled already to accommodate the rivet-nuts. However, on my car, they only halfway lined up with the upper holes. That meant I could not drill the lower as the bit would just skew and ruin the upper (critical) holes.
Part 2 - I got out my Dremel tool and went to work with a drill bit grinding the holes larger in the lower piece of steel roof. The drill bit snapped off, and dropped into the headliner area presumably. Then I discovered my Dremel chuck had frozen to the broken drill bit and couldn�t be released. I called �MAYDAY� to my friend Mark who is a car genius. He brought his Dremel, got the lower layer cut right, but broke a drill too, which disappeared down into the headliner area. The best part is Mark calmed me down and got the project back on track, at the cost of his Saturday.
Part 3 � We disassembled the rear of the car, and dropped down the headliner. No bits. Not even one. We looked and looked, high, low, inside, and all over, but never found either. I hate rattles, but admitted defeat and later drove the car. No rattles, so wherever the broken bits are, they are wedged tight.
What did I learn?
Lesson 1 � Templates - The templates that tape to the roof are excellent, but I am thinking that it is awfully easy to mis-install them. Pay particular attention to where the back of the template goes against the hatch opening and where it goes up against the raised roof ridge bead. It was probably my fault. However, the instructions certainly didn�t say �There are invisible holes underneath the top layer that you have to match�. It could be lower roof piece was installed an eighth�s inch off. Who knows. Just be prepared if you install your rack, and keep the Dremel handy. Don�t push your bits hard either.
Lesson 2 - Waterproofing - The rivet-nuts mushroom underneath like a cross between a lead anchor (for putting screws in concrete) and a pop rivet. Once they are fully pulled up by the fixture and mushroomed underneath, presumably they are watertight. I didn�t trust that. I put black silicone adhesive exterior sealant under the flange of the rivet-nut where it hit the roof. Once tightened down, the sealant squeezes out a little, but insures watertight installation.
I also waxed the rack parts well before installation, and Armor-All�ed the rubbery flange before affixing it to the roof. If anyone gets a set of rails with no parts, I have the templates here, as well as the fixture for mushrooming the rivet-nuts, and the instructions. They are free to anyone who needs them. Just e-mail me.
The name Elvis? We were listening to an Elvis rock-and-roll CD in the car, and my son suggested that Elvis was the car�s name. I thought a minute. Well, the car is from the South, it�s white, and it reminds me of the �50�s. I chuckled and said, �Yep, Elvis he is.�
God Bless, Marc
07-25-2009, 06:09 PM
#28
New Member
Thread Starter
Join Date: 12-31-2008
Location: MN
Posts: 28
Congratulations!
Ouch... I bet that was stressful! Congratulations, it sounds like you conquered the dreaded roof rack install with a job well done.
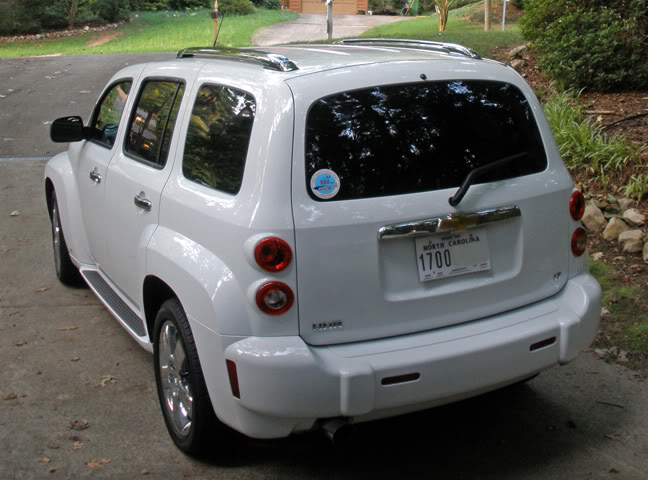
Thank you for posting your experience. When you get time lets see a photo of the finished product.

Thank you for posting your experience. When you get time lets see a photo of the finished product.
07-25-2009, 06:36 PM
#29
Senior Member
Join Date: 07-13-2009
Location: NC
Posts: 414
Hi R60us, It was a tough day, but that was mainly anxiety. It is not a physically demanding project, so I hope I don't scare anyone off doing the job themselves. Having great friends always makes a troublesome job easier. God Bless and best wishes to all, Marc
07-25-2009, 07:21 PM
#30
New Member
Thread Starter
Join Date: 12-31-2008
Location: MN
Posts: 28
Looks great!