DIY Roof Rack Install
 07-19-2010, 09:08 PM
#41

Join Date: 07-17-2010
Location: Pleasantville, OH
Posts: 1
Awesome! Thanks Rob.
 07-27-2010, 07:45 AM
#42
New Member

Join Date: 07-07-2010
Location: Bastop, TX
Posts: 21
Hey all. did you guy have to remove the headliner prior to drilling the holes?
Thanks
Thanks
07-28-2010, 07:51 AM
#44
New Member
Join Date: 07-07-2010
Location: Bastop, TX
Posts: 21
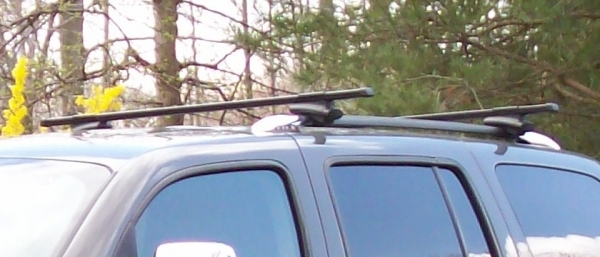
Could you post a pic with the Thule cross-bar on the OEM rails?
So tempting. Yesterday I had to go buy a rear cargo carrier that hooks onto my hitch to haul my travel gear.
So tempting. Yesterday I had to go buy a rear cargo carrier that hooks onto my hitch to haul my travel gear.

 10-22-2010, 03:23 PM
#46
New Member
Thread Starter

Join Date: 12-31-2008
Location: MN
Posts: 28
Here is a Prowler 13 Angler Kayak on top of my HHR. Thule 450 Crossroads Foot Pack, LB50 cross bars, and Yakima Bowdowns

Last edited by R60us; 10-23-2010 at 10:09 AM. Reason: add mount info
03-17-2012, 08:44 PM
#47
Rest In Peace

Join Date: 06-13-2010
Location: IL.
Posts: 2,301
Long shot, but i'll ask. 
Does anyone still have the paper Templates ?
Or if someone reads this "How To" to install a set, would you save the paper templates and send it my way Please.
I bought a used set of Chrome Rails, and the Template would be nice to have.
I have the proper nut rivet gun from my bodyshop days.
I could even mail the paper template back to you if you wanted to keep them.
03-17-2012, 10:33 PM
#48
Senior Member

Join Date: 08-29-2009
Location: Long Island, NY
Posts: 1,813
POST #27! Maybe his email link is still good?
05-14-2012, 03:21 PM
#50
Member

Join Date: 03-22-2012
Location: Simi Valley, California
Posts: 67
The people at Chevy are lying liars that lie!
They sent rivnuts and a 9mm drill bit with the install kit, however the rivnuts are not 9mm...
The drill bit was 9mm = 0.354in from cutting surface to cutting surface measured both on analog and digital calipers.
the rivnuts measured .386in or 9.794mm at the body with a little oversizing at the top for the gripping teeth these were measured both on analog and digital calipers.
There was no way short of using a hammer that the Rivnuts were going to go into the roof.
I had to redrill the holes with a 25/64 bit =.3906in or 9.9219mm to get them to fit and they were still very tight.
So be warned, if you try this yourself, you may get the larger rivnuts like I did. I went with a 25/64th bit instead of the full 10mm because I didn't want the holes to be too big. It seemed to work for me.
Also, after careful measuring I ended up dead center in the holes that are in the underlying sheet metal in back and had clearance issues with the riv-setting tool. My solution was to use an aluminum drill bit stop as a spacer on the tool to make it shorter. This worked perfectly and the rivnuts set with no issues.
All in all your tutorial was a great help and I'm glad I did it myself. I shudder to think what some low level tech at a dealership might have done if he'd been confronted with the rivnuts not fitting right...