When you click on links to various merchants on this site and make a purchase, this can result in this site earning a commission. Affiliate programs and affiliations include, but are not limited to, the eBay Partner Network.
"How To" Tutorial LibraryWrite tips and instructions on how to install parts or fix problems. This is for detailed "How To's" only, not a forum to ask how to do something. Please post those questions in appropriate forums.
Plastic Collar Quick Connect Fitting Service
Removal Procedure
Caution: Refer to Gasoline/Gasoline Vapors Caution in the Preface section.
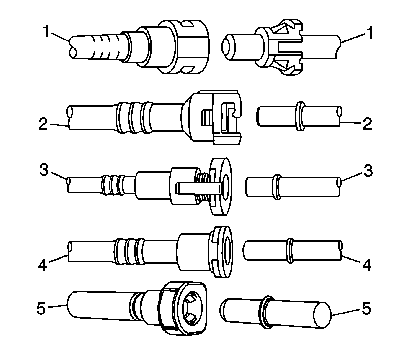
Important: There are several types of plastic collar fuel and evaporative emission quick connect fittings that may be used on this vehicle.
• Bartholomew (1)
• Q release (2)
• Squeeze to release (3)
• Sliding retainer (4)
• Push down TI (5)
The following instructions apply to all of these types of fittings except where indicated.
Relieve the fuel system pressure. Refer to Fuel Pressure Relief .
Caution: Wear safety glasses when using compressed air, as flying dirt particles may cause eye injury.
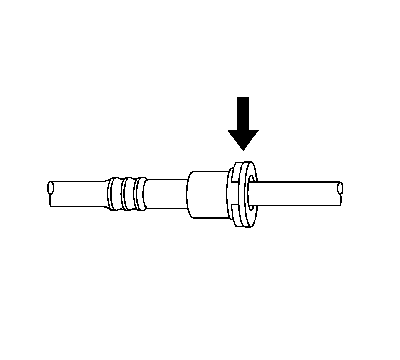
Using compressed air, blow any dirt out of the quick connect fitting.
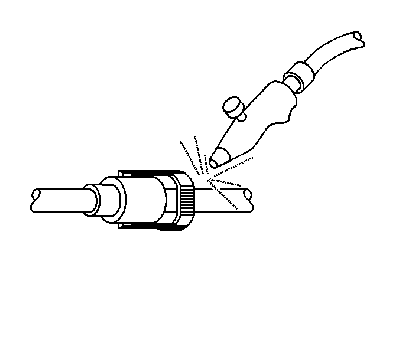
This step applies to the Bartholomew style connectors ONLY. Squeeze the plastic quick connect fitting release tabs.
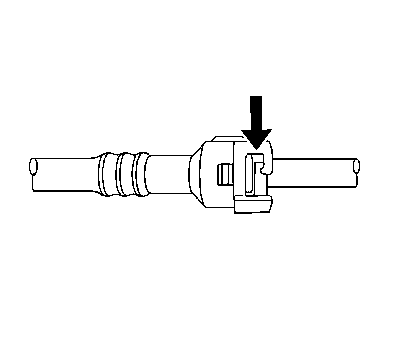
This step applies to the Q release type connectors ONLY. Release the fitting by pushing the tab toward the other side of the slot in the fitting.
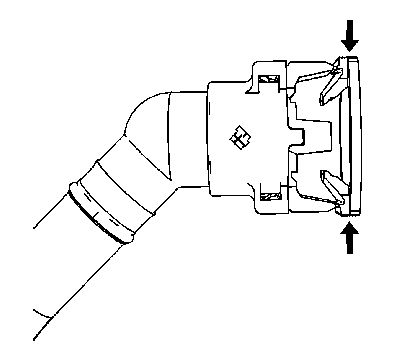
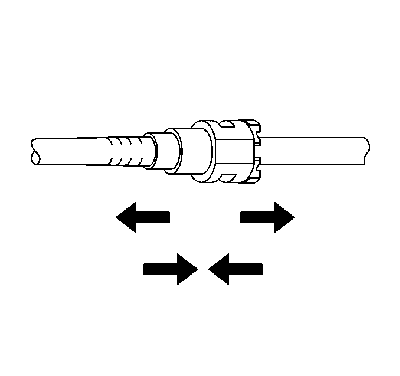
This step applies to the Squeeze to release style connectors ONLY. Squeeze where indicated by arrows on both sides of the plastic ring surrounding the quick connect fitting.
This step also applies to the Squeeze to release style connectors ONLY. Squeeze where indicated by the arrows on both sides of the plastic ring surrounding the quick connect fitting.
This step applies to the Sliding retainer style connectors ONLY. Release the fitting by pressing on one side of the release tab causing it to push in slightly. If the tab does not move, try pressing the tab in from the opposite side. the tab will only move in one direction.
This step applies to the Push down TI style connectors ONLY. Release the fitting by pressing on the tabs indicated by the arrow.
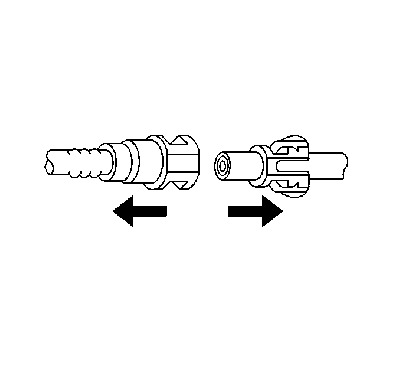
Pull the connection apart.
Wipe off the male pipe end using a clean shop towel.
Inspect both ends of the fitting for dirt and burrs.
Clean or replace the components as required.
Installation Procedure
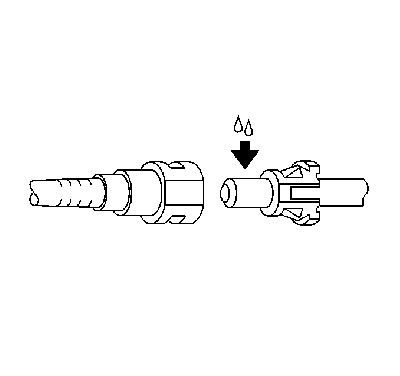
Apply a few drops of clean engine oil to the male connection end.
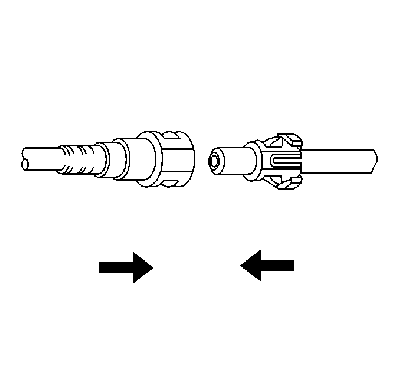
Push both sides of the quick connect fitting together in order to cause the retaining feature to snap into place.
Once installed, pull on both sides of the quick connect fitting in order to make sure the connection is secure.
Thanks to the OP for this handy guide. I managed to break one of my quick connectors while I was dropping the fuel tank. It is similar the to one pictured in the 6th photo down from the top.
A two piece connector where the black part that you squeeze latches into a translucent plastic part that contains the o-ring seal. It is for a the vapor return line on the very back / top side of the tank in my 2010 Suburban.
Does anyone know where to source one of the parts? I don't really want to replace the whole line. If I had to guess I would say this is a dealer only part,
Try you local parts palaces, Dorman might offer a solution, measure the OD of the vapour line it should be either 10 mm or 3/8 inch or 8 mm or 5/16 inch