When you click on links to various merchants on this site and make a purchase, this can result in this site earning a commission. Affiliate programs and affiliations include, but are not limited to, the eBay Partner Network.
"How To" Tutorial LibraryWrite tips and instructions on how to install parts or fix problems. This is for detailed "How To's" only, not a forum to ask how to do something. Please post those questions in appropriate forums.
So, from August 4,2015, until today July 7,2018, the Moog K200792 bearing bushings seemed just fine. During an inspection for a brake shake, I discovered they have worn out.
To be fair , I’ve put a lot of 125,000 klms on them driving back and forth to Hamilton every day from Sept 25 2015 until April 30, 2016, and then every other day until January 30 2017, while Sweetie kicked her cancers butt to the curb.
So, from August 4,2015, until today July 7,2018, the Moog K200792 bearing bushings seemed just fine. During an inspection for a brake shake, I discovered they have worn out.
To be fair , I�ve put a lot of miles on them driving back and forth to Hamilton every day from Sept 25 2015 until April 30, 2016, and then every other day until January 30 2017, while Sweetie kicked her dancers butt to the curb.
I got a good laugh from that misspelled word.
Seriously though. We're all proud of your Sweetie and her battle against the
big "C".
I pulled the LCA’s out, and the ball socket is loose in the Moog bushings , however , they have been subjected to pot holes and rough train tracks and broken pavement over 3 years and 125,000 klms.
I’ve stepped up to the zinc coated Moog K201285 bearing bushings.
The worn parts allowed the LCA’s to contact the top and bottom of the pocket they fit into in the unibody.
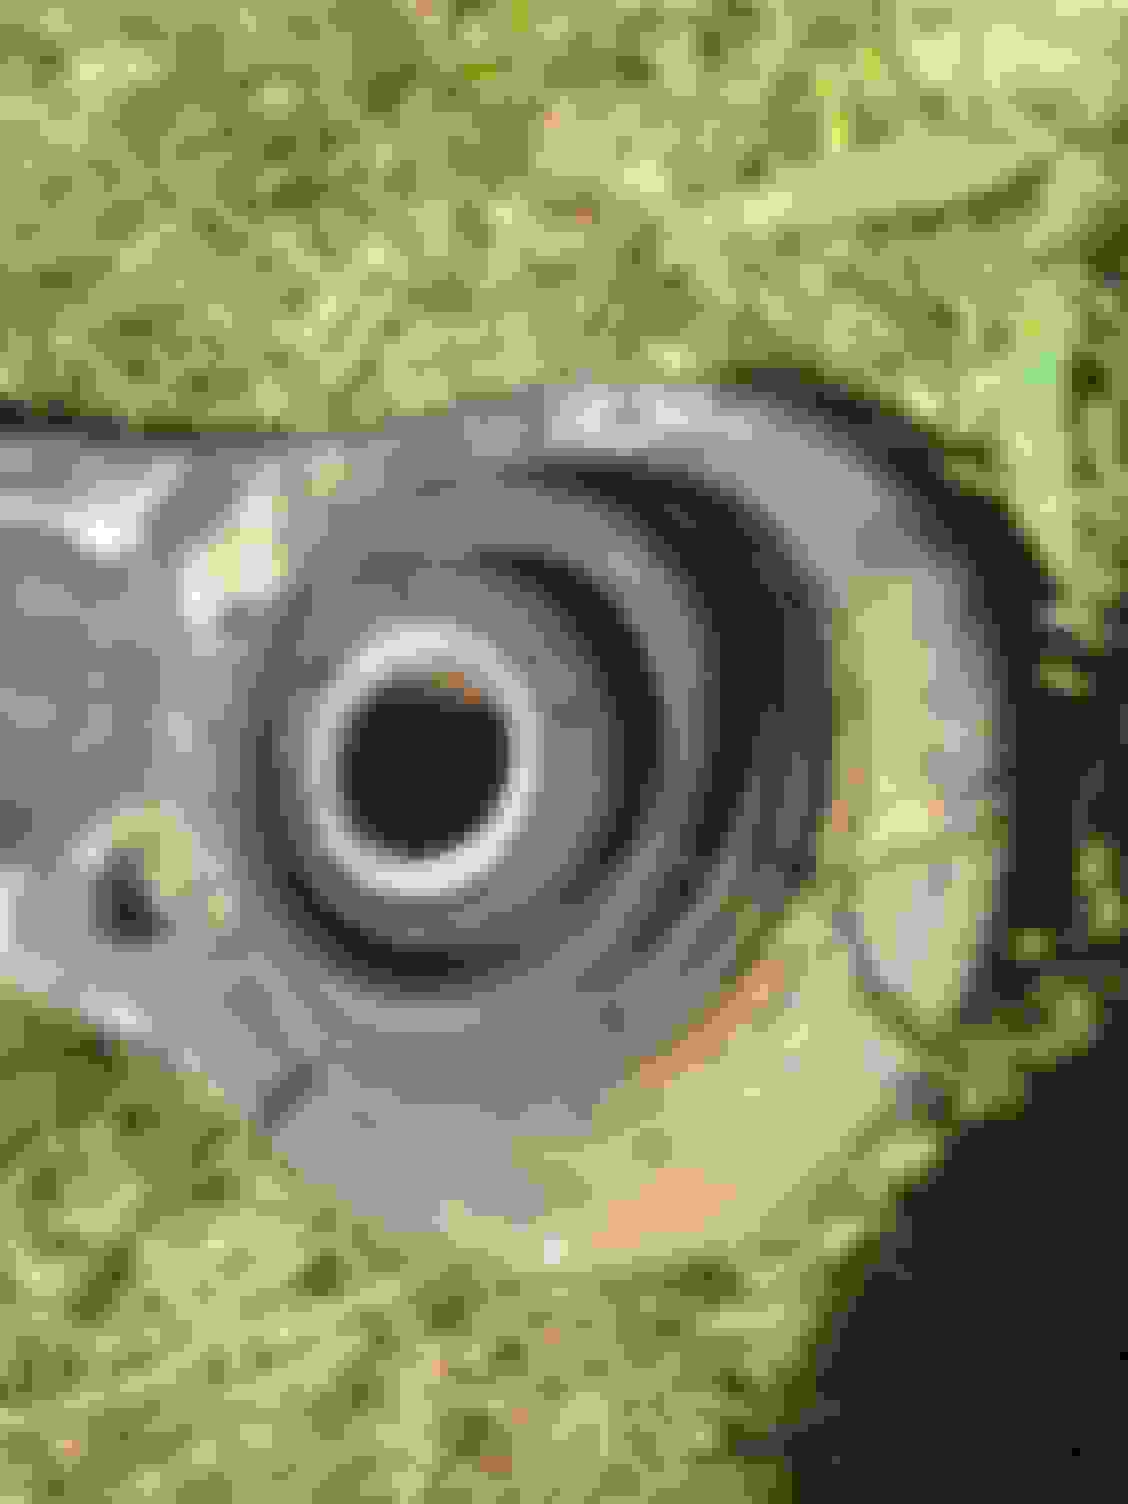
Here is the bottom, the centre bolt sleeve is loose and you can see the mark on the LCA above the grass blades on the right.
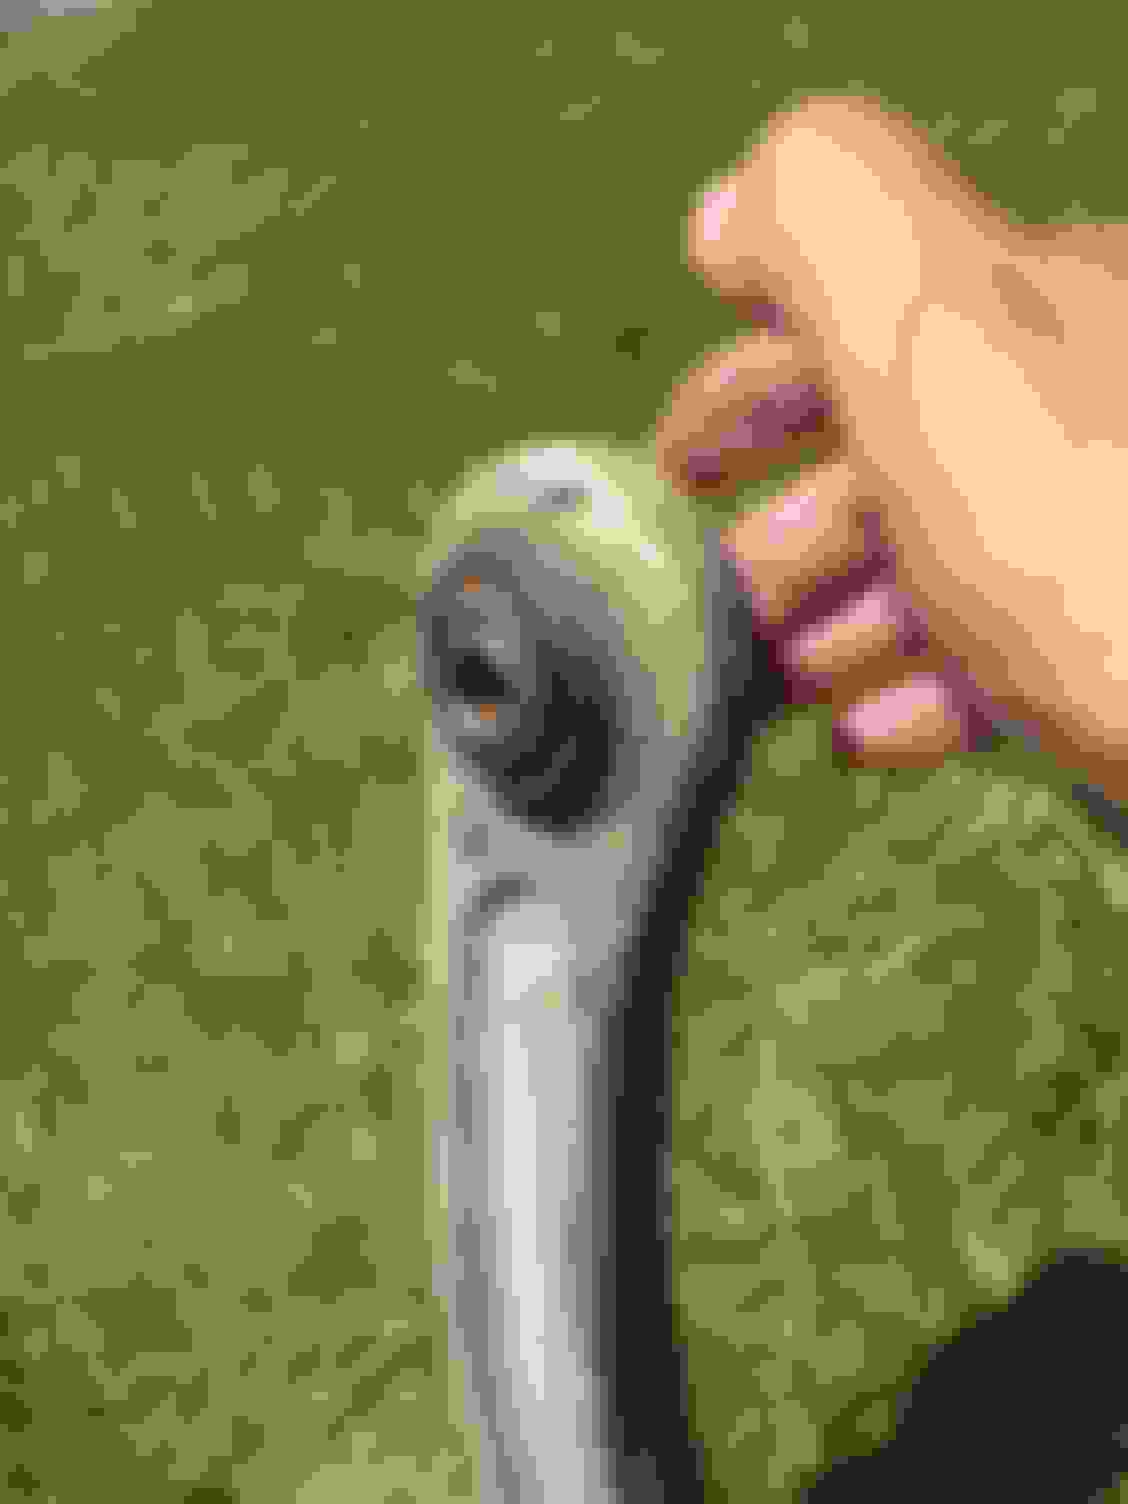
This is the top side, the bushing is pressed up and out, the new bushing presses in from this side, it has a taper or bevel to start it into the LCA, the hole has a slight bevel also to start the bushing in, I used a 1 7/8 socket and 8lb hammer to drive them home, using an old brake disc for an anvil.
I don't know if I posted this hint in this thread or not.
If you take the top strut nuts off life is much easier when you get to putting the ball joints in to the knuckle.
It was my experience that 12 inch sway bar links caused the banging, cleared up after I put the correct 10 inch links on. There is also a plastic stop on the sway bar inside the bushings, they can slip out of position.
or, in my case, the PLASTIC stop on one end of the sway bar broke and fell off....
How much you charge to do
replacement lower control arms
Nice write up maybe doing this in the
spring !
These are easy to replace. I have no mechanic skill and replaced my CV AXL Joint, Full complete strut and lower control arm for $145 bought parts on Ebay and borrowed an impact wrench, torque wrench and a FWD CV puller from autozone free. The rest was just time and watching youtube. Did it all in 4 hours.