Installed Corvette C6 SEATS, LOVE THEM
 04-24-2016, 10:31 AM
#11
Member
Thread Starter

Join Date: 03-30-2015
Location: Portland Oegon
Posts: 58
Front Seat mountings,
Here's how I used the original C6 Corvette front seat mount bracket.
Photo # 1 I drilled out the two rivets on each C6 bracket, soft steel..
Photo # 2 Here's the Front C6 front eat bracket Clamped in Place , but Rotated 180 degrees. This photo shows the front seat bracket set back on the seat track Two holes from the front of the seat rail. I later moved this forward one.
Photo # 3 Here the front seat brackets and bolted into place. I used Oval head bolts with an Allen head for easier install and Lock Nuts. The seat track is just barely forward enough for a fairly simple assembly.
Photo # 4 shows the side view on the now rotated and installed front bracket. I did give the top of both seat bracket a few light Wacks with a large hammer to set the angle just less than 90 degrees - for a nice Flat fit to the HHR floor bracing where this bracket bolts in place.
The Seat is ready for the install
No welding or mod's to the C6 seats other than removing the rear mounts and rotating the front mounts.
 04-24-2016, 11:23 AM
#12
Member
Thread Starter
Join Date: 03-30-2015
Location: Portland Oegon
Posts: 58
Next,, Seat belts and "Passenger in Seat" gel bag install
Photo # I is the Original HHR seat belt bolted to the C6 seat. Simple, just pop the cap off from the HHR seat belt blot and remove the lock nut. Then bolt the HHR seat belt, with electrical harness, onto the C6 seat belt bolt,, using the C6 lock nut.
Photo # 2 Here is the seat gel pack with sensor and control module. I tested the complete nit in place in the HHR to make Positive that everything worked properly. A 25 pound lead bar did not activate this sensor module. I had to stand on the bar to get the module to activate, there is a four second delay.
That small Black Forked Plastic tube under the wiring is the Back Seat heat duct, very nice GM
Photos # 3 and # 4 First I untied the seat cushion draw string and then remove the three Hog Rings on seat flap that attaches to the bottom cushion support system.
Photo # 5 shows the gel bag partially installed. I did slid it back out a little and move the black plastic pressure tubing over to the right of the next spring wire. And added a rew wire ties to secure the seat belt and this sensors wiring, plus the controller module.
Reinstall in reverse order. The Hog Rings can be tricky, I used all Awl and hooked it in the loose end on the seat frame then inserted the Awl into the seat frame hole and pried the spring into the hole.
I puled the seat draw string only slightly tighter than originally and used a few Clove Hitch to secure. l was careful to keep the bottom of the the seats leather separated.
Overall so far the project has gone well.

 05-05-2016, 10:10 PM
#15
Member
Thread Starter
Join Date: 03-30-2015
Location: Portland Oegon
Posts: 58
So here's how to remove the Original HHR seats. Mine are still in great shape and I'm keeping them in my dry storage, getting to be over crowed..
First I slid the seat forward , all the way. Then put the seat back in the forward position.There are two bolts, 18 mm drive socket, that bolt the rear of the seats in place. Mine had enough Blue LocTite for at least ten HHR's.
The attached Photo of the Bare HHR ''seat tracks and mounting'' in my HHR show these two bolts at the bottom of the seat track
The cross bar that support the seats has a welded in place threaded insert for the seat rear track bolts. Just remove these two Bolts.. I used a long 3/8 th inch drive racket, I should have used my Impact driver.
Look nearest the Red painted area in the Photo you'll see what I mean.
No additional Bolts, just lift the rear of the seat Up and forward while gently pushing forward. Pushing the seat forward will slide the front Edge of the front mount out of it's mounting Slots. I had to lift the front of the seat just under the cushion.
The next step is to remove the wiring connectors, there in the center of the seat tracks on the carpet, coiled, net to the rear seat header duct... I had a Seat Belt connector and the Electric seat connector., No Fanny Heaters. You'll need a pair of wire cutters to remove the plastic wire ties.
Next Post, the final C6 Corvette install.
05-21-2016, 03:26 PM
#16
Member
Thread Starter
Join Date: 03-30-2015
Location: Portland Oegon
Posts: 58
A few additional Photos.....
Once again, here is a close up photo of the HHR front seat bracket. Should give an idea of how the seat must be tilted forwards to slide out of the bracket. That's not the HHR seat. This bracket is setting on a flat bar on a C6 seat.
The two Allen head stainless bolts and lock nuts are what I used to Bolt the C6 Corvette seat bracket in place. I had some left over stainless, some might as well use them. And I use Lock nuts on Everything !!
The last Photo is a side view of the installed C6 seat. Under the seat you will see where the front C6 bracket that was turned 180 degrees is mounted to the HHR Floor Pan Hump.
The OEM HHR front seat bracket slides into a Slot in the Hump and locks into place. I used a rotary file at the rear of this slot so I could pass a 5/16 ih G-8 bolt into this Slit. Then I Fished a thick body washer inside this Hump and pulled it up. A little tricky using some same string. But I'm not satisfied or comfortable with Toggle boats or Riv nuts to hold My seats in place. I placed a large diameter flat washer on the top of the Hump and secured the 5/16 bolt in place with a thin Jamb nut. Once I had both bolts held in place I sat the seat in place and an additional body washer on top of the seat bracket and used a Double Nut instead of a lock lock.
both seats are secured in this manner.
Next post in the Electrical Connections
 05-21-2016, 05:14 PM
#18
Member
Thread Starter
Join Date: 03-30-2015
Location: Portland Oegon
Posts: 58
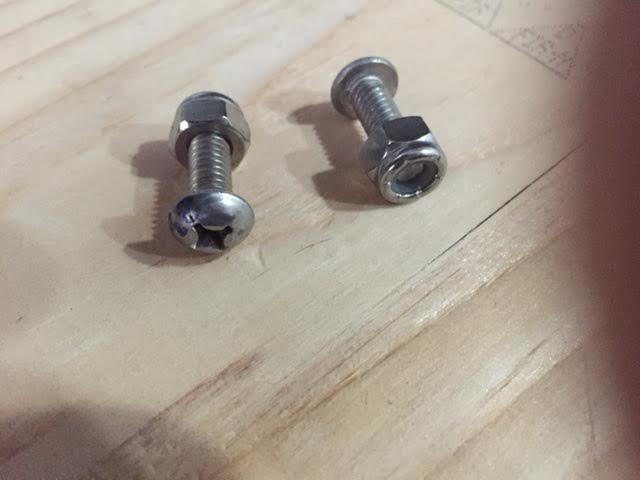
Oops,,,
Good Catch. That's what happens when I'm Tied, in a hurry and not wearing my Reads.
the correct version, Allen head machine screws, so I could get a wrench in the seat track to tighten them up Tight.... These I used to attached the C6 seat bracket to the seat track.
The seat front mounting bolts are 5/16 inch grade 8 are just a typical hex head....
Phew....

Thread
Thread Starter
Forum
Replies
Last Post
whopper
Canadian North Pacific
9
07-03-2015 10:23 AM
nacademus
General HHR
33
09-05-2011 09:18 PM