
My springtime plans for the HHR


Thread Starter
Senior Member
Joined: 09-05-2009
Posts: 452
From: New England
I always use Dupli-color ceramic paints, with a self etching primer for stuff like this
I start by cleaning everything with some brake cleaner. After that I'll use the wirewheel on my benchtop grinder to remove any heavy scaling, then I use some rough sandpaper (just to knock some more casting down) before hitting everything with some scotchbrite just so I can get in all the tight spots
The final stage before priming and painting is to clean everything with lacquer thinner. I keep going over the parts until the rags don't pick up anymore grime. You could use wax and grease remover from here, but I never do.
This is how I always do it, and my last job still looks as good as new and that was done about 5 years ago
Once I do this
Thread Starter
Senior Member
Joined: 09-05-2009
Posts: 452
From: New England
It's been a while since I've last updated, but since then I did install the wheels on the HHR, along with all the new lights and rear swaybar.
Right now I'm waiting for my stubby antenna, leather steering wheel (with radio controls), and stainless exhaust tips to come in. It all should be in next week.
The first thing I'm going to do (besides the antenna) will be to cut my rear bumper for dual exhaust and then bring it to have a new exhaust installed.
The steering wheel will have to wait. I have to tear it apart along with some other interior parts, because I'm getting some hydrographics done on a bunch of the interior trimwork
I will be posting up detail pics soon, but I won't be showing any complete shots of the HHR yet, because there is much more planned. I won't show any pics of the whole thing until it's 100% complete (for this year)
Thread Starter
Senior Member
Joined: 09-05-2009
Posts: 452
From: New England
Here's a bit of a tease on my parts while they're still in-process. I did my switch plates also
They are far from finished, but you get the idea anyway
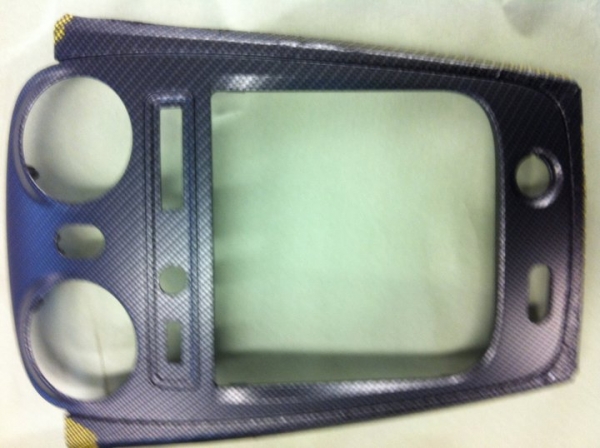
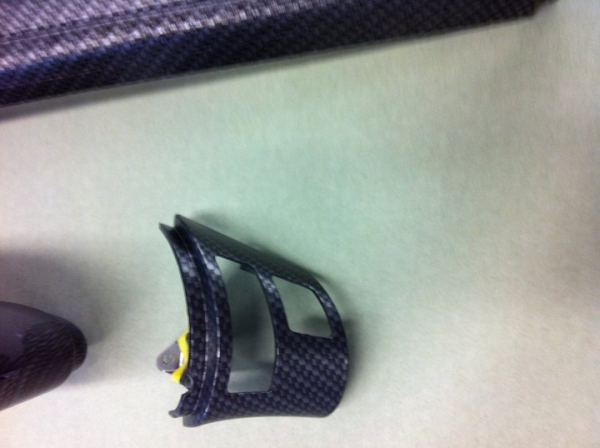
lots of changes coming up in the next month
They are far from finished, but you get the idea anyway
lots of changes coming up in the next month

Thread Starter
Senior Member
Joined: 09-05-2009
Posts: 452
From: New England
Thank you,
I've NEVER been a fan of ANY "fake" automotive modifications, but this type thing is pretty amazing. 75% of the "real" carbon out there (hoods, trunks, interior parts, etc) is actually laid on top of another material (usually fiberglass) anyway. This process is the same in that respect, in the fact that it's bonded on top of the original part.
There are literally hundreds of different patterns (carbon, skulls, marble, brushed metals, water drops, camo) that can be used with this process, but I decided to go with the carbon fiber look this time. Over the winter I will be tearing into one of my other cars and maybe going with a brushed aluminum finish on it's trim worm.
I think when people use "carbon fiber" sitckers, it looks cheap as all hell. A sticker looks like a sticker no matter what you try to do.
Hopefully I'll have some finished pics up by the end of the weekend
Thread Starter
Senior Member
Joined: 09-05-2009
Posts: 452
From: New England
I dropped off my grill to get painted yesterday and the shop already had a paint card, but I figured that if they had an actual piece of the car to match the color, it might be even better for them.
So since I was bored today I figured I'd give them a body piece. To do that I decided to cut a section out of my rear bumper, to get it ready for my dual exhaust. As I've done on cars in the past, I just used a dremel with the proper bits, along with files and sandpaper. Now hopefully on Monday I can go to the exhaust shop and get a new exhaust installed.
So since I was bored today I figured I'd give them a body piece. To do that I decided to cut a section out of my rear bumper, to get it ready for my dual exhaust. As I've done on cars in the past, I just used a dremel with the proper bits, along with files and sandpaper. Now hopefully on Monday I can go to the exhaust shop and get a new exhaust installed.

Platinum Member
Joined: 01-09-2007
Posts: 16,081
From: SE USA
I dropped off my grill to get painted yesterday and the shop already had a paint card, but I figured that if they had an actual piece of the car to match the color, it might be even better for them.
So since I was bored today I figured I'd give them a body piece. To do that I decided to cut a section out of my rear bumper, to get it ready for my dual exhaust. As I've done on cars in the past, I just used a dremel with the proper bits, along with files and sandpaper. Now hopefully on Monday I can go to the exhaust shop and get a new exhaust installed.
So since I was bored today I figured I'd give them a body piece. To do that I decided to cut a section out of my rear bumper, to get it ready for my dual exhaust. As I've done on cars in the past, I just used a dremel with the proper bits, along with files and sandpaper. Now hopefully on Monday I can go to the exhaust shop and get a new exhaust installed.

Thread
Thread Starter
Forum
Replies
Last Post