


V8 HHR Build


Thread Starter
Senior Member
Joined: 04-06-2010
Posts: 655
From: Riverside, California
Decided on a battery location
I made a full scale mock-up of the battery I'm going to use (Optima Yellow top D34.....painted red and black of course) and went around the car to find a suitable location to mount it. Originally I was going to put it in the back but that's all taken up with fuel cell now. then I was going to put it in the well under were the passenger rear seat would go if it had one. I had enough room there but since it's still inside the cabin it must be vented. (just like the stock HHR battery) The available vented batteries on the market is quite limited. I opted for a big assed Optima yellow top mounted in a conventional manner under the hood. Once I've painted it to look like a Red Top it will blend with all the other stuff under the hood. I still have the a.c. dryer to fit on that side of the engine but I think I'll be ok on room.
Thread Starter
Senior Member
Joined: 04-06-2010
Posts: 655
From: Riverside, California
Changed My Mind
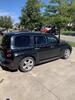
The best thing about mocking something up and not actually building it is you can change your mind and you don't loose much time/effort. After looking at the "battery" in the engine compartment for an hour or two I have decided that it hogs up too much valuable real estate under the hood and makes it look junky. Thus, I going with the location behind the passenger seat and I will build an enclosure that is vented out the floor. Another good thing about this spot is it well be within 18" of the air compressor for the front air struts for maximum volts/amps.
Thread Starter
Senior Member
Joined: 04-06-2010
Posts: 655
From: Riverside, California
Black Headliner
Thanks to this great forum, I searched and learned that dyeing a headliner is rough at best and it's generally better to cover the stock gray with a new piece of fabric. With that in mind I took the headliner to my local auto upholstery shop to get re-covered. They did a great job and the fabric is identical to the stock gray material. I took all the plastic parts,interior light, hooks, sun visors, ect and sprayed them satin black with SEM color coat. Once it's all back together I think it will look factory. I will use the SEM stuff on the pillar posts as well as they are also gray. Next week I'll take them the sun visors to be re-covered in black fabric. This will give me a completely black interior except for the red of the SS seats and door panels. Last week I talked on the phone with the guy from PTeasers, the ones that built the NASCAR HHR for the build-off about the roll cage they had in their panel. If I decide to build a roll cage for the V8 Panel it will be painted red........or black......or red. I'll figure that out when I get there.


Thread Starter
Senior Member
Joined: 04-06-2010
Posts: 655
From: Riverside, California
Tooling Up
In the past I have used a local cnc plasma cutter to make parts. That system works well as long as the parts are drawn correctly and they fit the first time. If they are designed wrong (by me) it's re-draw time and then pay again for the part. As the pieces get progressively more complex I have decided to do them all in-house. I am hooking up my ThermalDynamics plasma cutter to a GoTorch CNC system. Started building the water table for the machine today. Should take another week or so to complete. Once it is done I will be able to custom fit all the parts I'll need. The torque arm and rear trans mounts are just two fairly complex pieces that still need to be built.

Senior Member
Joined: 02-03-2013
Posts: 840
From: Arcola
Have I told you yet how much I admire your amazing talents? Of course I have, but your skills and knowledge warrant repeating myself! You are a great craftsman and engineer and We are all so very fortunate to have you sharing this build with us... Thank you!!! Please keep the updates coming!!!
