


V8 HHR Build


Thread Starter
Senior Member
Joined: 04-06-2010
Posts: 655
From: Riverside, California
Lift gate louvers
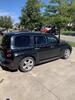
When I was welding up the rear wiper and rear washer holes I looked at the possibility of doing a row or two of louvers on either side of the license plate. The deeper I got into it the more work it became. You would litteraly have to cut the rear door into two pieces the get into the louver press. It would be cool ( you can't have too many louvers) but it was just too much work right now. It's not like I don't have anything to do. Maybe when it's running an I get bored.


Thread Starter
Senior Member
Joined: 04-06-2010
Posts: 655
From: Riverside, California
What was that about measure twice?
Well I spent half of a day making the rear trans mount. It fit fine.....only problem is the rear of the trans is about 3/4" too low. Oh well at least I had a pattern for the second one. It's in now and now I can get back on my sheet metal work on the interior. Still lots to do on that.
Here is a pic of the 2 trans mounts. I installed the front one.
Here is a pic of the 2 trans mounts. I installed the front one.
Thread Starter
Senior Member
Joined: 04-06-2010
Posts: 655
From: Riverside, California
Change of plans
I was all excited about getting back on the interior sheet metal work but the more I look at things I need to finish up some other items first. I don't want the sheet metal work to be modified further down the line because something hits it like the torque arm or the B&M shifter. For that reason I am going to complete the drive shaft, torque arm and shifter linkage first. Here is a picture of the trans and how much more I need to cut out of the floor for things to clear each other.
Thread Starter
Senior Member
Joined: 04-06-2010
Posts: 655
From: Riverside, California
Wheel polishing shield
I'm waiting on parts so I thought I would polish the widened rear wheels. The Moon Speedmasters started out as 7" wide before they were widened to 8 3/4". The machine marks in the Dodge "outers" that were added to make the wheels the new width did not match the stock 7" Speedmasters on the front. The problem is I didn't want to remove the sand casting marks on the wheel centers. To solve this I took a scrap of 20ga. sheet, cut into a pie shape and with a shrinker and a bead roller I turned down the round side. It's got just enough "it doesn't fit" that it will hold itself into the recess of the wheel. This gives me a metal protective edge to keep the sandpaper, scotchbrite wheel and buffing wheels away from the wheel center. Here is a picture of the shield in place while I hand sand it with 120 grit. I'll post pics when I'm done.
Thread Starter
Senior Member
Joined: 04-06-2010
Posts: 655
From: Riverside, California
Before and After
Here is what the wheels looked like when I started. they polished up pretty well. I may take a very fine scotchbrite and put some very fine lines in them to knock down some of the shine. What do you think....polished to a brilliant shine or muted slightly with some very fine scratches?

