
LDK build


Platinum Member
Joined: 12-06-2009
Posts: 11,721
From: Alabama

I've been working on cars for 40 years. I've always used the term flexplate for the auto trans.
Flywheel is for the manual trans.
Maybe it's the region or area you're in.
Just don't ask your local machine shop to resurface a "flexplate" for you.
Last edited by firemangeorge; Apr 24, 2016 at 06:54 PM.

Thread Starter
Senior Member
Joined: 09-02-2010
Posts: 383
From: Philadelphia, PA

Senior Member
Joined: 06-20-2011
Posts: 737
From: Savanna Illinois
Back in the 50's when automatic transmissions were still pretty new my dad was the master mechanic at the Ford dealership in Beloit Wisconsin.
He and the second mechanic were sent over to Michigan to the Ford plant to learn all about these new fangled automatic transmissions.
He said they called it the starter ring plate back then, Flex plate didn't come into general use till the 60's, at least for Ford.
He and the second mechanic were sent over to Michigan to the Ford plant to learn all about these new fangled automatic transmissions.
He said they called it the starter ring plate back then, Flex plate didn't come into general use till the 60's, at least for Ford.

Administrator
Joined: 10-13-2011
Posts: 40,083
From: Welland,Ont Canada
An informative video FMG, thank you for posting that!
Yes replace the bolts, OEM or ARP, but use new bolts and Loctite. blue is removable, red is permanent
Yes replace the bolts, OEM or ARP, but use new bolts and Loctite. blue is removable, red is permanent
Last edited by Oldblue; Apr 11, 2016 at 10:52 AM. Reason: House keeping

Thread Starter
Senior Member
Joined: 09-02-2010
Posts: 383
From: Philadelphia, PA
Saturday we got more work done on the LDK build!
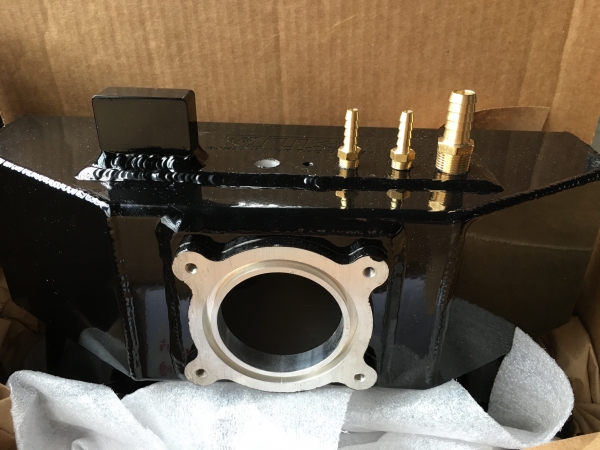
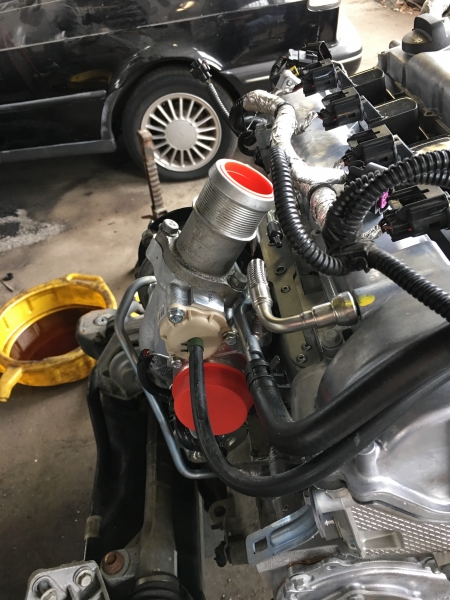
The TTR Manifold came in - took a few photos to get some better looks at it. I purchased it with the PCV housing, so they already had it taped and everything.

Where the throttle body attaches
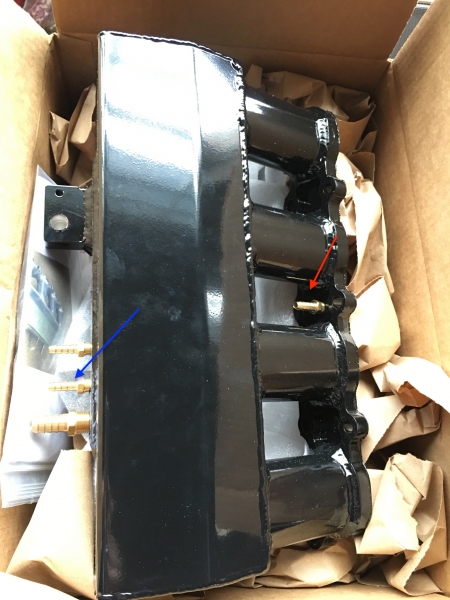
Red arrow feed to PCV, blue arrow clean port from catch can
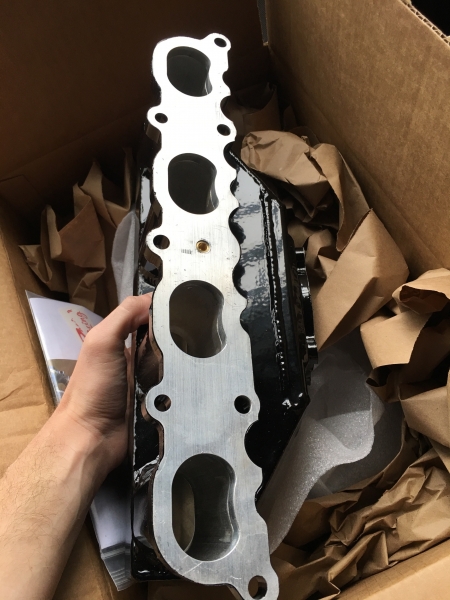
Inside of manifold
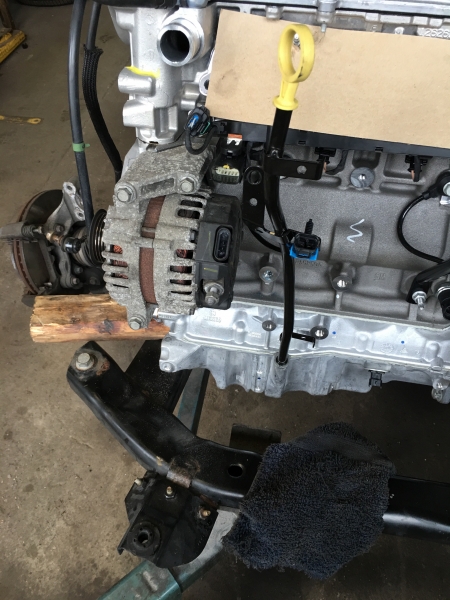
We attached the flex wheel to the motor during the week, so we were able to mount the engine to the transmission
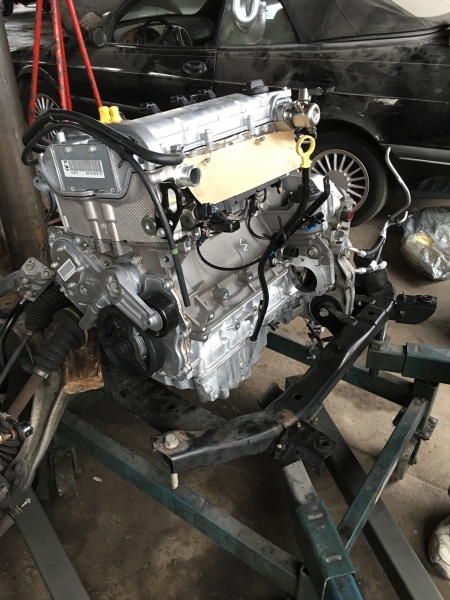
We secured all bolts for the engine to trans, and began dressing the engine with all the new hoses, and some of the parts from the old LNF.
We also began connecting the computer harness
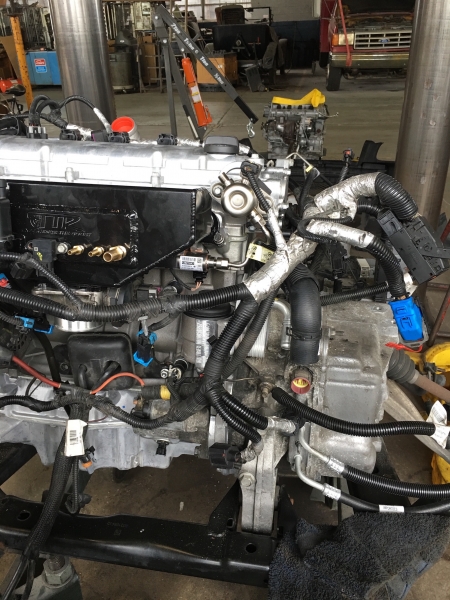
And the top of the turbo that goes to the intercooler (cleaned with 2+2 first to remove old oil)
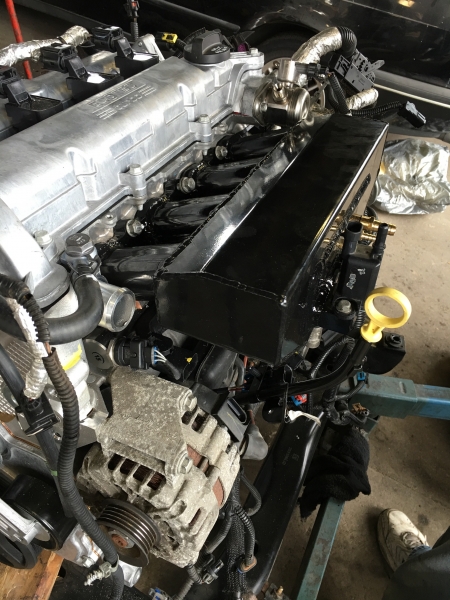
Finally, we installed the TTR manifold to the LDK
Couple things:
1) After installing the TTR manifold, realized I can no longer use the stock air box since the front of the box connects to mounts attached to the stock manifold. Looks like I'll have to go aftermarket, so I'm looking at the ZZP Turbo HHR CAI tube setup. I'm hoping I can run this without a tune. I'd like to tune the car after I get the GM Stage 1 sensors and install that.
2)Since the motor is attached to the trans, we can now remove the two trans mounts and install the TTR bushings into them
3) I haven't done the upgrades to the turbo (wastegate actuator, and Forge Valve). Talking to a local turbo shop (recommended by customer service at TiAL), it sounds as if installing an aftermarket actuator is pretty moot unless I tune the car and I'm pushing more PSI. So for the time being, I'll probably replace the plastic divertor valve with a forge divertor valve, then after I install the GM Stage 1 sensors and tune to get around 25 PSI, I'll install the MV-I with a 22PSI spring to handle the extra boost.
until next time!
The TTR Manifold came in - took a few photos to get some better looks at it. I purchased it with the PCV housing, so they already had it taped and everything.
Where the throttle body attaches
Red arrow feed to PCV, blue arrow clean port from catch can
Inside of manifold
We attached the flex wheel to the motor during the week, so we were able to mount the engine to the transmission
We secured all bolts for the engine to trans, and began dressing the engine with all the new hoses, and some of the parts from the old LNF.
We also began connecting the computer harness
And the top of the turbo that goes to the intercooler (cleaned with 2+2 first to remove old oil)
Finally, we installed the TTR manifold to the LDK
Couple things:
1) After installing the TTR manifold, realized I can no longer use the stock air box since the front of the box connects to mounts attached to the stock manifold. Looks like I'll have to go aftermarket, so I'm looking at the ZZP Turbo HHR CAI tube setup. I'm hoping I can run this without a tune. I'd like to tune the car after I get the GM Stage 1 sensors and install that.
2)Since the motor is attached to the trans, we can now remove the two trans mounts and install the TTR bushings into them
3) I haven't done the upgrades to the turbo (wastegate actuator, and Forge Valve). Talking to a local turbo shop (recommended by customer service at TiAL), it sounds as if installing an aftermarket actuator is pretty moot unless I tune the car and I'm pushing more PSI. So for the time being, I'll probably replace the plastic divertor valve with a forge divertor valve, then after I install the GM Stage 1 sensors and tune to get around 25 PSI, I'll install the MV-I with a 22PSI spring to handle the extra boost.
until next time!
Thread Starter
Senior Member
Joined: 09-02-2010
Posts: 383
From: Philadelphia, PA
More work done today - we finished all the mounts, and got the more of the harness connections out of the way.
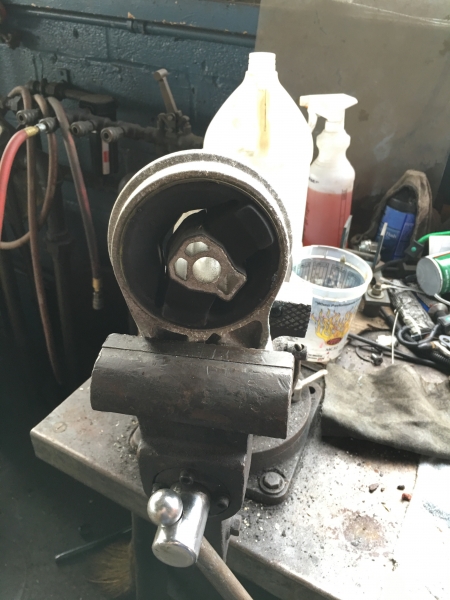
First step was the trans mounts. Since TTR doesn't make new mounts for Auto, they recommended bushings to press into my current mounts.
Jacked up the trans and removed 1 at a time - first the front, than the back. With both mounts we did the following:
Hold mount with vice grip and removed old bushing


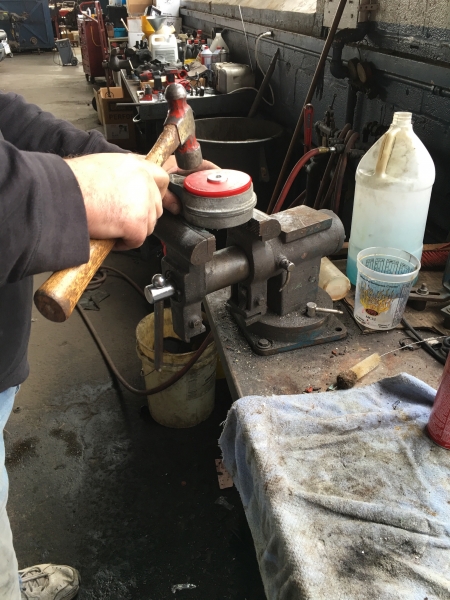
Once the bushing was out, cleaned the inside of the mount, greased the inside with marine grease , and pressed the new bushings in. We used a small screwdriver to get the lip into the mount, then pushed it as far as it would go. A couple final hits with the hammer, and it was in place
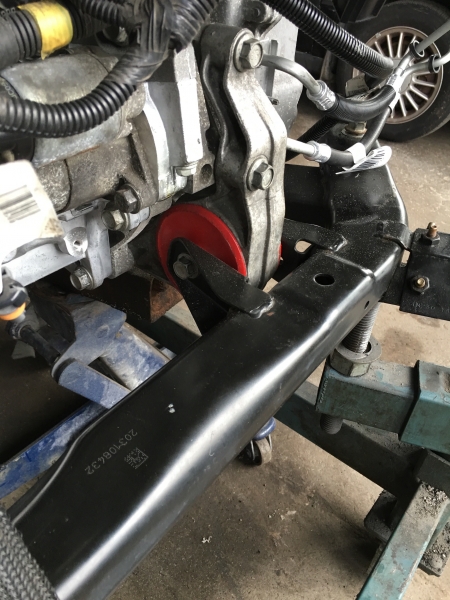
Reinstalled the mount, then did the same for the rear
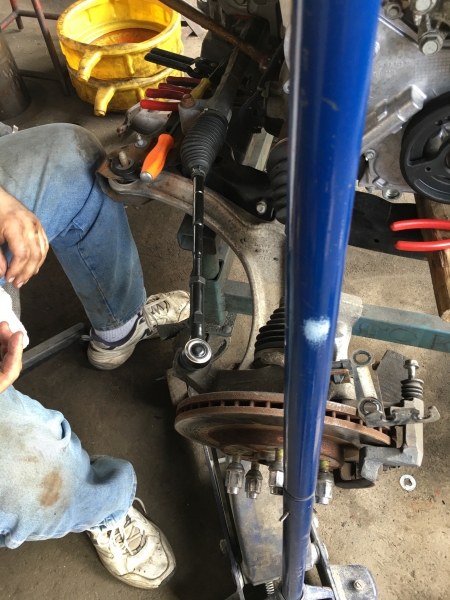
We also installed new Energy Suspension sway bar bushings - again greased with the marine grease. Also installed Zerk's 90 degree fittings to make it easier to grease them.
After the sway bar bushings, we installed new inner and outer tie rods. 81k on original and with the entire front end out, we figured best to do it.
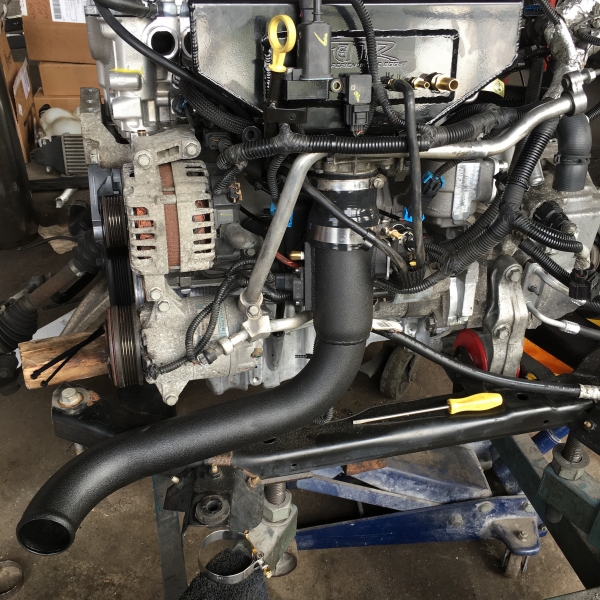
Finally, we began connecting vacuum hoses, installed the AC motor, connecting some of the wire harness to the engine components, etc. We realized with the TTR manifold, a few things were floating freely since they bolted up to the stock manifold. Figured out a few places we could mount wires, sensors so there's no strain on the cables, and to make sure they were out of the way. We put the ZZP lower charge pipe on as well to make sure those cables cleared the throttle body.
That's it for now - we're getting close!
First step was the trans mounts. Since TTR doesn't make new mounts for Auto, they recommended bushings to press into my current mounts.
Jacked up the trans and removed 1 at a time - first the front, than the back. With both mounts we did the following:
Hold mount with vice grip and removed old bushing
Once the bushing was out, cleaned the inside of the mount, greased the inside with marine grease , and pressed the new bushings in. We used a small screwdriver to get the lip into the mount, then pushed it as far as it would go. A couple final hits with the hammer, and it was in place
Reinstalled the mount, then did the same for the rear
We also installed new Energy Suspension sway bar bushings - again greased with the marine grease. Also installed Zerk's 90 degree fittings to make it easier to grease them.
After the sway bar bushings, we installed new inner and outer tie rods. 81k on original and with the entire front end out, we figured best to do it.
Finally, we began connecting vacuum hoses, installed the AC motor, connecting some of the wire harness to the engine components, etc. We realized with the TTR manifold, a few things were floating freely since they bolted up to the stock manifold. Figured out a few places we could mount wires, sensors so there's no strain on the cables, and to make sure they were out of the way. We put the ZZP lower charge pipe on as well to make sure those cables cleared the throttle body.
That's it for now - we're getting close!