Lower Billet Grille Problem
 04-02-2013, 11:38 AM
#21
Premium Member
Join Date: 10-09-2010
Location: Tacoma
Posts: 14,420
Yea since the hood was still open. The grill has 3 threaded tubes welded to the rear, with a stud to bolt the angle iron to the grill, then uses a body clip to bolt to the lower lip. It has three but I only used the body clip on the middle one, so one screw holds it in place.
 04-02-2013, 03:23 PM
#22
Senior Member

Join Date: 05-23-2006
Location: Chandler, AZ
Posts: 1,082
 I put the Carriage Works lower grille on our '06 also, and at about 7 years or so ago too. I wasn't too impressed with how it attached, but it's still on there, never given me a problem. With all the HHR's I see around here I'm surprised I've never seen another with a lower billet grille. I think it adds so much to the front view!
  04-02-2013, 05:36 PM
#24
Senior Member
Thread Starter

Join Date: 12-04-2011
Location: El Paso, TX
Posts: 374
I have the billet grille, manufactured by APS. I added locknuts to the screws and mine has stayed inplace. If the problem is from the brackets piviting then it seems to me that drilling a small hole at the top of each bracket and safety wiring them to the holes mentioned by Dracos should keep things in place.
04-03-2013, 03:23 PM
#25
Senior Member

Join Date: 11-04-2012
Location: Dedham Maine
Posts: 1,545
My grill is almost done 
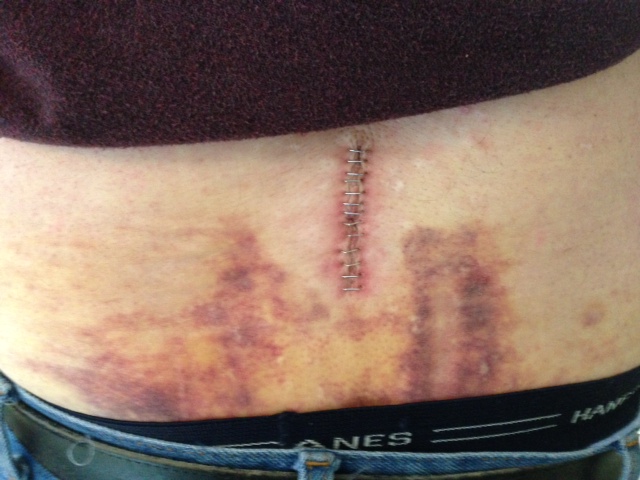
My back Grill is done now for the front :)
Once Im healed I go BACK to my ABS lower Grill. I picked up some flat stock from LOWEs and will cut each piece alittle longer then the stock ABS, drill a hole in center use the vibration nuts and add 1 hole for each bracket in the lower bumper. use those slip/clamp on screw things and that should keep it in place,
Last edited by Radco; 04-07-2013 at 12:51 PM.
04-06-2013, 11:17 PM
#26
Senior Member
Thread Starter
Join Date: 12-04-2011
Location: El Paso, TX
Posts: 374
I took copious amounts of measurements today, and ended up with a cardboard prototype:
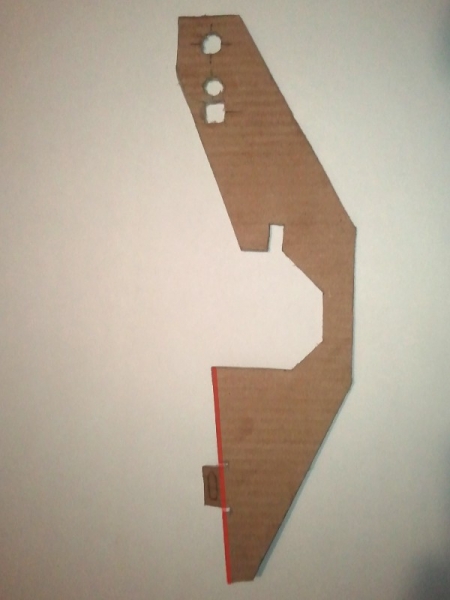
When I went to test fit it, everything was more or less correct except the location of the bolt hole that will hold it to the vertical inside the bumper... the lowest square hole is the correct one.
The thin notch going upward toward the bolt hole accepts the upturned lip of the bumper's bottom surface, thus minimizing the bracket's wiggle room. The final notch will be narrower.
The red edge at the bottom indicates where back side of the billet grille will match up. That edge is the full height of the grille to prevent it from spinning on the axis created by its screws, which was the original issue. The tab in that edge will get bent over to accept the screws. The edge is positioned so that that front of the grille will be more or less flush with the forward edge of the opening, vertically centered so it floats.
Not sure yet if this will be stable or if I'll need to add a crossbar between the brackets. The brackets will go on the outboard sides of the verticals.
04-07-2013, 12:49 PM
#27
Senior Member
Join Date: 11-04-2012
Location: Dedham Maine
Posts: 1,545
I took copious amounts of measurements today, and ended up with a cardboard prototype:
When I went to test fit it, everything was more or less correct except the location of the bolt hole that will hold it to the vertical inside the bumper... the lowest square hole is the correct one.
The thin notch going upward toward the bolt hole accepts the upturned lip of the bumper's bottom surface, thus minimizing the bracket's wiggle room. The final notch will be narrower.
The red edge at the bottom indicates where back side of the billet grille will match up. That edge is the full height of the grille to prevent it from spinning on the axis created by its screws, which was the original issue. The tab in that edge will get bent over to accept the screws. The edge is positioned so that that front of the grille will be more or less flush with the forward edge of the opening, vertically centered so it floats.
Not sure yet if this will be stable or if I'll need to add a crossbar between the brackets. The brackets will go on the outboard sides of the verticals.
04-07-2013, 01:48 PM
#28
Senior Member
Thread Starter
Join Date: 12-04-2011
Location: El Paso, TX
Posts: 374
Looks pretty cool!,, I mounted mine yesterday as I was board from hanging around healing ! I made a set of brackets like the 2 stock but longer used 2 nylon nuts(anti vibration),, Mounts a tad better but like you design better. I think 2 brackets like yours on the inside of the bumper will stiffen it up way better for a firm mount,, I may try and make a cardboard cut out now of what I am thinking of,, Thanks for your great idea
04-07-2013, 04:03 PM
#29
Senior Member
Join Date: 11-04-2012
Location: Dedham Maine
Posts: 1,545
04-07-2013, 04:32 PM
#30
Senior Member
Thread Starter
Join Date: 12-04-2011
Location: El Paso, TX
Posts: 374
I made an outline in Photoshop based on the measurements. Since I don't have a functioning printer, I scaled the view to the correct physical size and traced it onto vellum directly on my monitor. I did a rubbing of the vellum onto corrugated cardboard from an old shoe box and cut it out with a utility knife. Regular posterboard stock will be too flimsy to get a decent fitment while working inside the bumper.