


RWD HHR in the works


Thread Starter
Senior Member
Joined: 04-06-2010
Posts: 655
From: Riverside, California
Engine in - sort of......
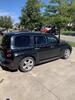
Well I spent the whole week-end building motor mounts for the LS1. Unfortunately it's in the wrong place. The engine and trans were in an OK place but it didn't work out for the steering rack and tie rods. The good news is it's mostly just tack welded so it won't take too much to remove what I did. No work on it this week-end ...taking the grand kids up to the lake...Labor Day.

Thread Starter
Senior Member
Joined: 04-06-2010
Posts: 655
From: Riverside, California
Some progress
Spent 2 full days working on the car; 1 day tearing out the previous motor mount install and the next actually making some progress. I discovered the LS1 rubber motor mounts were shot so I replaced them while I was in there. I fabbed new steel mount pads and extensions and welded them into the correct location. The correct location of the engine is determined by the steering rack location which must be fairly close to the center line of the steering arm spindle holes. I said all that to get to my next point.
I had not planned on moving the firewall. That was before. I took the plasma cutter out and cut a hole in the firewall large enough for the engine to slide thru. I ended up moving the engine back almost 2 inches. This means in addition to the trans hump, I'll be fabbing a modified firewall....just as well tho, I have to move the master cylinder over to miss the engine.
The next item is to start making cardboard patterns for the firewall/trans hump. Once that's done it will be time for the bead roller and English wheel to transform it to sheet metal.
I had not planned on moving the firewall. That was before. I took the plasma cutter out and cut a hole in the firewall large enough for the engine to slide thru. I ended up moving the engine back almost 2 inches. This means in addition to the trans hump, I'll be fabbing a modified firewall....just as well tho, I have to move the master cylinder over to miss the engine.
The next item is to start making cardboard patterns for the firewall/trans hump. Once that's done it will be time for the bead roller and English wheel to transform it to sheet metal.
Last edited by lasater; Sep 8, 2013 at 10:42 PM.
Thread Starter
Senior Member
Joined: 04-06-2010
Posts: 655
From: Riverside, California
Talked with YearOne
I thought that I would try a long shot and make a phone call to YearOne to see if I could get any info on the HHR they built for SEMA. Surprise, surprise, about 2 hours later I received a call back from Kevin Orr. He was one of the original builders at YearOne when they did the conversion. His memory of some of the exact details was foggy but he did answer some critical questions. As I suspected, with a 6 week build time they had to cut alot of corners. For example, there are NO electrical items in the car except for the engine running. NO computers of any kind. No guages, no door locks, no air bags, no nothing. Given the time they could have accomplished these but it just wasn't possible in 6 weeks.
He did however confirm that they moved the firewall back, something I discovered last week on my own. Another interesting thing he told me is that I was about the 50th guy to call them with questions on the conversion so I guess there has been plenty of interest in this over the past 8 years. On a bad note he told me that there are no other photos of the build that aren't already on the internet. I was hoping for some fantastic new unseen pics that would answer all my questions. No such luck.
He did however confirm that they moved the firewall back, something I discovered last week on my own. Another interesting thing he told me is that I was about the 50th guy to call them with questions on the conversion so I guess there has been plenty of interest in this over the past 8 years. On a bad note he told me that there are no other photos of the build that aren't already on the internet. I was hoping for some fantastic new unseen pics that would answer all my questions. No such luck.

Senior Member
Joined: 12-04-2009
Posts: 463
From: Port St Lucie, Florida
This project is simply amazing. I would trade my left nut to wake up one morning with your skills and drive to do this. Instead, I'll buy it off of you when it's done if I hit the powerball. If I don't win the powerball it's still ok because win or not, I keep my left nut. 
You're simply awesome. Cant wait to see some pics and VIDs when it's done!
You're simply awesome. Cant wait to see some pics and VIDs when it's done!

Senior Member
Joined: 07-02-2013
Posts: 7,827
From: Claremont, CA
I have been following this thread for a while and I am in awe. I love cars but know enough to be dangerous and could only tackle a project like this in my dreams. I just noticed where you live, I am not far from you and would love to see the car when it is done! Keep up the good work and of course keep the updates flowing for us armchair builders!

