
Homelink add on


Member
Joined: 09-14-2015
Posts: 74
From: Peck, MI
Thanks for the reply, appreciate your input. "IF" the thickness is ok, how did you fasten the homelink box to the panel in the VUE, just glue like on the HHR? If so, what glue did you actually use (looks like pretty tough stuff).
I also wondered about going this route (see link below), but it would be a lot of work attaching the wires, and I'm a little concerned about soldering with those holes being so small and the closeness of the connection points on the circuit board (I'd hate to destroy the unit). But this would eliminate the problems and worries if I could pull it off). It would be a clean looking install, and drilling four holes in the panel would be the easy part.
Audi area: Audi A3. Homelink Install

New Member
Joined: 08-17-2015
Posts: 16
From: Novi, Mi
I got lucky in the VUE, there was a flat surface behind the panel that the Homelink is affixed to, I was able to just sandwich the Homelink in there... So it was actually held in place by te front panel. However, I usually use silicone to hold the modules in place, a two part epoxy that is compatible with plastics would work as well. Just scuff up the plastic surfaces and clean with rubbing alcohol prior to application.
The Audi install is pretty slick, I've contemplated that as well. A little bit more work but a lot more flexibility when you just can't fit the module in.
The Audi install is pretty slick, I've contemplated that as well. A little bit more work but a lot more flexibility when you just can't fit the module in.
Member
Joined: 09-14-2015
Posts: 74
From: Peck, MI
Finished my HomeLink install. I do not have the skill or knowledge that amarv12 has, first time using a dremel bit, and I used electric drill (which maybe does not spin fast enough?. Anyway, got it done, but not as clean and professional as amarv12's work on his VUE.
Here is the prep for the back of the dash panel. You need to grind down the ridges on the back side.
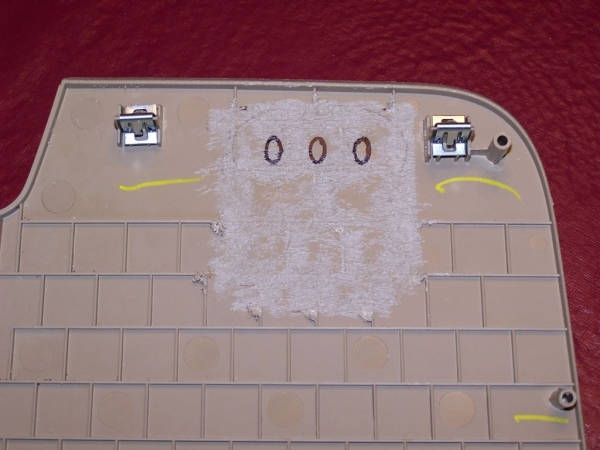
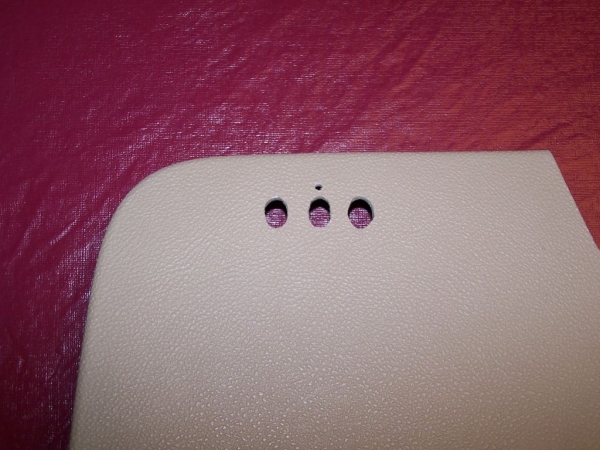
Here are the oval holes drilled out. I used the homelink trim plate to mark it out. I did not use the trim plate on the front like armarv12 did on his install (even though I like the look better) because I only had a gray one, rather than a tan/brown trim plate. But on the plus side, you don't need to worry about the buttons being long enough to reach by not using the trim plate.
Gluing the unit to the backside of the dash. I used silicone, that way it could be removed if necessary down the road.
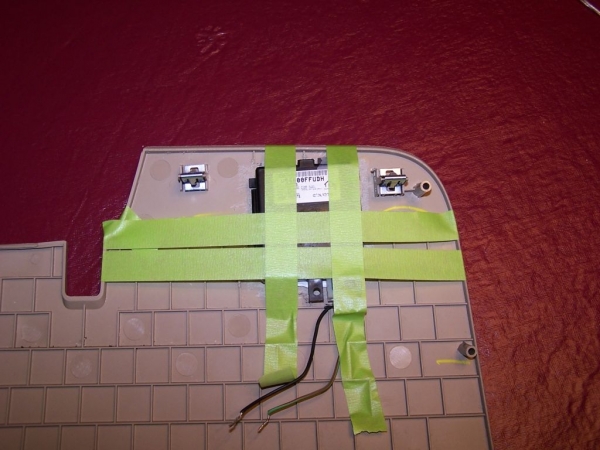
Here it is ready to install. I drilled a couple holes in the clip areas and put an extra support wire on the back. Not sure if that's necessary, more than likely overkill, lol, but not much room for silicone near the top due to the buttons.
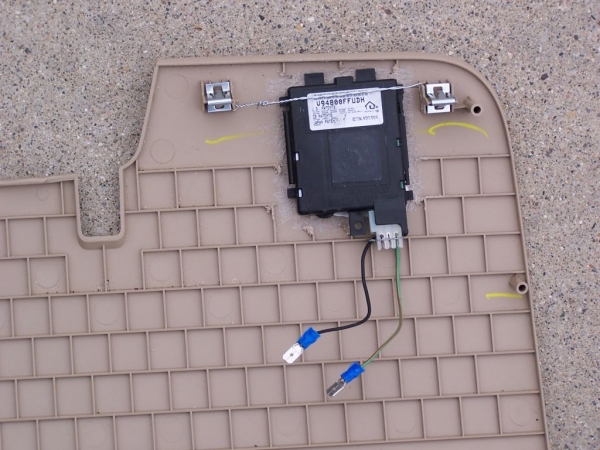
Dash prep, you need to remove some of the dash backer material to allow for the homelink unit. Be careful NOT to put the unit too high, or you'll need to trim a little from the upper dash material (which I had to do at the very end). Run a power wire over to you fuse box, and another one for a ground (I used that mounting screw in the lower left corner in the metal dash sub-frame).
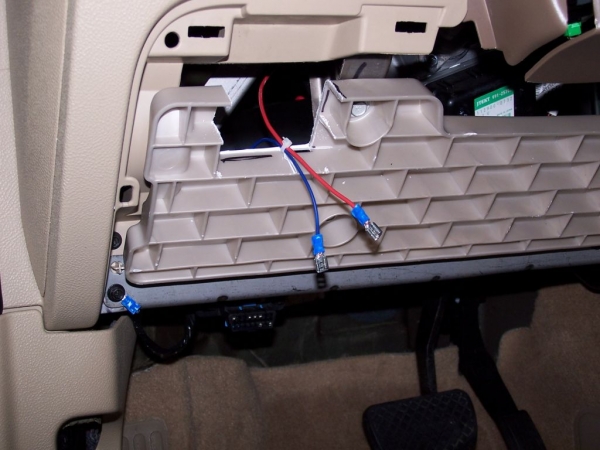
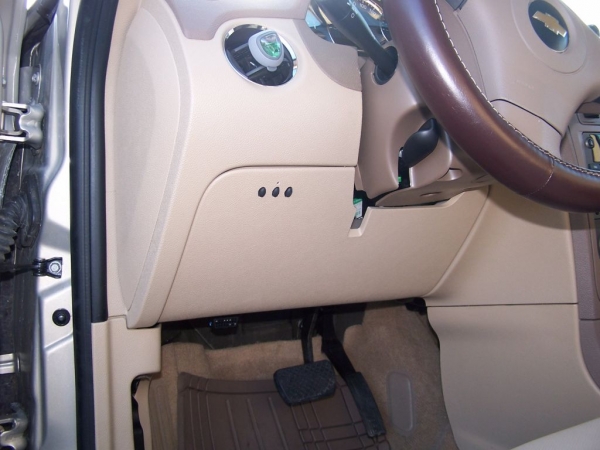
Final results.
Here is the prep for the back of the dash panel. You need to grind down the ridges on the back side.
Here are the oval holes drilled out. I used the homelink trim plate to mark it out. I did not use the trim plate on the front like armarv12 did on his install (even though I like the look better) because I only had a gray one, rather than a tan/brown trim plate. But on the plus side, you don't need to worry about the buttons being long enough to reach by not using the trim plate.
Gluing the unit to the backside of the dash. I used silicone, that way it could be removed if necessary down the road.
Here it is ready to install. I drilled a couple holes in the clip areas and put an extra support wire on the back. Not sure if that's necessary, more than likely overkill, lol, but not much room for silicone near the top due to the buttons.
Dash prep, you need to remove some of the dash backer material to allow for the homelink unit. Be careful NOT to put the unit too high, or you'll need to trim a little from the upper dash material (which I had to do at the very end). Run a power wire over to you fuse box, and another one for a ground (I used that mounting screw in the lower left corner in the metal dash sub-frame).
Final results.
Last edited by a_bartle; Nov 1, 2015 at 10:12 AM.


Thread
Thread Starter
Forum
Replies
Last Post

